KVM is a free, open-source virtualization tool for Linux-like operating systems. Installing KVM on an Ubuntu server makes it a Type 2 KVM hypervisor. The minimum requirement for KVM is that the server has CPU virtualization extensions such as Intel-VT or AMD-V. KVM is also called kernel-based virtual machine because the kernel modules (kvm-intel.ko / kvm-amd.ko) are loaded into the kernel during KVM installation.
This article shows how to install and configure a KVM hypervisor on an Ubuntu 20.04 LTS server. Assuming you already have a freshly installed Ubuntu 20.04 LTS server. Let's take a closer look at the KVM installation steps.
Step 1. Check if your server supports hardware virtualization
Log into your Ubuntu 20.04 LTS server and run the following grep command:
# grep -E -c "vmx|svm" /proc/cpuinfo
2
The above output confirms that the server supports hardware virtualization. If the output is not greater than zero, reboot the server, go to BIOS settings and enable VT technology.
To verify that the server can run the KVM virtual machine, install the kvm-ok utility using the apt command:
# sudo apt install -y cpu-checker
After the cpu-checker package is installed, run the kvm-ok command and check its output.
# kvm-ok
INFO: /dev/kvm exists
KVM acceleration can be used
The output above confirms that a KVM-based virtual machine can be installed on the server.
Step 2. Install KVM, virt-manager and bridge-utils
Install KVM, Bridge-Utils, Virt-Manager, and other KVM dependencies by running the following apt commands:
# apt install -y qemu qemu-kvm libvirt-daemon bridge-utils virt-manager virtinst
After all packages are successfully installed, you can use the lsmod command to verify if the KVM modules are loaded.
# lsmod | grep -i kvm
kvm_intel 286720 0
kvm 663552 1 kvm_intel
Step 3. Start the libvirtd service and check
The libvirtd service starts automatically when you install KVM. Check its status by running the following command:
# systemctl status libvirtd.service
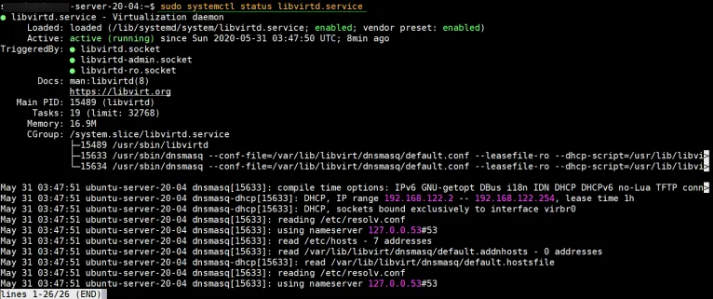
If for some reason the libvirtd service does not start, run the following command to start and enable it.
# systemctl enable libvirtd --now
Step 4. Set up a network bridge for KVM virtual machines
In this step, you will configure a network bridge for your KVM VM to make the VM externally accessible. A virtual bridge 'virbr0' is automatically created when KVM is installed, but it is only used for testing purposes.
To setup a network bridge, you need to edit the /etc/netplan/00-installer-config.yaml file. Below is the contents of the server file before any changes were made.
# cat /etc/netplan/00-installer-config.yaml
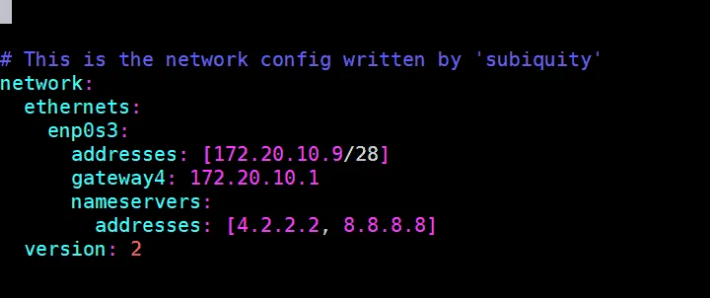
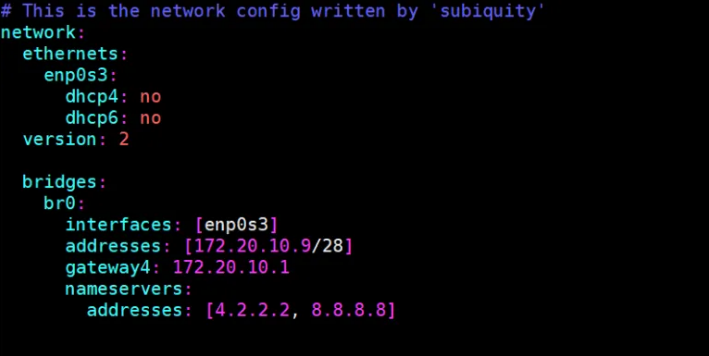
Add a network bridge entry, remove the IP from the enp0s3 interface, and assign the same IP to the network bridge (br0). After making the changes, the contents of the file should look like this:
# vi /etc/netplan/00-installer-config.yaml
# This is the network config written by 'subiquity'
network:
ethernets:
enp0s3:
dhcp4: no
dhcp6: no
version: 2
bridges:
br0:
interfaces: [enp0s3]
addresses: [172.20.10.9/28]
gateway4: 172.20.10.1
nameservers:
addresses: [4.2.2.2, 8.8.8.8]
Run the "netplan apply" command to enable brid br0 and make the above changes to effect.
# netplan apply
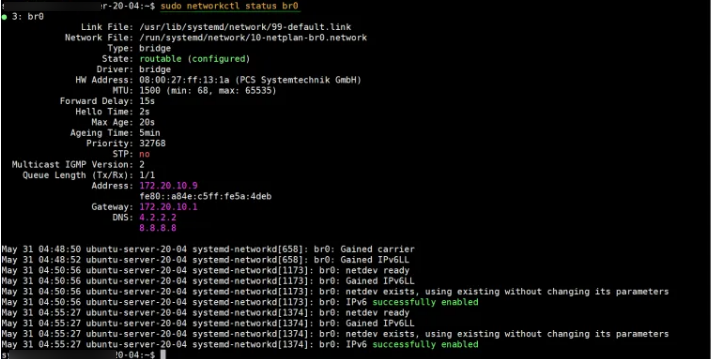
Check the status of the br0 bridge by running the following command:
# networkctl status br0
The status of bridge br0 can also be checked with the following ip command:
# ip a s
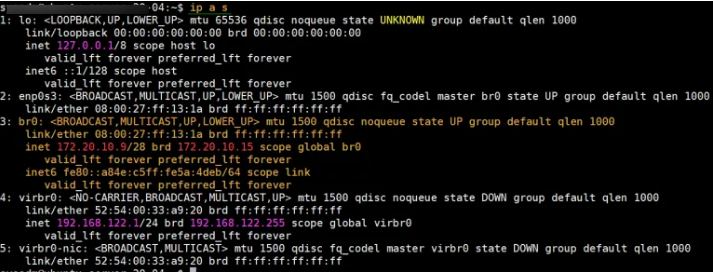
The output from the above command confirms that network bridge br0 is enabled and configured successfully. Now let's move on to the VM creation steps.
Step 5. Create digital machines with virt-supervisor & virt-deployation
virt-supervisor is X11-server primarily based totally GUI (graphical person interface), so it calls for xserver surroundings, run beneath instructions to setup minimum xserver surroundings
# apt update
# apt-get install xorg -y
Once xorg programs are installed, reboot your server.
# reboot
Once the server is to be had after reboot, open the terminal and type virt-supervisor command to begin gui,
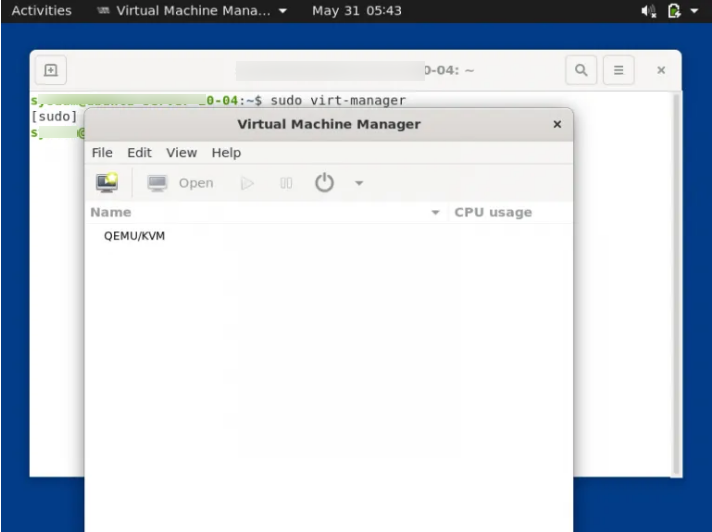
Now begin developing a digital machine, click on Monitor Icon
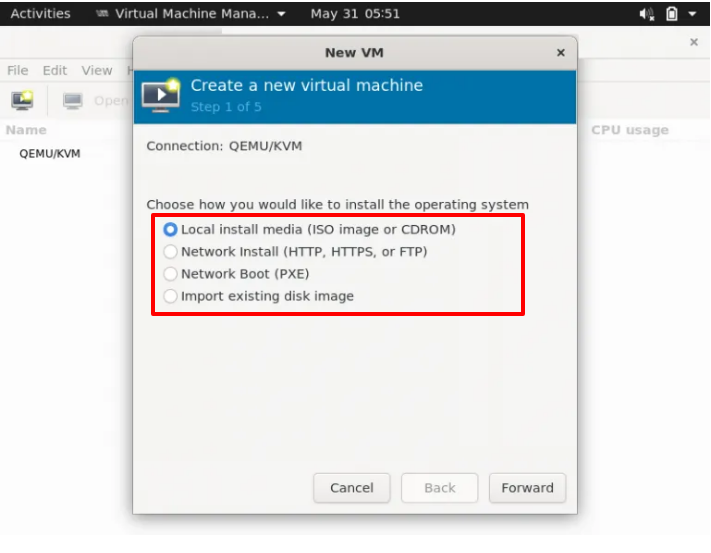
Choose the first option and then click on the Forward button,
Browse set up media like ISO record locally, in my case it is Debian 10 ISO record that's located in sysadm person's domestic directory.
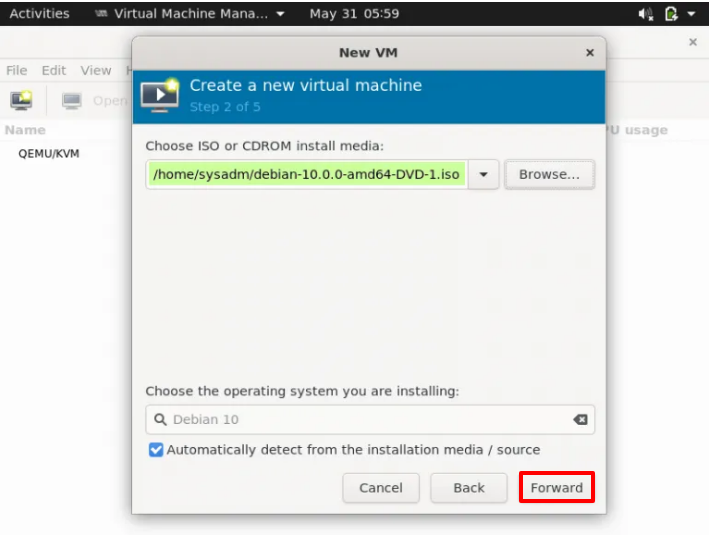
Click on Forward,
In the following window, specify the RAM and vCPUs for your VM and then click on forward button.

In the following window, specify the disk length for the VM.

Click on Forward to continue further,
Choose the community which you need to hook up with the VM, in my case I am attaching the equal community bridge (br0) that we've got created withinside the above step and set the VM call as consistent with the requirement.
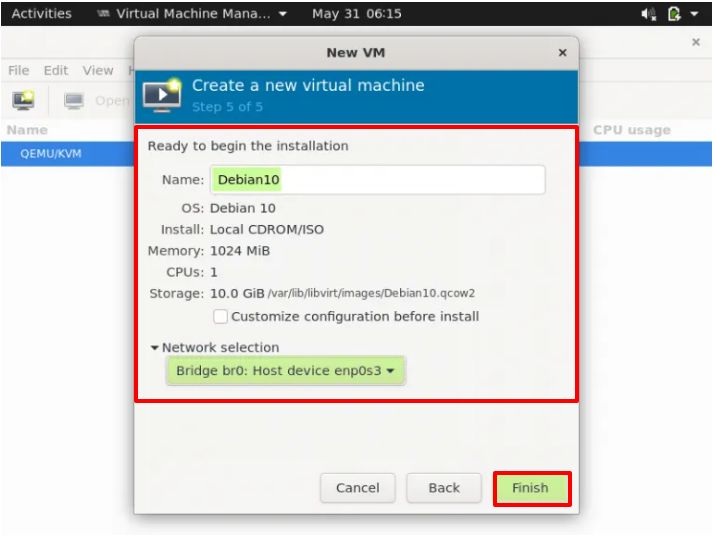
Click on Finish to begin OS set up.
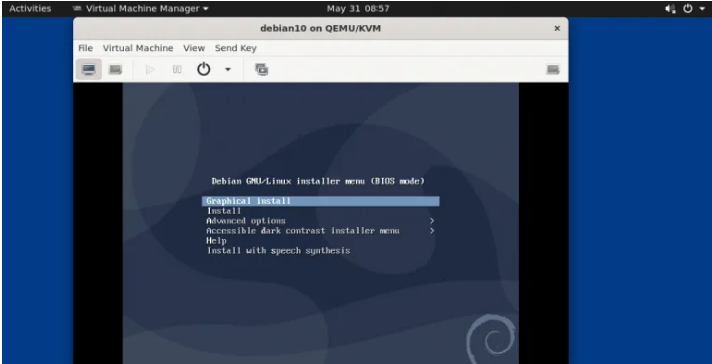
Follow the display screen commands and whole Debian 10 OS set up.
Create a virtual machine using virt-install (command line tool)
virt-install is a command line utility for installing kvm VMs. An example is shown below.
# virt-install -n CentOS-Server --description "VM for Database" --os-type=Linux --os-variant=rhel7 --ram=1096 --vcpus=1 --disk path=/var/lib/libvirt/images/centos-server.img,bus=virtio,size=10 --network bridge:br0 --graphics none --location /home/sysadm/CentOS-7-x86_64-DVD-1511.iso --extra-args console=ttyS0
Note:
Change the parameters in the above command to suit your environment
When you see the following CLI screen, follow the instructions to complete the CentOS 7 installation.
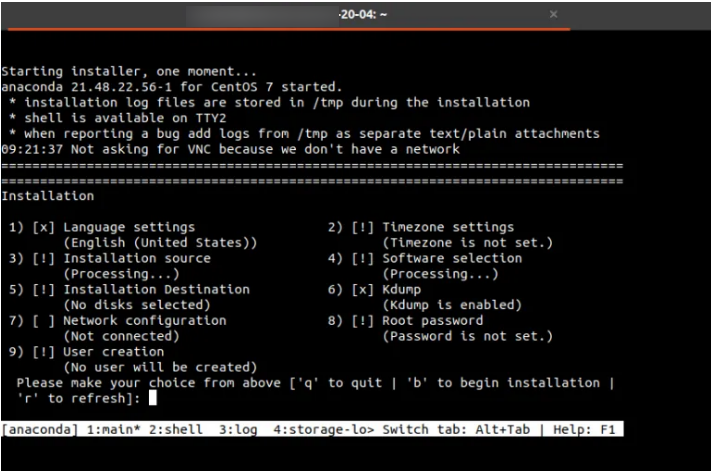
See the virt-install man page for details on the various options and parameters.
That's all from this article. I hope these steps helped you set up his KVM hypervisor on your Ubuntu 20.04 LTS server. Please let us know what you think.
