Introduction
PowerShell is an advanced and powerful replacement for the traditional Command Prompt in Windows. It provides administrators with a rich set of cmdlets, deep integration with the .NET framework, and the ability to automate complex system tasks efficiently.
One of the common administrative tasks is opening or closing ports in Windows Firewall, whether on a Windows Server OS or Windows Desktop OS. PowerShell makes this process fast, repeatable, and scriptable—especially useful for server environments and automation.
This guide explains how to open ports in Windows Firewall using PowerShell, verify the firewall rules, and confirm them through the graphical firewall interface.
Things You Should Know Before Opening a Port
Before creating a firewall rule, you should be clear about the following parameters:
Firewall Profile
-
Public
-
Private
-
Domain
(Optional – you may also apply the rule to all profiles)
Port Number
-
Example: 80, 443, 3389, 5253, etc.
Direction
-
Inbound (incoming traffic)
-
Outbound (outgoing traffic)
Protocol
-
By name: TCP, UDP, ICMPv4, ICMPv6
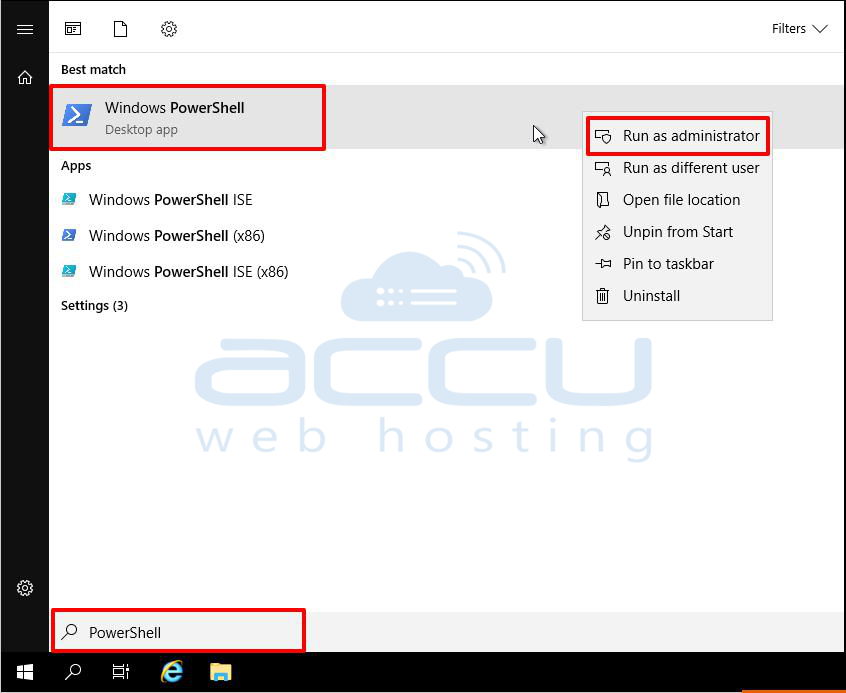
Step 1: Open PowerShell as Administrator
-
Search for PowerShell in the Windows Server or Windows Desktop search bar.
-
Right-click on Windows PowerShell.
-
Select Run as administrator.
Running PowerShell with administrative privileges is mandatory to create or modify firewall rules.
Step 2: Open a Single Port Using PowerShell
To open TCP port 80 for inbound traffic on all firewall profiles, run the following command:
New-NetFirewallRule `
  -DisplayName "ALLOW TCP PORT 80" `
  -Direction Inbound `
  -Profile Any `
  -Action Allow `
  -LocalPort 80 `
  -Protocol TCP
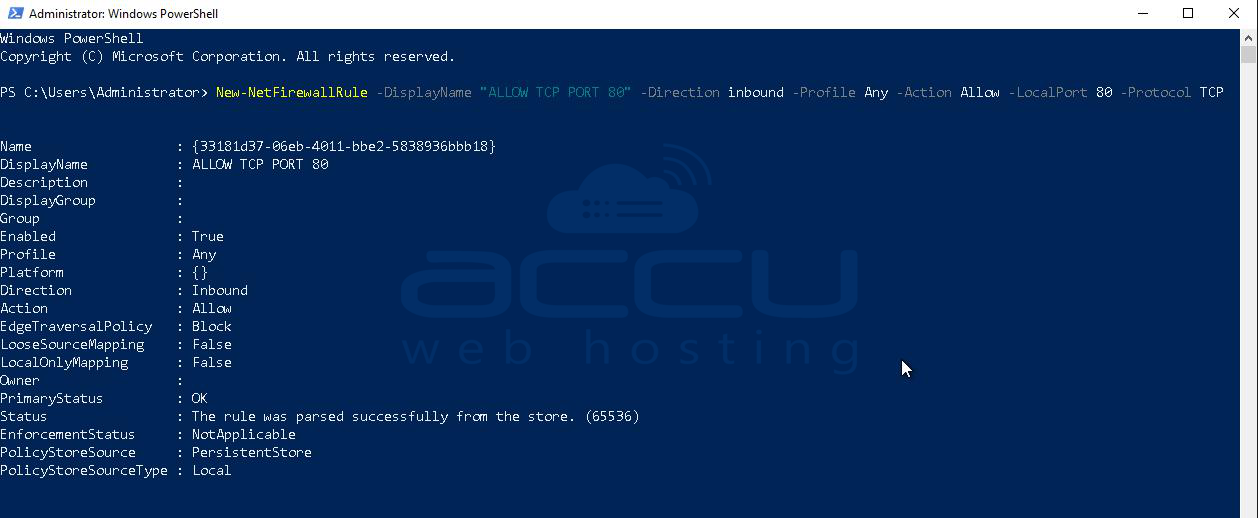
Explanation
-
DisplayName – Friendly name for the firewall rule
-
Direction – Inbound traffic
-
Profile – Applies to all profiles (Public, Private, Domain)
-
Action – Allows the traffic
-
LocalPort – Port number to open
-
Protocol – TCP protocol
Step 3: Open Multiple Ports Using PowerShell
To open multiple TCP ports at once (for example: 80, 8080, and 8090), use the following command:
New-NetFirewallRule `
  -DisplayName "Required Port" `
  -Direction Inbound `
  -Profile Any `
  -Action Allow `
  -LocalPort 80,8080,8090 `
  -Protocol TCP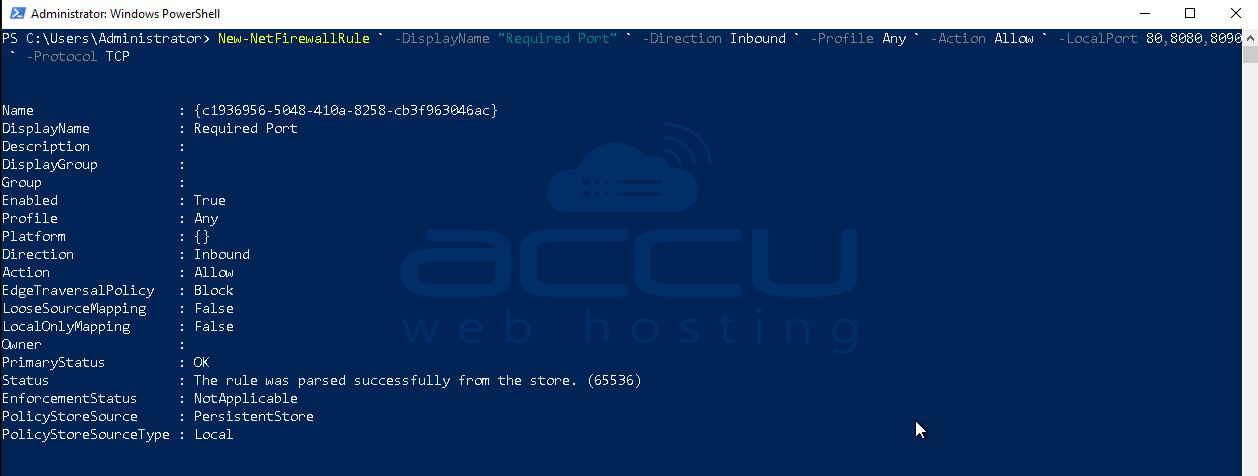
Step 4: Confirm the Port Has Been Opened Successfully
After executing the command, PowerShell will return an output indicating that the firewall rule has been created successfully.
Step 5: Verify the Firewall Rule Using PowerShell
To verify the firewall rule details, run the following command:
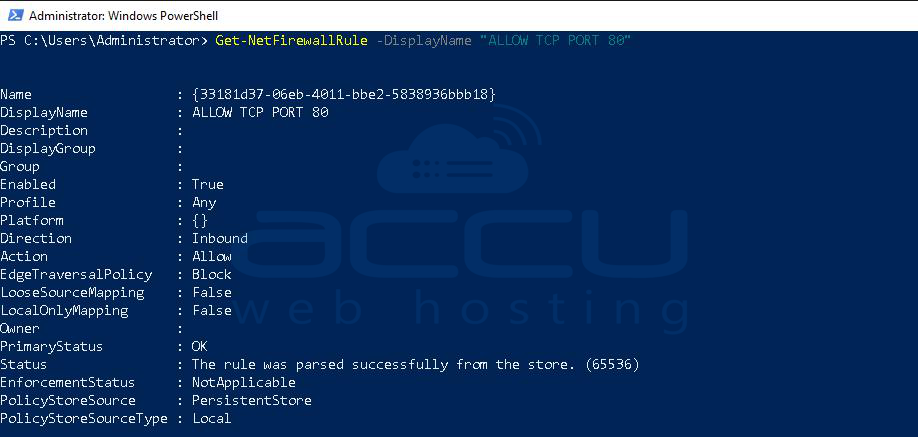
This command displays:
-
Protocol
-
Local Port
-
Remote Port
-
Remote Address
-
Rule status
-
Profile
-
Direction
-
Action
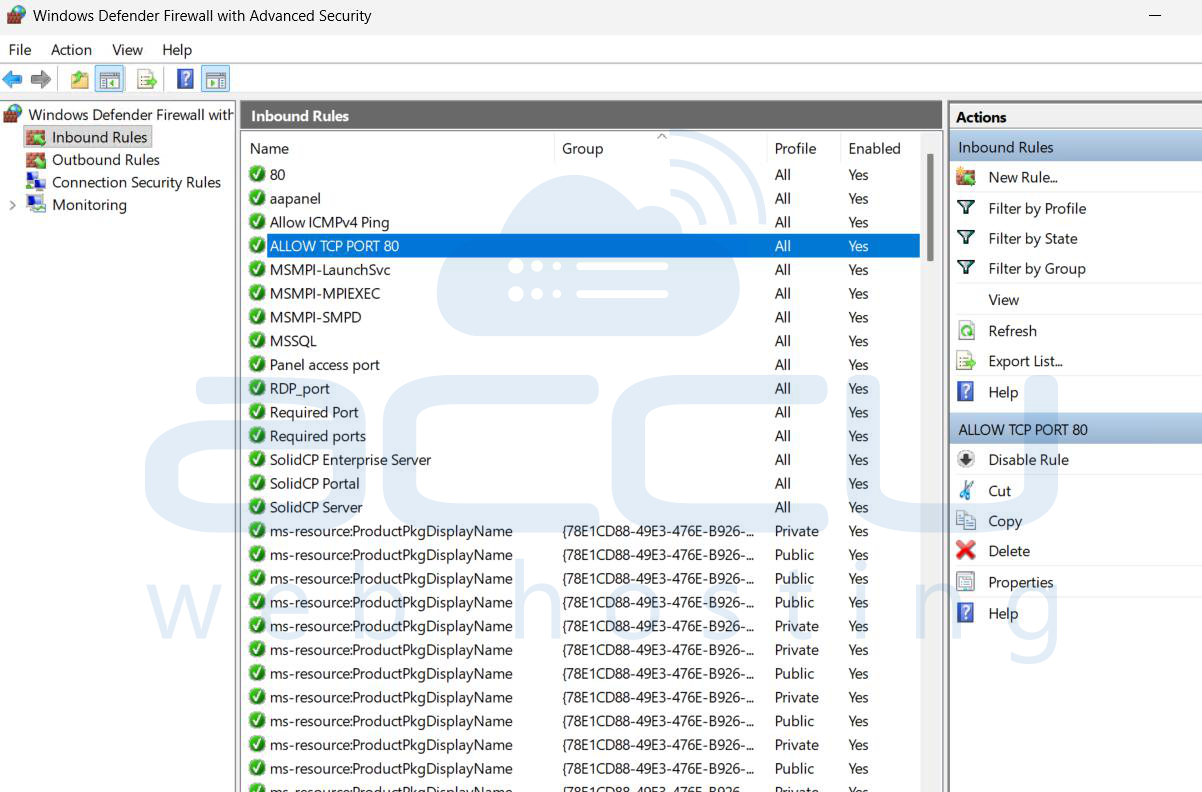
Step 6: Verify the Rule via Windows Firewall GUI
-
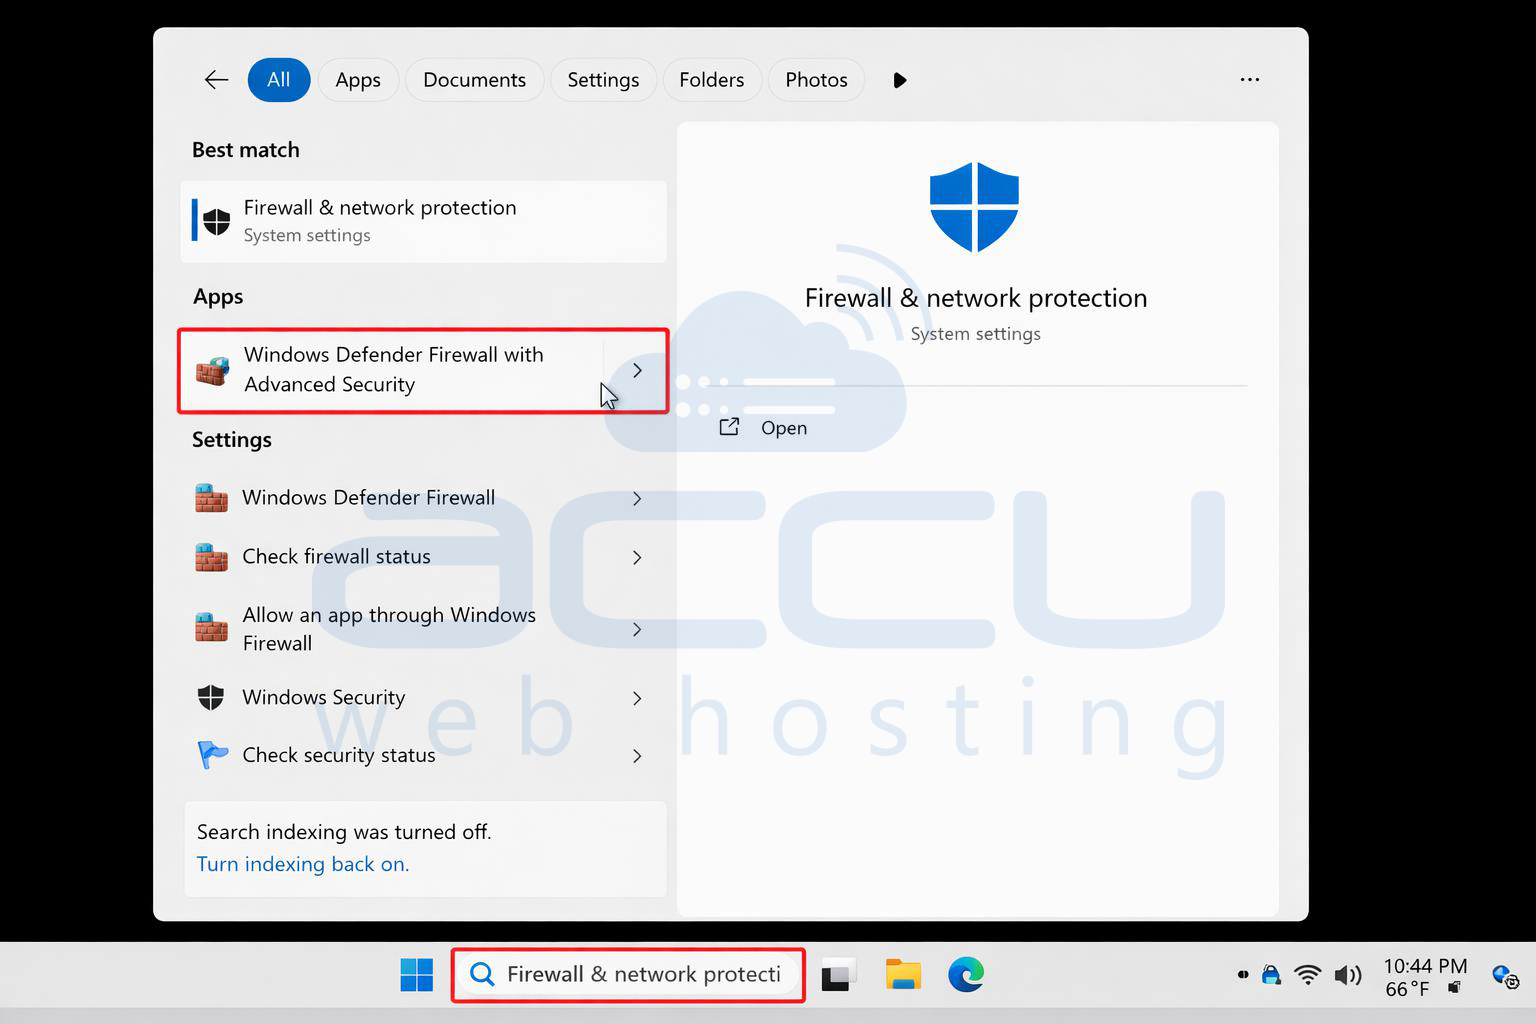
Open Windows Firewall with Advanced Security.
-
Type Windows Firewall with Advanced Security in the search bar.
-
In the firewall window, click Inbound Rules.
-
Look for the rule name you created (e.g., ALLOW TCP PORT 80).
-
Confirm that the rule is Enabled and Allow is selected.
Conclusion
You have successfully opened a port in Windows Firewall using PowerShell and verified it using both PowerShell commands and the Windows Firewall graphical interface.
Using PowerShell for firewall management offers several advantages:
-
Faster configuration
-
Automation-friendly
-
Ideal for servers and bulk operations
-
Reduced dependency on GUI access
For better security, always:
-
Open only required ports
-
Use specific firewall profiles when possible
-
Regularly review firewall rules
-
Combine firewall rules with strong authentication and access controls
