You can block traffic from any specific IP address with the .htaccess file by following the steps listed below –
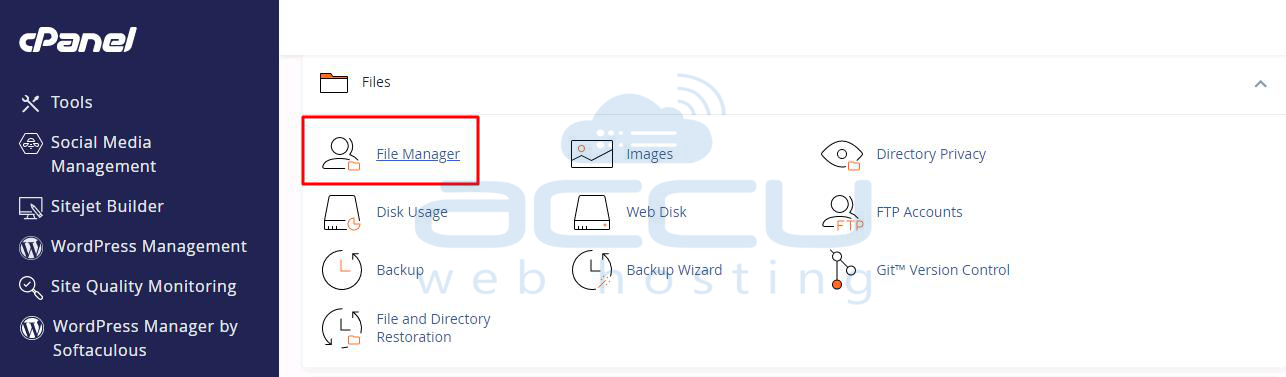
Step 1: Log in to your cPanel account and open the File Manager.
Step 2: Open the public_html directory, there you will find the .htaccess file.
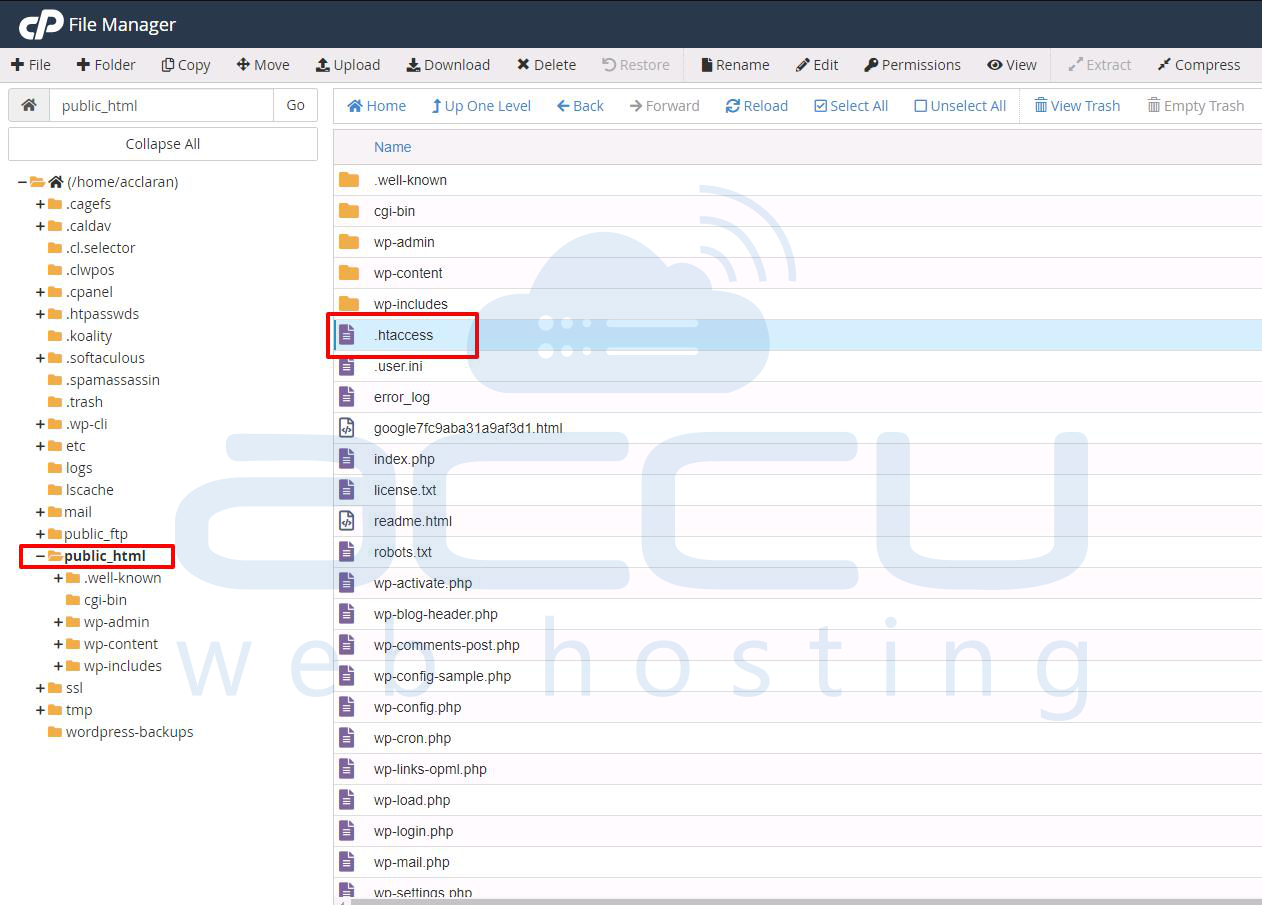
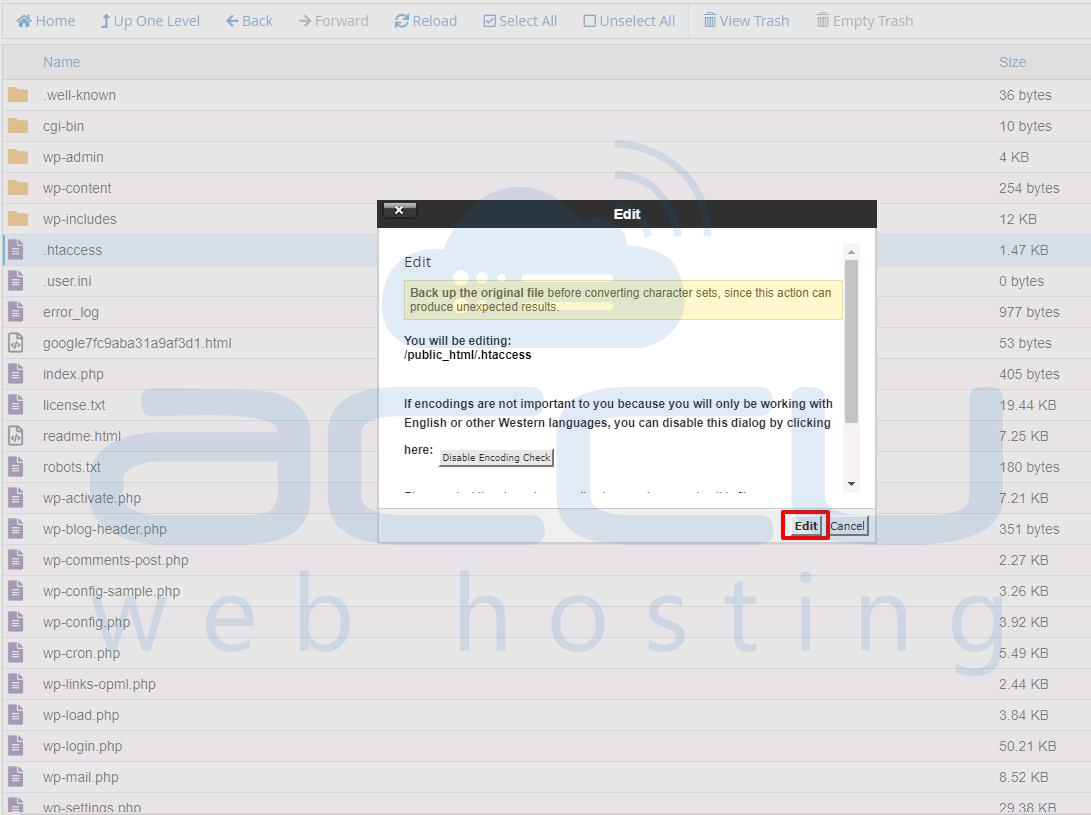
Step 3: Right-click on the .htaccess file and click on the Edit option.
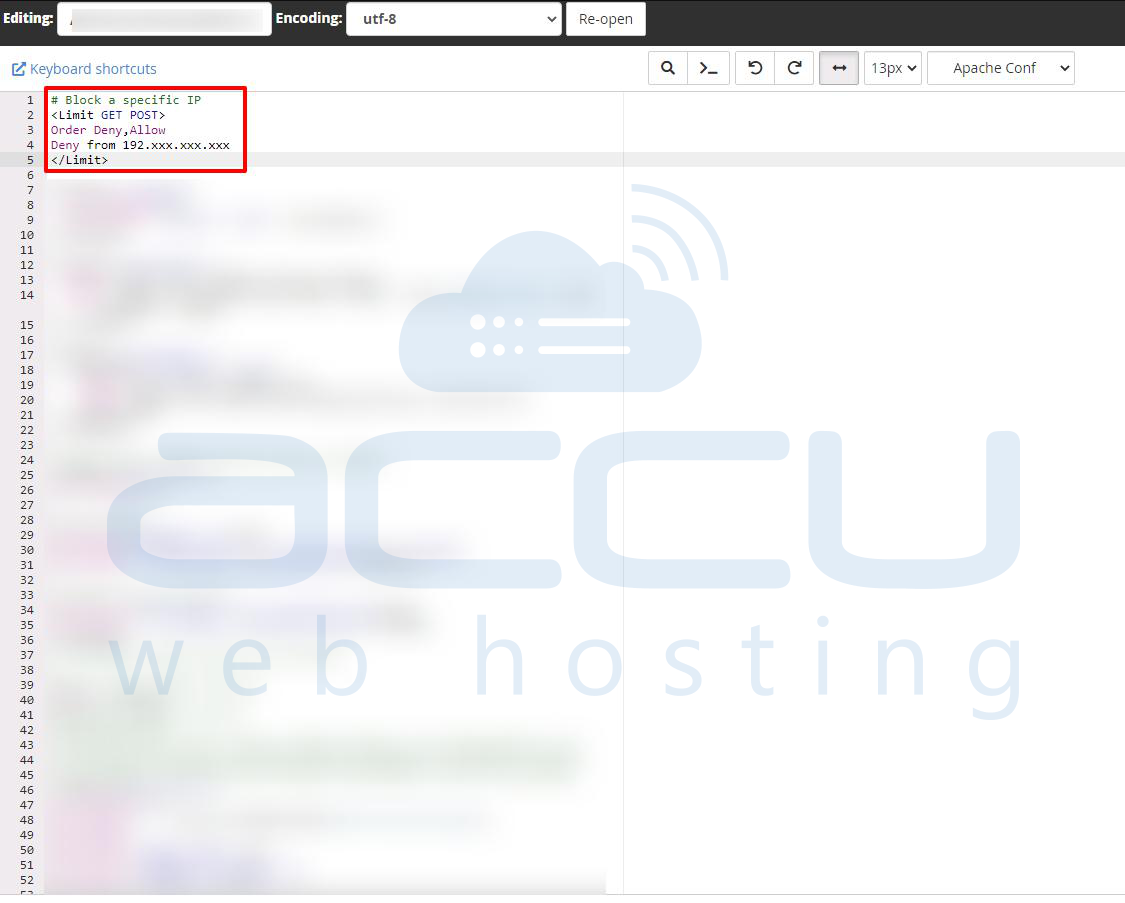
Step 4: Insert the lines at the top or before any rewrite rules, like this:
Block a specific IP
<Limit GET POST>
Order Deny,Allow
Deny from 192.xxx.xxx.xxx
</Limit>
If your server is running Apache 2.4 or later, Order, Deny, and Allow are deprecated. Use the new syntax instead:
Require not ip 192.xxx.xxx.xxx
Note: Replace the IP 192.xxx.xxx.xxx with the actual IP Address you want to block for your website.
Conclusion:
Blocking an IP address using the .htaccess file is a quick and effective way to restrict unwanted access to your website at the server level. By adding just a few lines of code, you can deny specific IPs from reaching your site without modifying your application code or firewall settings. Always ensure you're blocking the correct IP to avoid unintentionally restricting legitimate users.
