Python is a popular computer language that lots of people like to use, whether they are just starting or they have experience. Python can do many things like helping with writing code, doing tasks automatically, working with data, and making computers learn and do things.
If you have a computer with Windows, it doesn't have Python already on it like some other computer systems. But you can put Python on your Windows computer, whether it's a server or a regular one, by following a few easy steps.
Installing Python 3 on Windows
Step 1: Choose the Python Version
1.1 To install Python, you first need to pick the right version. If you have a project that uses a specific Python version like 2.6, you should get that one. But if you're starting a new project, you can choose any version you like.
1.2 If you're learning Python, we suggest getting both the latest versions of Python 2 and 3. This way, you can work on older projects and test new ones to make sure they work with older Python code.
Note: If you're installing Python on a faraway Windows server, use Remote Desktop Protocol (RDP) to log in. Once you're logged in, the steps for installation are the same as on a regular Windows computer.
Step 2: Get the Python Installer
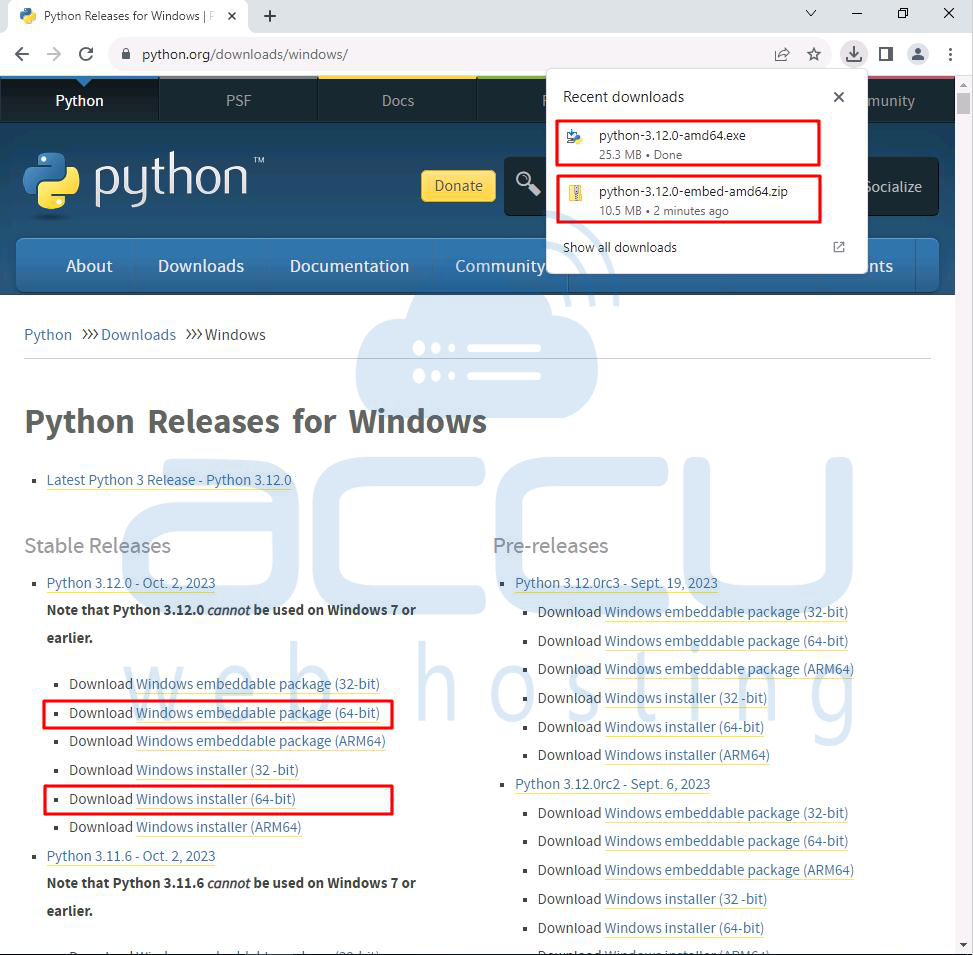
2.1 Open your web browser and go to the "Downloads for Windows" section on the official Python website.
2.2 Look for the Python version you want. As of the time this article was written, the newest Python 3 is version 3.12.0, and the newest Python 2 is version 2.7.18.
2.3 Click a link to download either the Windows x86-64 installer (if your computer is 64-bit) or the Windows x86 installer (if it's 32-bit). The file is about 25MB in size.
Note: If your Windows computer is 32-bit, use the Windows x86 installer. If it's 64-bit, use the Windows x86-64 installer. Don't worry if you pick the "wrong" one; you can uninstall one version and install the other if needed.
Step 3: Start the Installation
3.1 Once you've downloaded the installer, just double-click the .exe file (like python-3.12.0-amd64.exe) to start the Python setup.
3.2 Choose the "Install launcher for all users" option. This lets everyone who uses the computer use the Python launcher tool.
3.3 Select the "Add python.exe to PATH" option. This allows people to run Python from the command line.

3.4 If you're new to Python and want to install it with the default settings as shown in the window, click "Install Now" and move on to Step 4: Check if Python Is on Your Computer. If you want to install extra things or make changes, click "Customize installation" and continue.

3.5 The "Optional Features" are extra tools for Python, and you can install them all, even if you don't plan to use them.
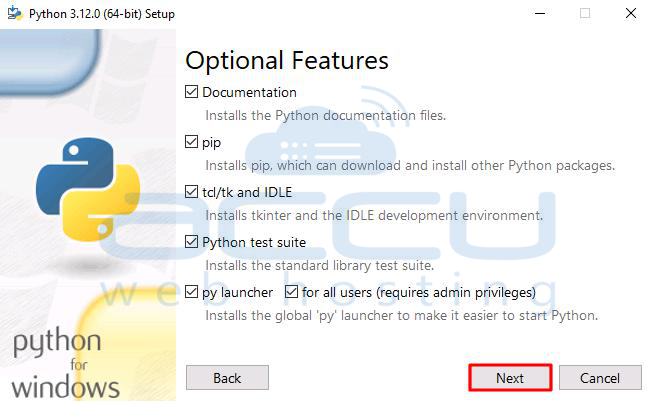
Choose some or all of these options:
Documentation: good to have
pip: useful if you want to install other Python stuff
tcl/tk and IDLE: good if you want to use IDLE
Python test suite: good for testing and learning
py launcher for all users: lets people start Python from the command line
3.6 Click "Next."
3.7 Now, you'll see the "Advanced Options" window.

Pick the options that fit your needs:
"Install for all users": good if more than one person uses the computer
"Associate files with Python": helps with opening Python files
"Create shortcuts for installed applications": useful for quick access to Python programs
"Add Python to environment variables": helps start Python easily
"Precompile standard library": not needed; it may slow down the installation
"Download debugging symbols" and "Download debug binaries": only if you're making C or C++ things
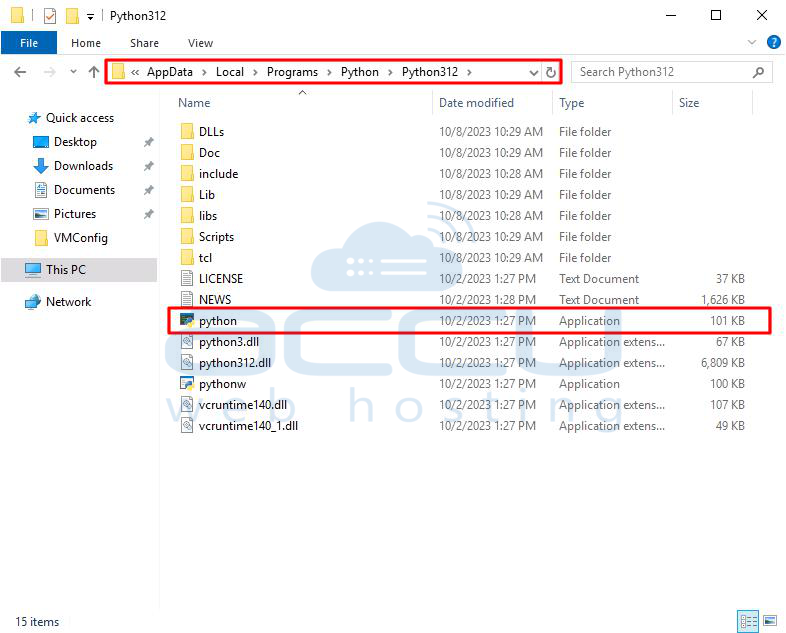
Remember where Python is installed in case you need it later. In our case, Python is installed on the following path.
C:\Users\Administrator\AppData\Local\Programs\Python\Python312
3.8 Click "Install" to begin the installation.
3.9 Once it's done, you'll see a message saying "Setup was successful."

Turning on the "Disable path length limit" won't mess up other computer settings. It just helps with potential issues when working on Python projects from Linux.
Step 4: Check if Python Is on Your Computer
4.1 Go to the place where Python was put on your computer. For example, if you have the latest version, it might be in a folder like C:\Users\Administrator\AppData\Local\Programs\Python\Python312. Look for a file named "python.exe" and double-click it.
If it's there, you should see something like this:
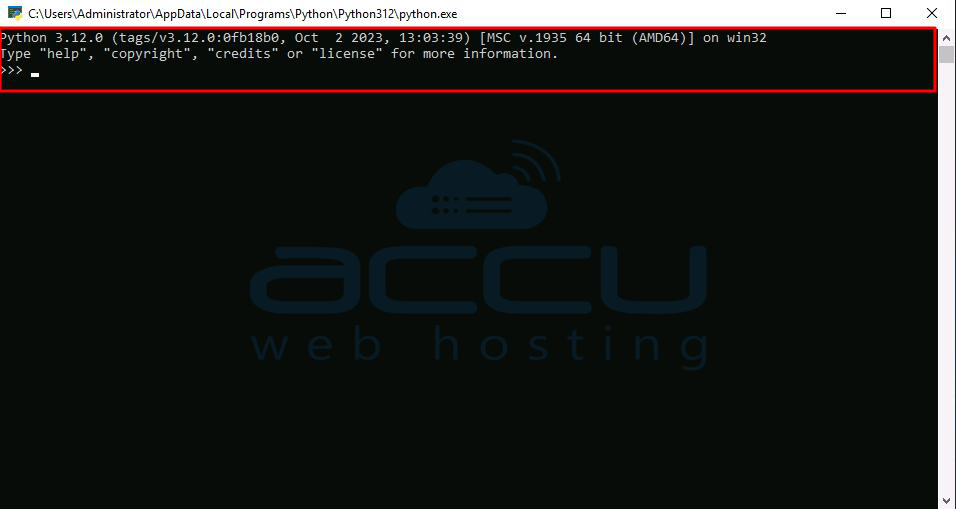
Note: You can also check if Python was installed by typing "python -V" in the Command Prompt. It should show the version you installed. For example, it might say "Python 3.12.0."

Step 5: Make Sure Pip Is Installed
If you chose an older Python version, it might not have Pip installed. Pip is a handy tool for managing Python programs.
To check if Pip is installed:
5.1 Open the Start menu and type "cmd."
5.2 Select the "Command Prompt" program.
5.3 In the console, type "pip -V." If Pip is installed, it should show some information about it.
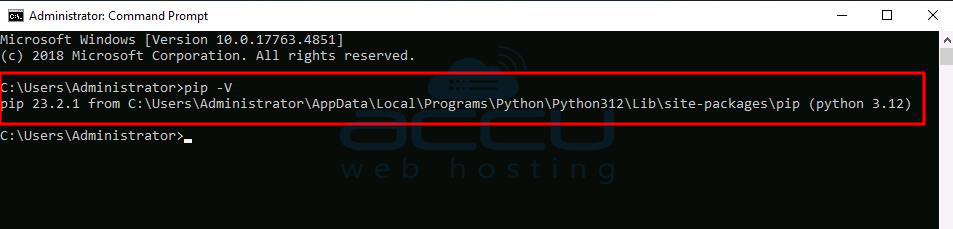
5.4 If you see an error like "'pip' is not recognized as an internal or external command," it means Pip is not installed yet.
Step 6: Put Python in the Command Line (Optional)
You can skip this if you added Python to the command line during installation.
If you want to use Python in the command line but didn't do it during installation, you can do it manually.
First, find where Python is installed on your computer. It could be in one of these places:
C:\Program Files\Python312: If you installed it for everyone on the computer.
C:\Users\Administrator\AppData\Local\Programs\Python\Python312: If you didn't install it for everyone.
Remember, the folder name might be different for another version, but it'll always start with "Python."
Now, follow these steps:
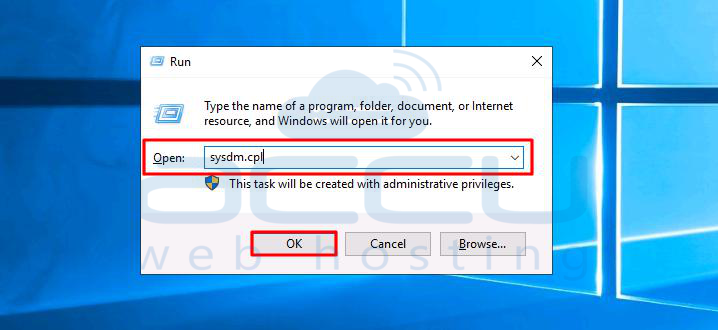
6.1 Open the Start menu and use the Run app.
6.2 Type "sysdm.cpl" and click OK.
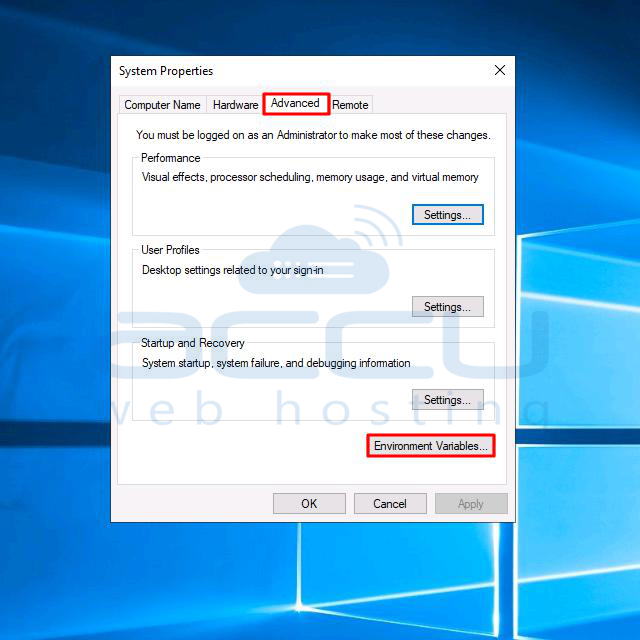
6.3 This opens the System Properties window. Go to the Advanced tab and pick "Environment Variables."
Depending on how you installed Python:
If you choose to install it for everyone, choose "Path" from the System Variables list and click "Edit."
If you didn't install it for everyone, choose "Path" from the User Variables list and click "Edit."
Since we installed Python for everyone, we'll pick "Path" from the System Variables list.
6.4 Under System Variables, find and choose the "Path" variable. Click on the Edit button.

6.5 In the Variable value field, add the path to the "python.exe" file, and put a semicolon (;) in front of it. For example, we added ";C:\Users\Administrator\AppData\Local\Programs\Python\Python312"
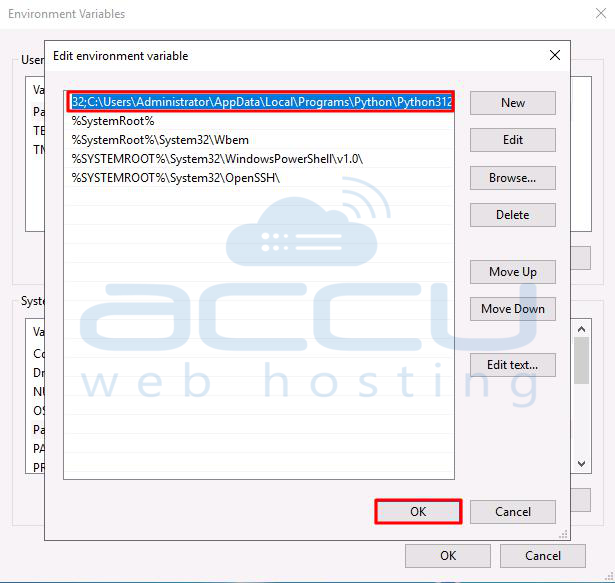
6.6 Click OK and close all the windows.
Now, you can run Python scripts like this: "Python script.py" instead of "C:\Users\Administrator\AppData\Local\Programs\Python\Python312 script.py." It's neater and easier.
Step 7: Install virtualenv (Optional)
You have Python and Pip to manage stuff, but now you need one more thing called "virtualenv." It lets you make separate little spaces for your Python projects.
Why use virtualenv?
By default, Python programs are installed for the whole computer. So, if you change one thing for one project, it changes for all your Python stuff. You want to avoid that, and having separate little spaces for each project is the simple solution.
To install virtualenv:
7.1 Open the Start menu and type "cmd."
7.2 Choose the Command Prompt app.
7.3 Type this Pip command in the console:
C:\Users\Username> pip install virtualenv

7.4 After that, you'll have virtualenv on your computer.

Conclusion:
In this guide, we explained how to install Python on your Windows computer. If you're using a different Python version, the steps will be pretty much the same.
Just remember to pick the right version, check for Pip, and consider using separate spaces for your projects if you're working on many things on one computer.
