When you set up a new server, a default account is created called root. This user has complete system access and should be used only for administrative tasks. As a root user, you have practically no restrictions on what you can do to your system. Linux does not have an “undo” button, which is powerful but extremely dangerous.
In order to reduce this risk, we can create a new user with fewer privileges and is better suited for everyday tasks. If you need administrator privileges to run any command or view files, you can access that feature using the command sudo. It will temporarily elevate privileges for a single command.
In this article, we will guide you on creating a new user in a Linux system and grant those users access to the sudo command if they need administrative privileges.
Steps to Add Sudo User on Ubuntu
Create a New User
( If you have already created it then you can skip this step)
Step 1: Log into your Server/System with a root user.
Step 2: Open a terminal window and execute the below-mentioned command to add a new user in your server.
# adduser newuser
The command adduser will create a user, a group, and a home directory for the new user.
Note: Replace the newuser with any username you want to create on your system or server.
Step 3: Once you fire the command in the terminal, the server will add the new user; then prompt you to enter a password. Please enter a strong password. In the Retype new Unix password field, you need to enter the same password which you have entered in the Enter new UNIX password field.

Step 4: After then, the system will ask you to enter additional details about the user. It includes names, phone numbers, etc. These fields are optional. You can skip it by pressing Enter.
Add User to Sudo Group
Generally, all Linux systems, including Ubuntu, have a user group for sudo users. To give new users elevated privileges, add them to the sudo group.
Step 1: Go to the terminal and enter the following command.
# usermod -aG newuser
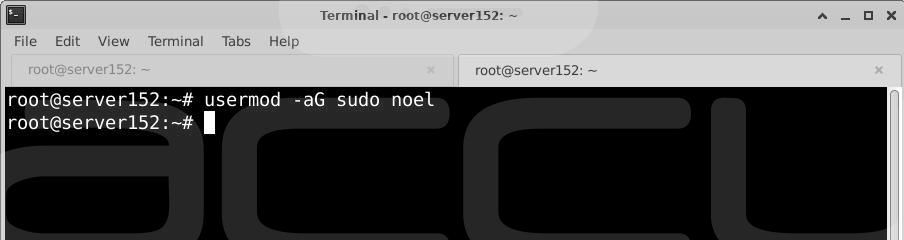
Note: Replace the newuser with the username you used in Step 2 of Create New User section.
The -aG option instructs the system to append the user to the specified group.
Verify User Belongs to Sudo Group
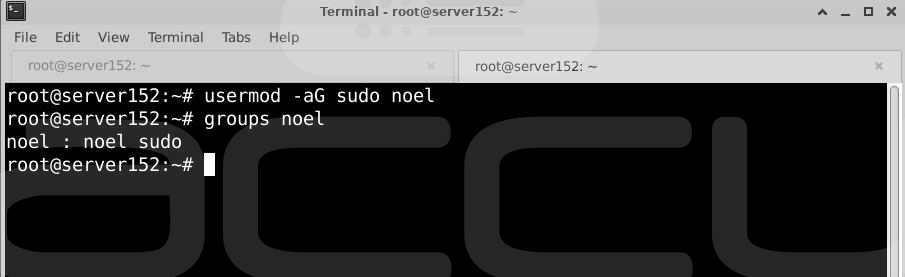
To verify that the user belongs to the sudo group, enter the following command in the terminal.
# groups newuser
The system will show the username and the groups it belongs to.
Note: Replace the newuser with the username you used in Step 2 of Create New User section.
For example: newuser: newuser sudo
Verify Sudo Access
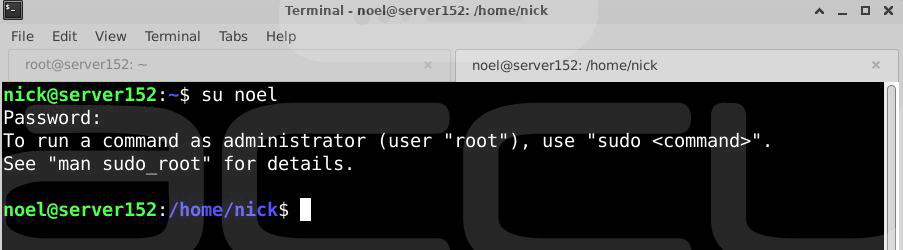
First, we need to switch the user; you can change the user by executing the following command in the terminal.
# su - newuser
Note: Replace the newuser with the username you used in Step 2 of Create New User section.
You can run the commands as usual by entering them in the terminal.
# ls /home
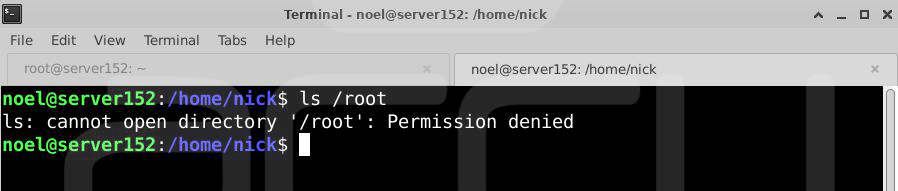
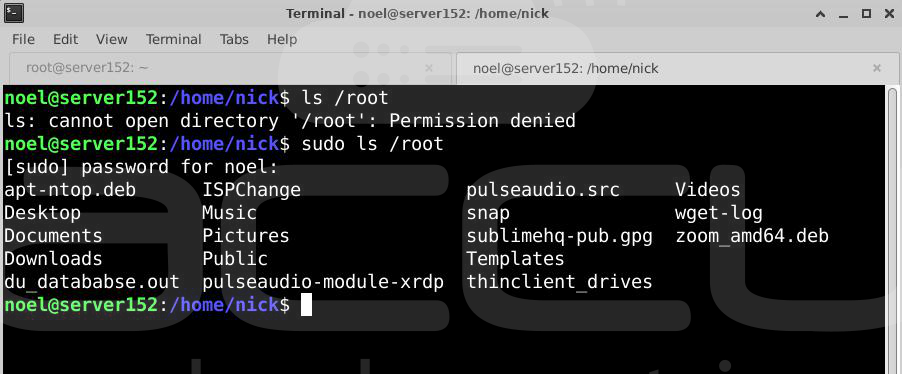
However, some commands or locations require high privileges. If you are going to list the contents of the /root directory, you’ll receive an access denied error:
# ls /root
To remove the error, you need to use sudo command before the ls command.
# sudo ls /root
Once you execute the above command, the system will ask for the password. Enter the same password you set in Step 2 of Create New User section.
Now, you will get the content of the /root directory.
That's all.
