Laravel is a PHP framework, and Nginx is a web browser that can be installed on Ubuntu. Nginx is highly popular because it is lightweight, and we will deploy a Laravel application on it.
First of all, your server should have installed Nginx and PHP-FPM. Please click on this link to install and configure PHP-FPM and Nginx.
We believe you have already installed this, so we can proceed further.
We need to access the server with the root or sudo user because we will edit the Nginx virtual host files to deploy our Laravel Application.
1. Update the Ubuntu repository with its package.
# sudo apt update
# sudo apt upgrade
Let us reboot the server once.
2. Once the server is up, install Nginx using this command –
# sudo apt install nginx -y
3. Install PHP 7.2 and PHP-FPM.
# sudo apt install php7.2 php7.2-curl php7.2-common php7.2-cli php7.2-mysql php7.2-mbstring php7.2-fpm php7.2-xml php7.2-zip -y
4. Start and enable PHP 7.2
# systemctl start php7.2-fpm
# systemctl enable php7.2-fpm
5. You can verify PHP-FPM running under the socket file with this command
# netstat -pl | grep php7.2-fpm
6. Install MariaDB using the command given below –
# sudo apt install mariadb-server mariadb-client -y
7. Start and enable MariaDB
# service mysql start
# service enable mysql
8. Here, we will configure the MariaDB root password with the 'mysql_secure_installation.'
#mysql_secure_installation
Set root password? [Y/n] Y
Remove anonymous users? [Y/n] Y
Disallow root login remotely? [Y/n] Y
Remove test database and access to it? [Y/n] Y
Reload privilege tables now? [Y/n] Y
9. Install PHP Composer with the below command -
# sudo apt install composer -y
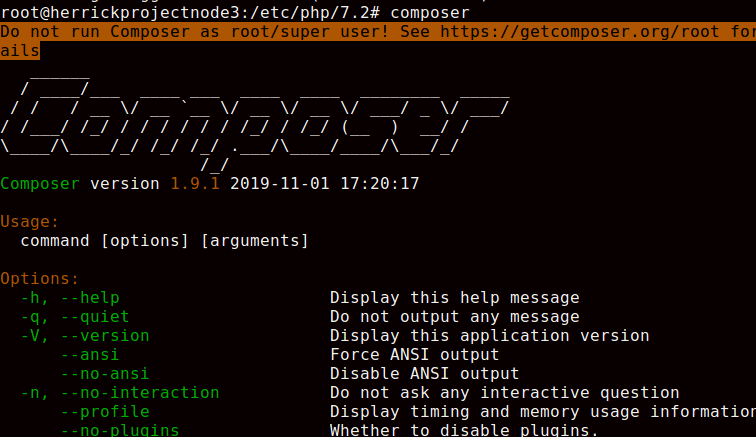
10. Once you run the composer command, it will give the same screen as shown below -

This means the composer is PHP Composer is installed.
#composer
11. Let us configure the Nginx virtual host for Laravel.
Here, we will use the /var/www/laravel_test directory for our project. First, we will create the same directory.
# mkdir -p /var/www/laravel_test
12. We should test Nginx to make sure there is no error.
ln -s /etc/nginx/sites-available/laravel_test /etc/nginx/sites-enabled/nginx -t
13. Restart the Nginx service.
# service nginx restart
14. Go to the folder laravel_test, which we have defined earlier.
# cd /var/www/laravel_test
15. Run the following composer command to install Laravel.
# composer create-project laravel_test/laravel_test
16. Now, change the ownership of the Laravel project directory to the www-data user.
Change the permission of the storage directory to 755.
# chown -R www-data:root /var/www/laravel_test
# chmod 755 /var/www/laravel_test
17. To test Laravel, we need to access the domain name we added to the virtual host configuration file.
18. Once you access the domain name, it should give the Laravel hostname.


