This article will assist you in adding a new website to IIS.
If you have opted for the control panel, we recommend adding a website from the control panel itself.
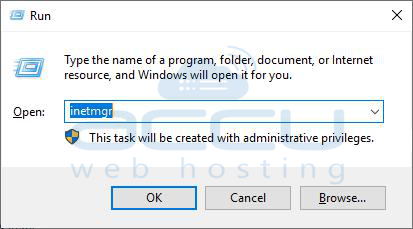
Step 1: Open IIS Manager (Start >> Run >> type inetmgr and press enter).
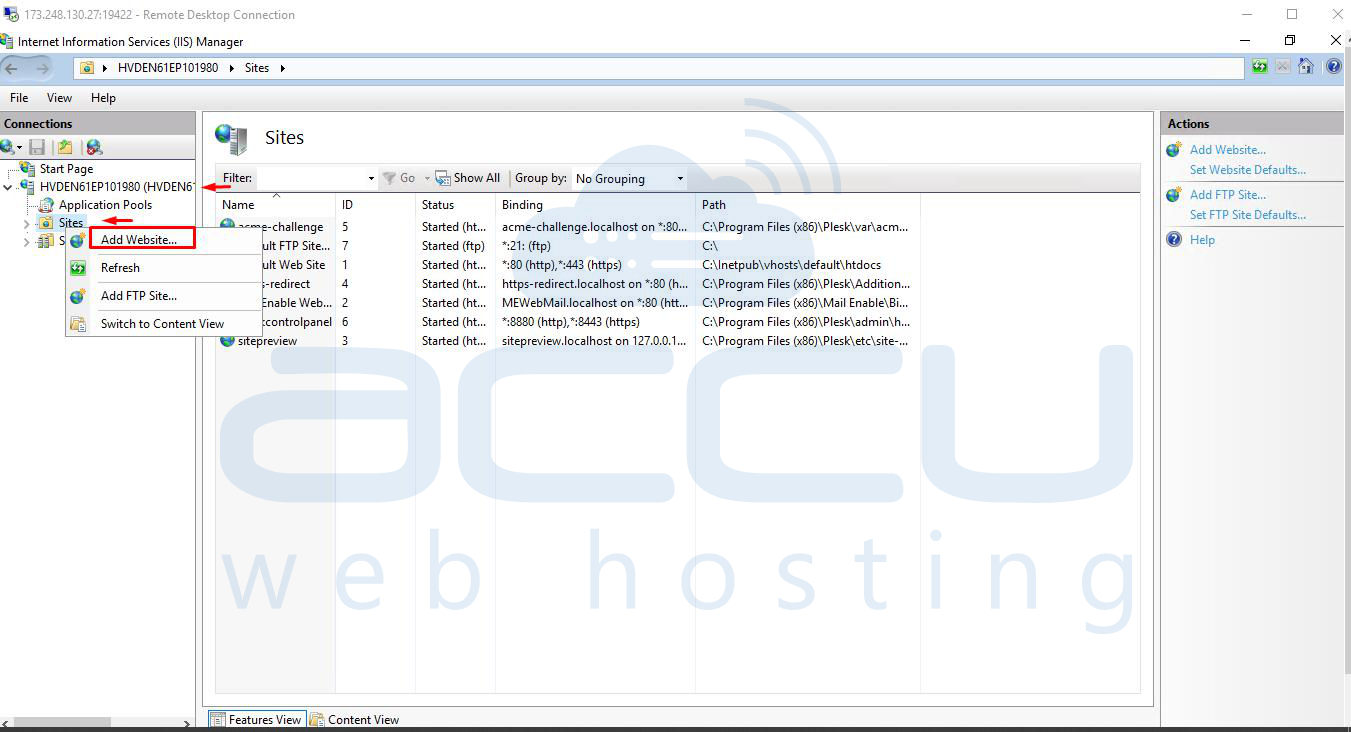
Step 2: In the Connections pane, right-click on the Sites and click on Add Web Site.
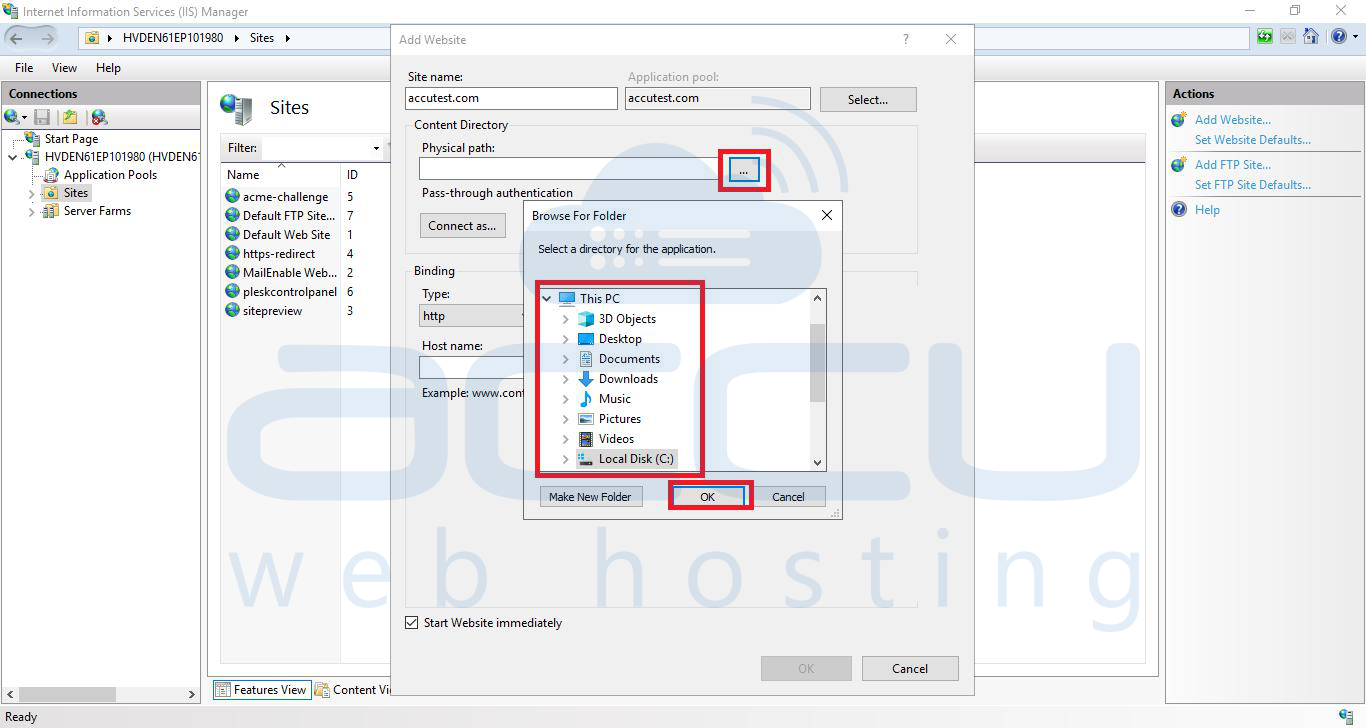
Step 3: In the Add Web Site box, enter a preferred name of your website in the Site name box.
Step 4: Click Select if you want to set a different application pool than the one listed in the Application Pool box.
This will open the Select Application Pool dialog box. Then select an application pool from the Application Pool drop-down and click OK.

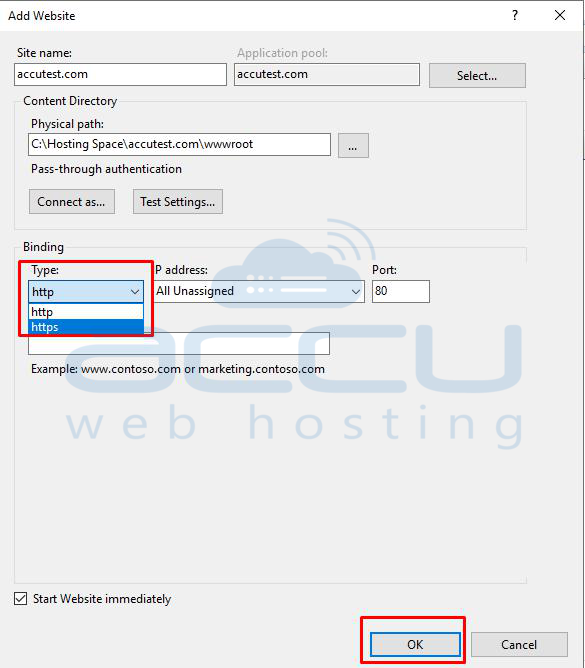
Step 5: In the Physical path box, you can type the physical path of your website folder. Alternatively, you can click the browse (...) button and select the website folder manually.
Step 6: Select the protocol from the Type drop-down.
Step 7: Under the IP address box, the default value would be All Unassigned. If you want to specify the static IP address for your website, type an IP address or select it from the drop-down.
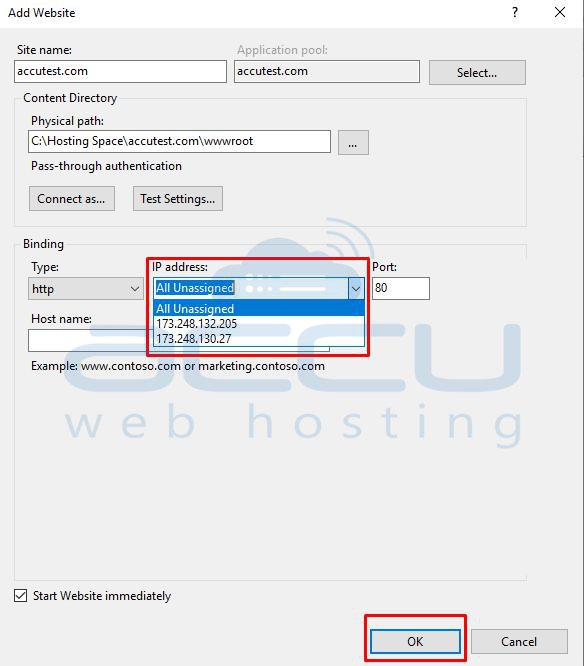
Step 8: Enter the port number upon which you want to bind your website.
Please note that port 80 is the default port for all websites. When you specify a port other than 80, you must browse your website along with the port number (For example, http://example.com:8080). Next, type a host header name in the Hostname box.
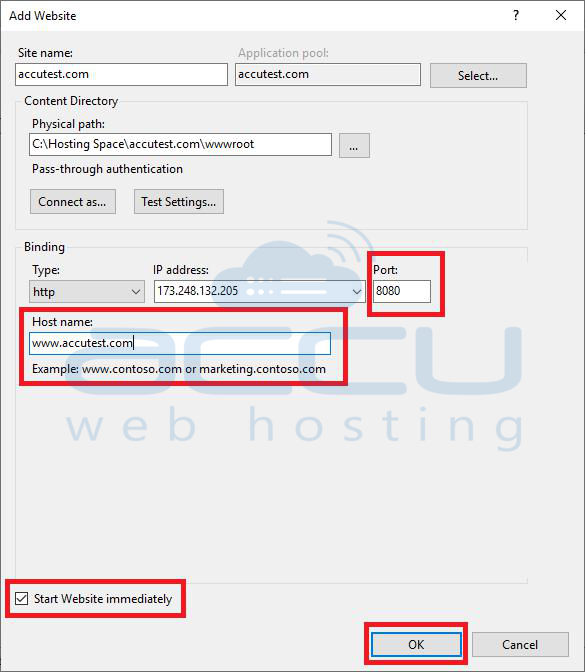
Step 9: Select the Start Web site immediately, check the box, and click OK.
This way, you can add a Website to the IIS.
