By default, PHP sets a relatively low limit on the maximum file size that can be uploaded. This can cause issues if you’re working with larger files, such as media uploads, backups, or application imports. On a Windows VPS, you can raise this limit by adjusting the PHP configuration file (php.ini) and restarting your web server.
Step 1: Connect to Your Windows VPS
Use Remote Desktop Connection (RDP) to log in. Sign in with the Administrator account.
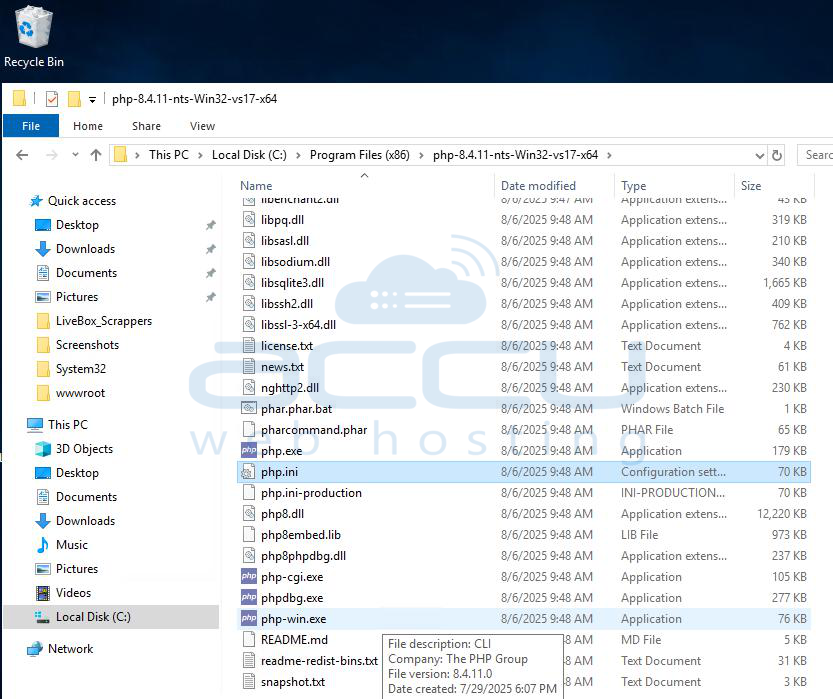
Step 2: Locate the php.ini File
Navigate to your PHP installation directory (often found at):
- C:\Program Files (x86)\PHP\
- Find the php.ini file.
- Right-click and select Edit (open with Notepad or Notepad++).
Step 3: Update the Upload Limit
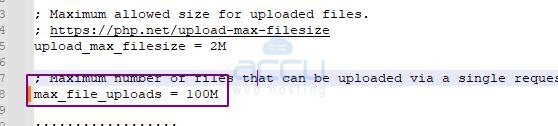
In the file, look for:
- upload_max_filesize
- Increase the value as needed (e.g., 100M instead of 10M).
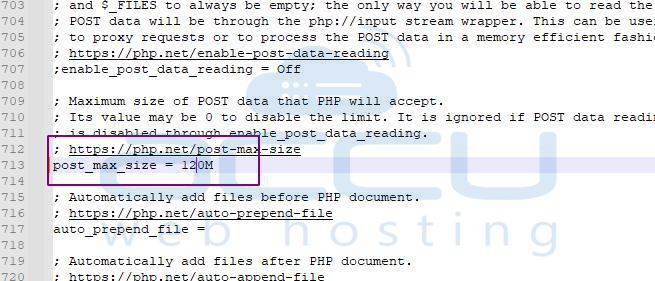
- Also, adjust post_max_size so it’s slightly higher than your upload limit:
Step 4: Save Your Changes
Press Ctrl + S (or use File > Save). Close the editor when finished.
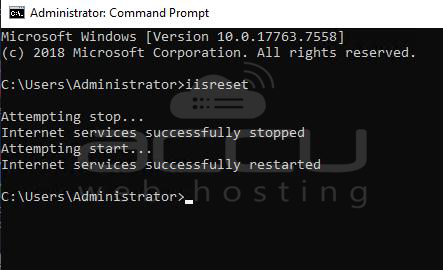
Step 5: Restart IIS
Open Command Prompt as Administrator. Run the below command:
# iisreset
Step 6: Verify the New Limit
In your web root, create a file named phpinfo.php.
Add this code:
<?php phpinfo(); ?>
Open it in your browser: http://your-domain.com/phpinfo.php
Search for upload_max_filesize and confirm the new value.
Conclusion:
And that’s it, you’ve successfully increased the PHP file upload size limit on your Windows VPS. Adjusting php.ini gives you control over how large files can be, ensuring that your applications and users won’t encounter unnecessary restrictions.
If you’re still hitting upload issues, double-check that both upload_max_filesize and post_max_size are set appropriately and that your web application doesn’t have its limits configured.
