
Website speed plays a major role in user experience, SEO rankings, and conversion rates. Visitors expect websites to load within seconds, and search engines like Google reward fast-loading websites with better rankings. If your website is hosted on a LiteSpeed web server, one of the best ways to improve performance is by using QUIC.cloud CDN.
QUIC.cloud is the only Content Delivery Network (CDN) built specifically for LiteSpeed Web Server. It integrates seamlessly with LiteSpeed Cache and provides advanced caching, image optimization, DDoS protection, and global content delivery. In this comprehensive guide, you'll learn how to enable QUIC.Cloud CDN on your cPanel website using CNAME verification.
What is QUIC.cloud CDN?
QUIC.cloud is a global Content Delivery Network designed exclusively for websites running on LiteSpeed Web Server. Unlike traditional CDNs, QUIC.cloud communicates directly with LiteSpeed servers, making caching faster and more efficient.
Instead of serving content only from your hosting server, QUIC.cloud stores cached copies of your website on multiple edge servers around the world. When visitors access your website, they receive content from the server closest to their location, significantly reducing loading times.
QUIC.cloud also includes several optimization features such as:
-
Global CDN
-
Dynamic and static content caching
-
Image optimization
-
CSS and JavaScript minification
-
HTML optimization
-
HTTP/3 support
-
DDoS protection
-
Free SSL certificates
-
Intelligent cache management
Because of its deep integration with LiteSpeed Cache, QUIC.cloud is one of the fastest CDN solutions available for WordPress and LiteSpeed-powered websites.
Benefits of Using QUIC.cloud CDN
Enabling QUIC.cloud CDN provides several advantages for website owners.
Faster Website Loading: Website files are delivered from the nearest edge location, reducing latency.
Lower Server Load: Since cached content is served from QUIC.cloud's servers, your hosting server handles fewer requests.
Better SEO Rankings: Website speed is an important Google ranking factor. Faster pages generally perform better in search results.
Improved Security: QUIC.cloud protects websites against:
-
DDoS attacks
-
Malicious bots
-
Traffic spikes
-
Unauthorized access
Lower Bandwidth Usage: Static files such as images, CSS, JavaScript, and cached HTML are served directly from QUIC.cloud.
Better User Experience: Visitors enjoy quicker page loads regardless of their geographic location.
Why Use CNAME Verification?
There are multiple ways to connect a domain with QUIC.cloud. One of the easiest and safest methods is CNAME verification.
Using a CNAME record allows you to:
-
Verify domain ownership
-
Connect the CDN without changing your nameservers
-
Continue managing DNS through your current DNS provider
-
Easily enable or disable the CDN whenever needed
Prerequisites
Before you begin, make sure you have the following:
-
A website hosted on a cPanel server
-
LiteSpeed Web Server enabled
-
A QUIC.cloud account
-
Access to your domain's DNS settings
-
LiteSpeed Cache plugin installed (WordPress only)
Many hosting providers include LiteSpeed and QUIC.cloud compatibility with their shared and reseller hosting plans.
Enable QUIC. cloud CDN Using LiteSpeed Cache Plugin (WordPress)
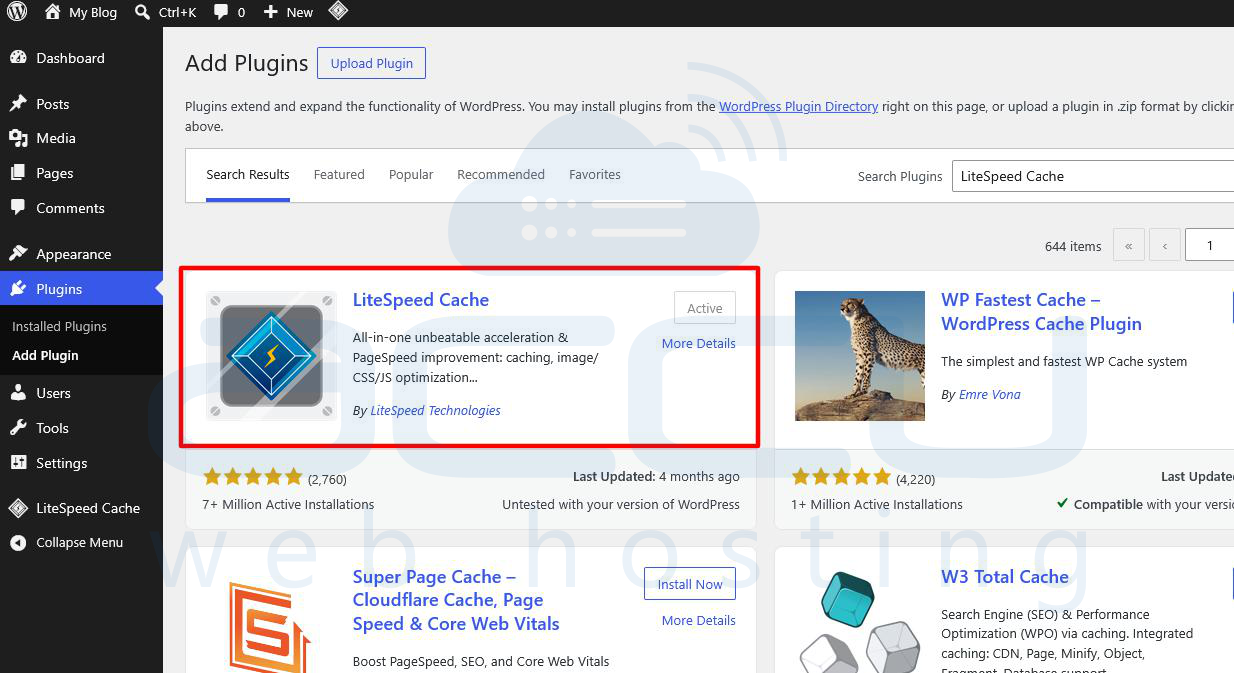
Step 1: Install & Activate the LiteSpeed Cache Plugin. Log in to your WordPress Dashboard. Go to Plugins > Add New. Search for LiteSpeed Cache in the search bar. Click Install Now, and once installed, click Activate.
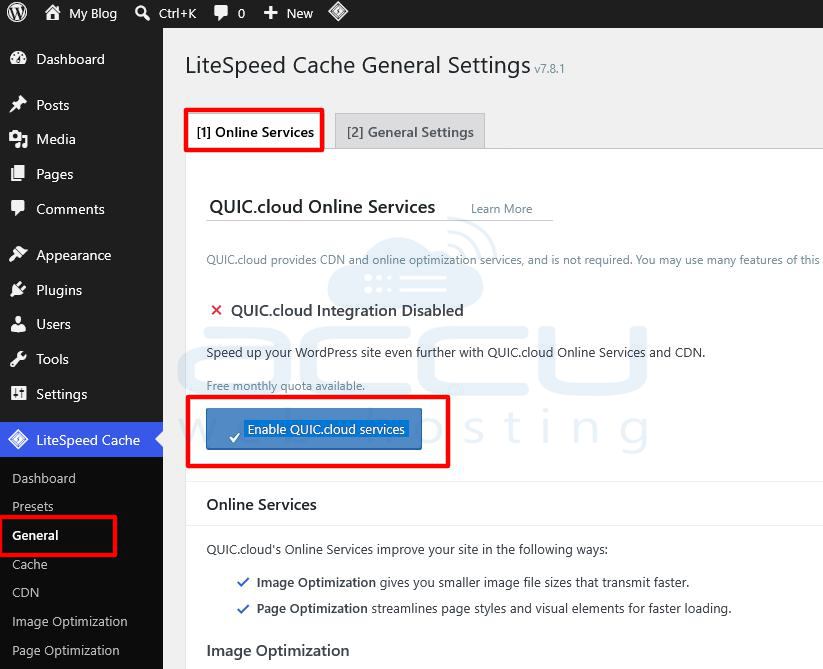
Step 2: Enable QUIC.cloud Services in WordPress. From the side panel, navigate to LiteSpeed Cache > General. Ensure you are on the [1] Online Services tab. Click on the blue Enable QUIC.cloud services button to initiate the link between your site and QUIC.cloud.
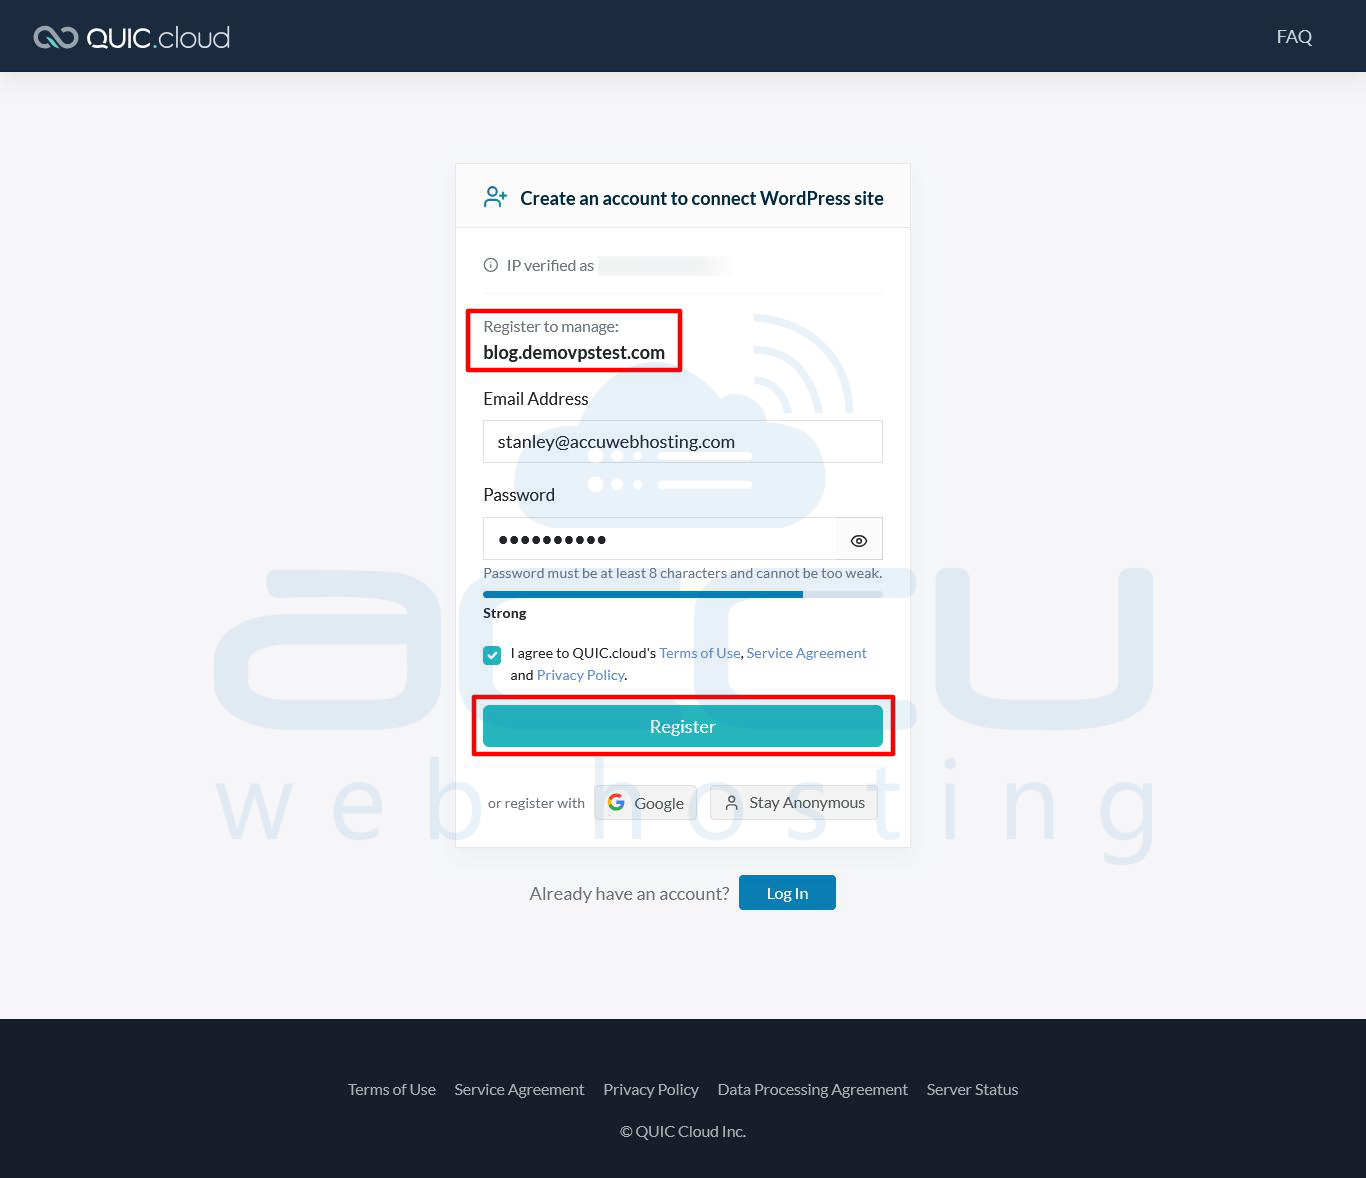
Step 3: Create & Register Your QUIC.cloud Account. You will be redirected to the QUIC. cloud sign-up page. Verify that your domain name (e.g., blog.demovpstest.com) is displayed correctly under Register to manage.
Enter your Email Address and create a Password. Check the box to agree to the Terms of Service, Privacy Policy, and Service Agreement. Click Register.
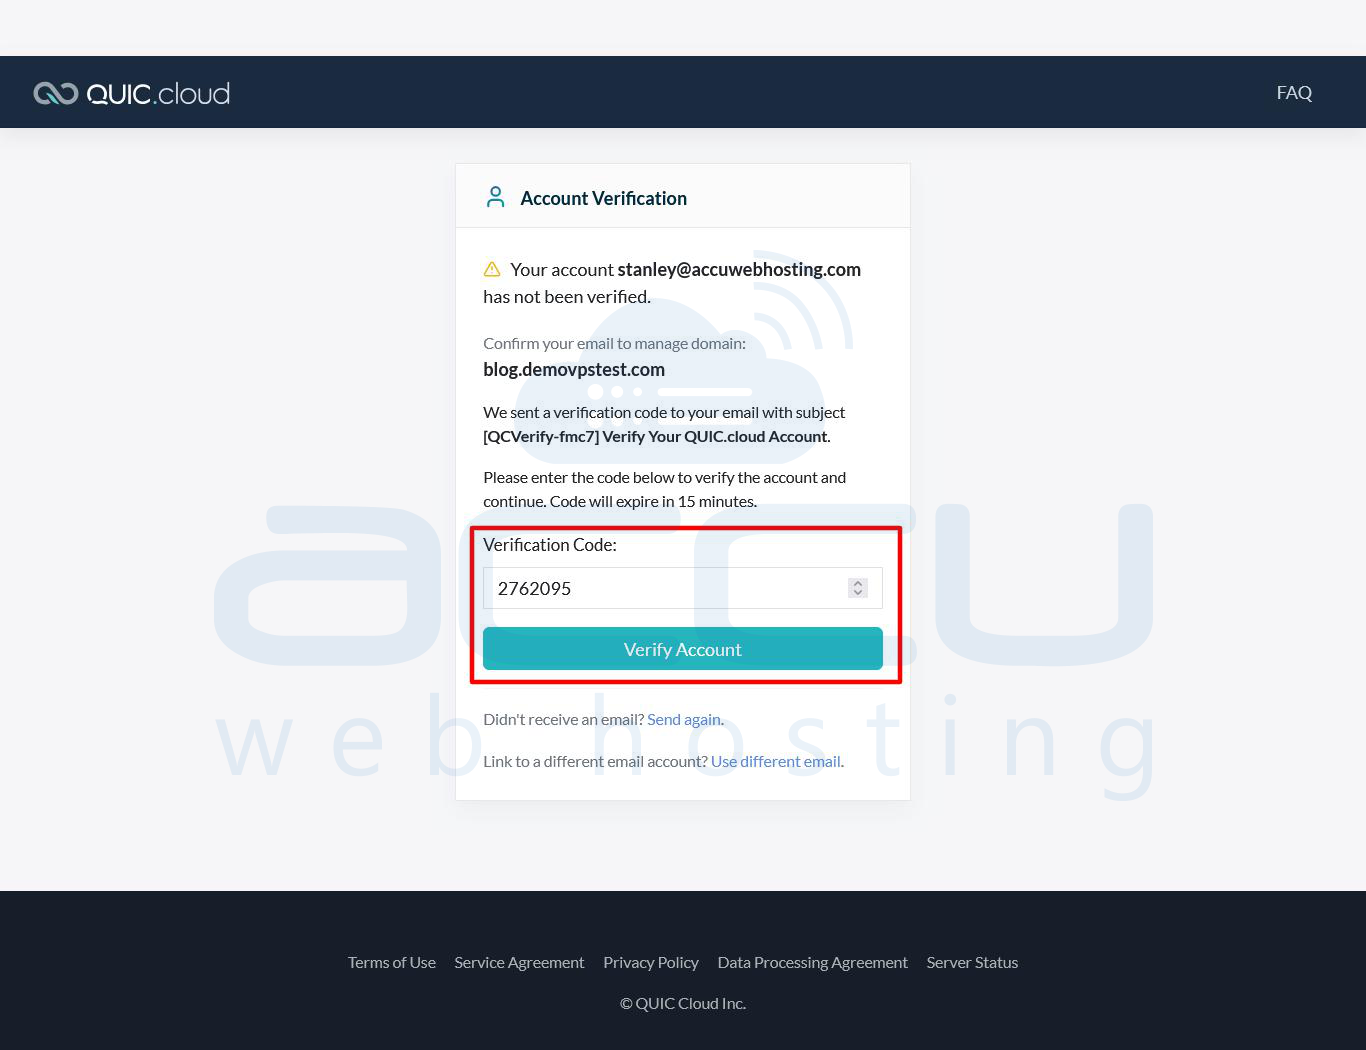
Step 4: Verify Your Account. Check your email inbox for a verification email from QUIC.cloud containing a 7-digit code.
Enter the Verification Code in the provided box on the screen. Click Verify Account.
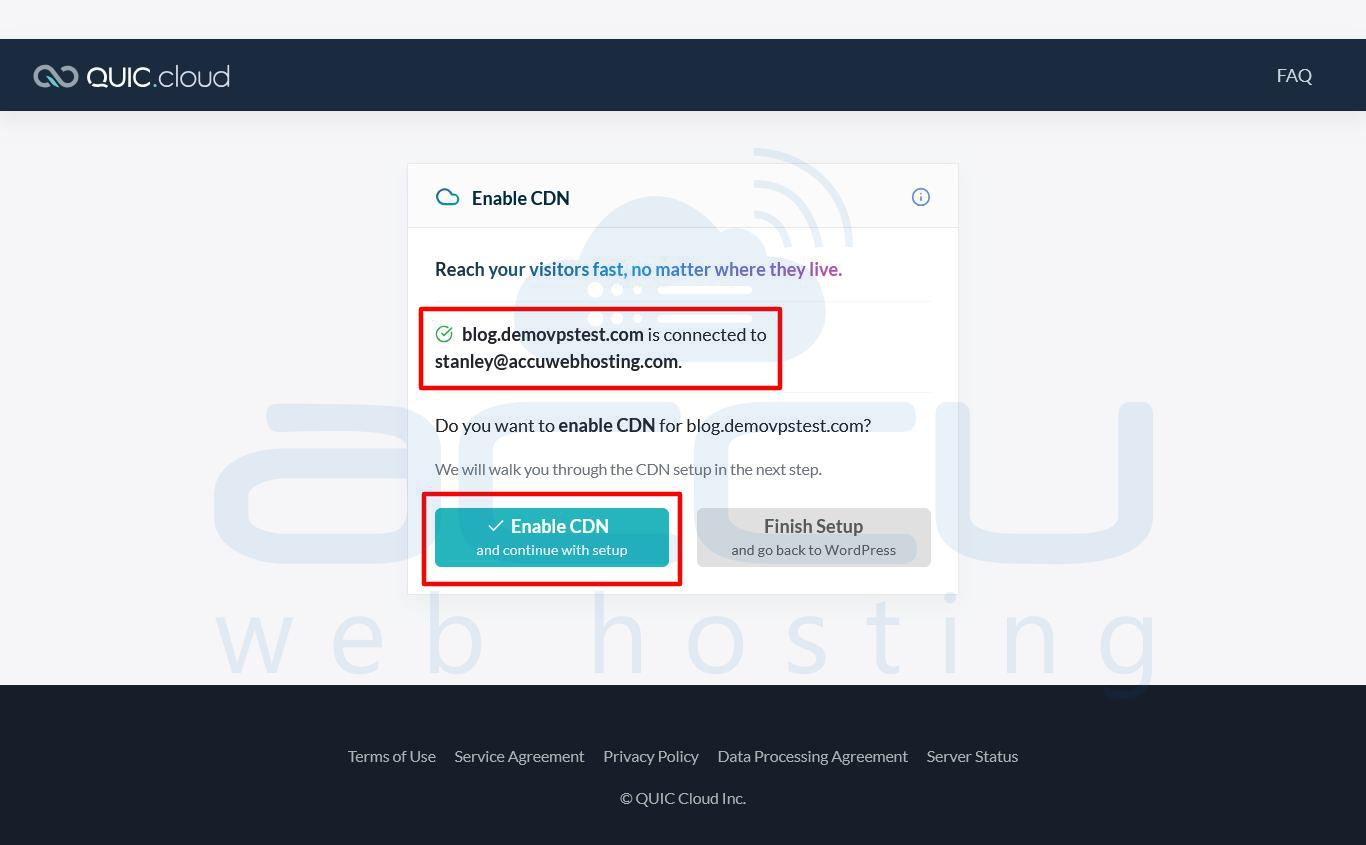
Step 5: Start the CDN Setup. Once your email is verified, you will see a confirmation screen confirming that your domain is linked. Click the green button: Enable CDN and continue with setup.
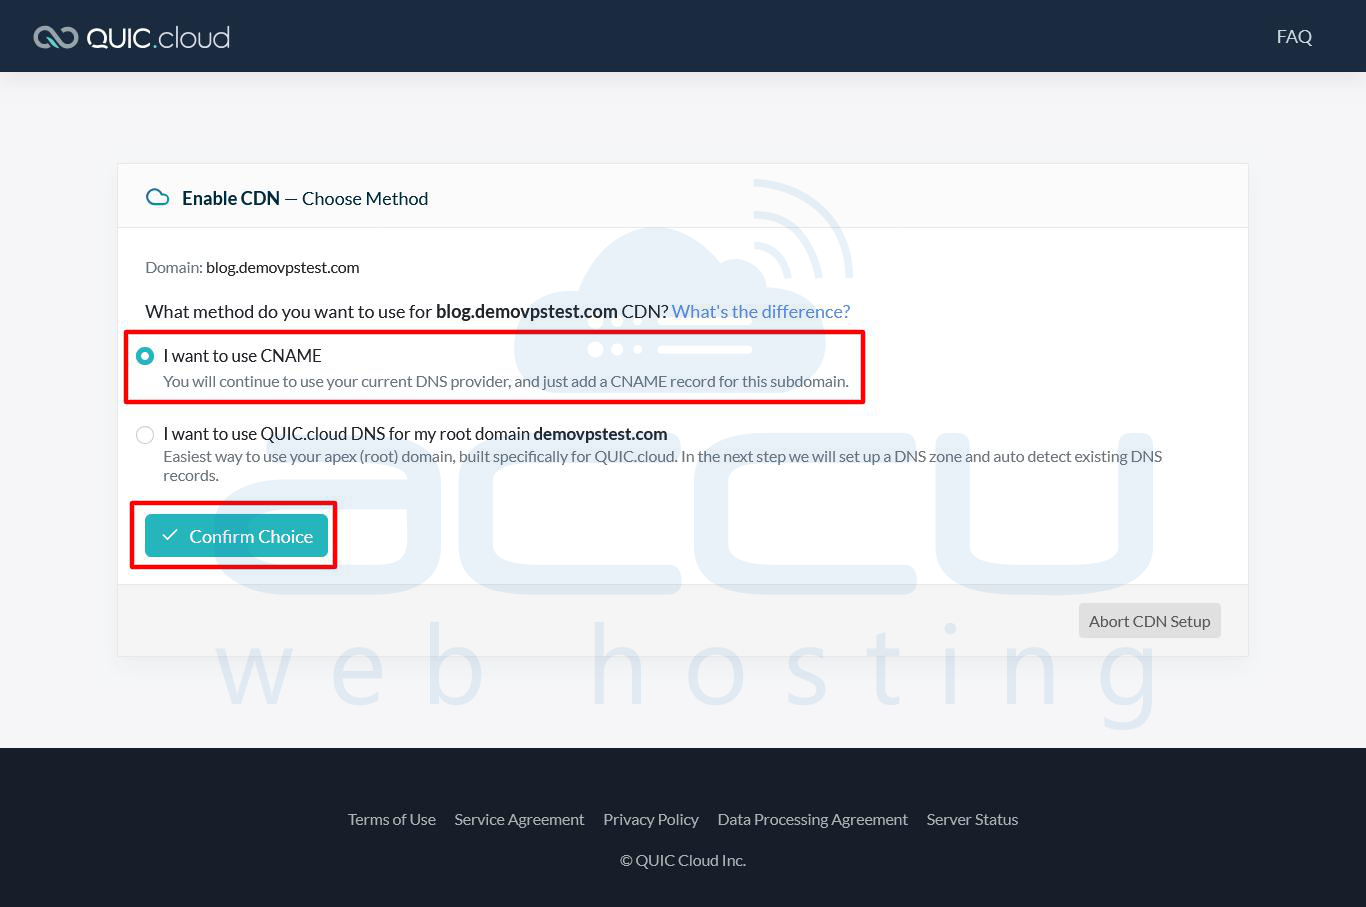
Step 6: Choose Your Integration Method. Select "I want to use CNAME" (if you wish to keep your existing DNS provider and add a CNAME record for your domain or subdomain). Click Confirm Choice.
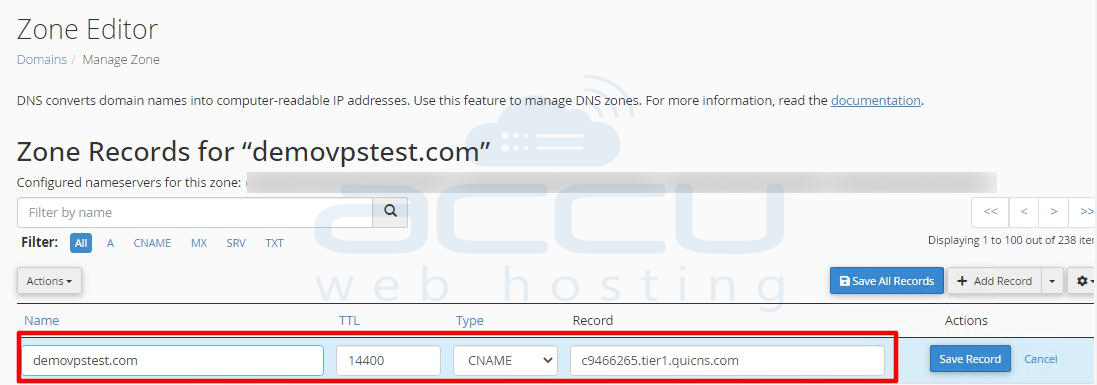
Step 7: Update CNAME Records in Your DNS Manager (e.g., cPanel Zone Editor), Copy the assigned CNAME value provided by QUIC.cloud (e.g., c9466265.tier1.quicns.com).
Log in to your hosting control panel or DNS manager (such as cPanel Zone Editor). Find your domain and click Edit on your record (or Add Record). Set the Type to CNAME. Paste the assigned target value into the Record field and click Save Record.
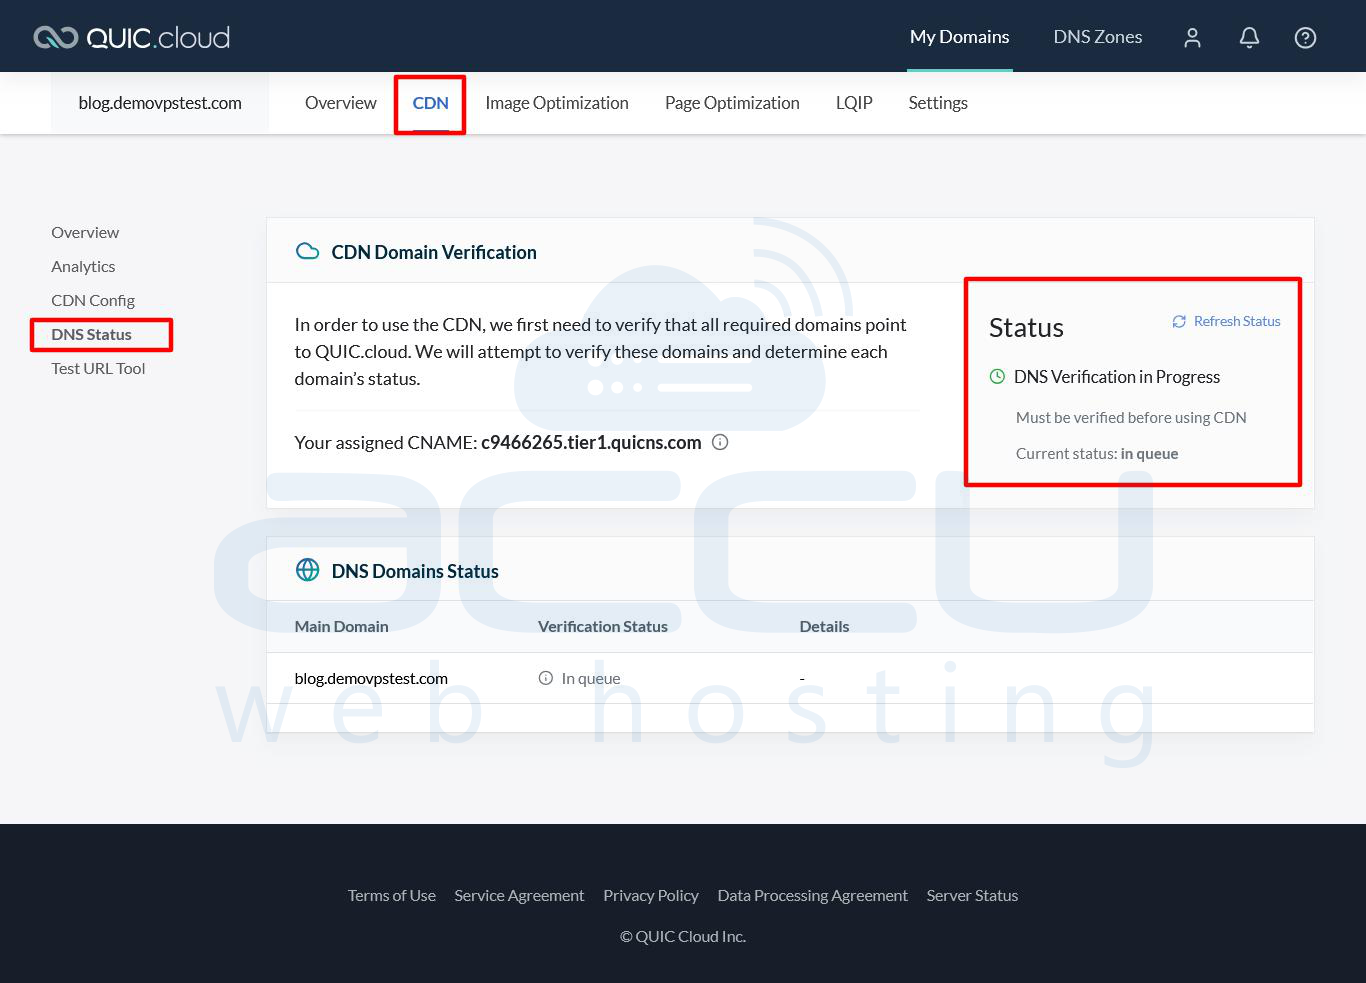
Step 8: Verify DNS Status in QUIC.cloud. Return to your QUIC.cloud dashboard and navigate to the CDN > DNS Status tab.
Initially, the status will show "DNS Verification in Progress" with the status set to In queue.
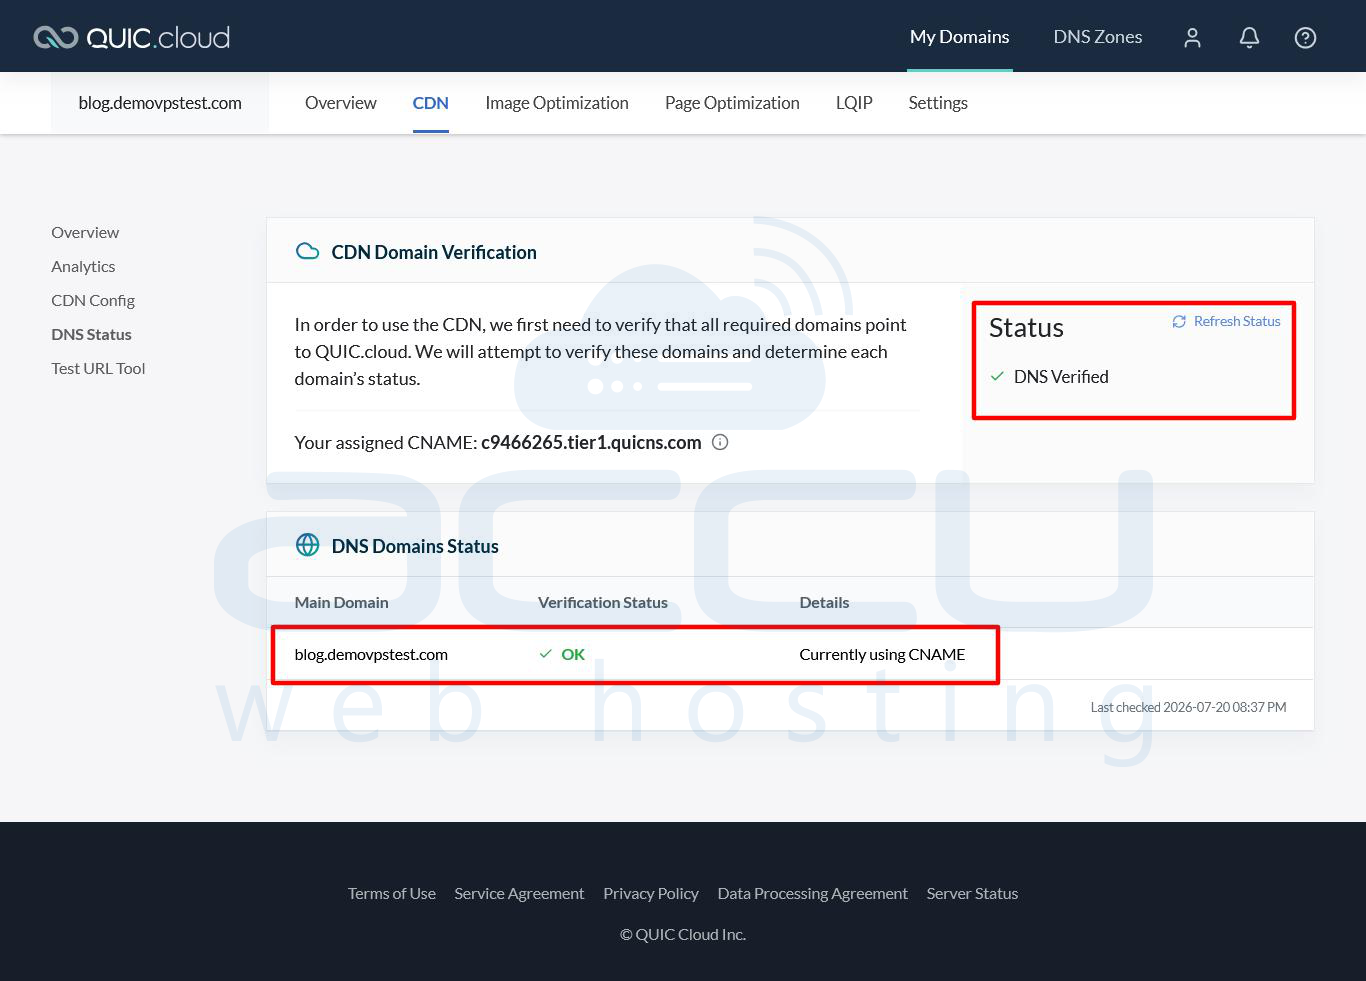
Allow a few minutes for DNS propagation. Once verified, click Refresh Status. The status will update to "DNS Verified", showing OK - Currently using CNAME.
Step 9: Confirm Active Integration in WordPress. Return to your WordPress Dashboard and navigate to LiteSpeed Cache > General.
Under Online Services, verify that it now shows a green checkmark next to QUIC. Cloud Integration Enabled.
Under the enabled features, you should see:
-
Page Optimization
-
Image Optimization
-
CDN - Enabled
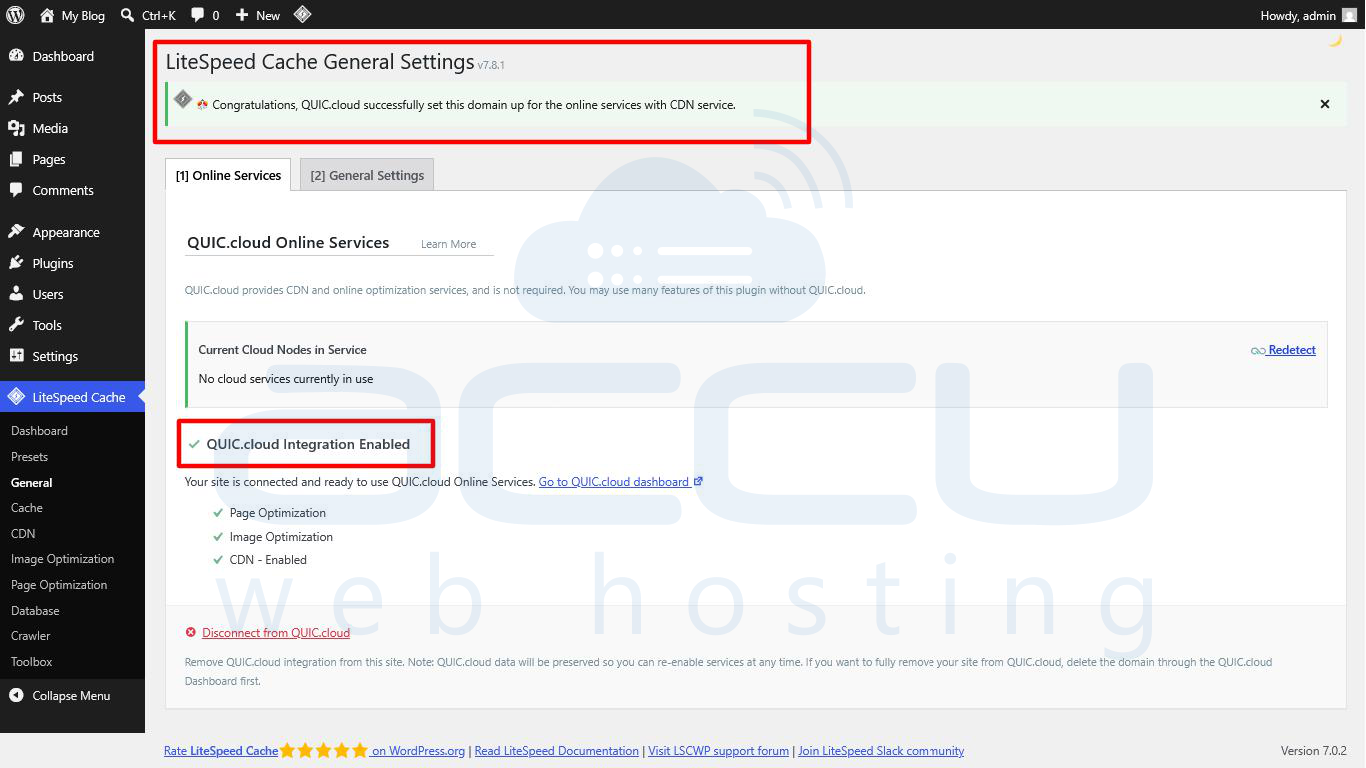
Congratulations! Your WordPress site is now connected to and accelerated by the QUIC.cloud CDN.
Verify Your CDN Configuration
After activation, confirm everything is working correctly.
Open your website in Chrome or Edge.
-
Press F12 to open Developer Tools.
-
Go to the Network tab.
-
Refresh the page.
-
Click the first request (your domain).
-
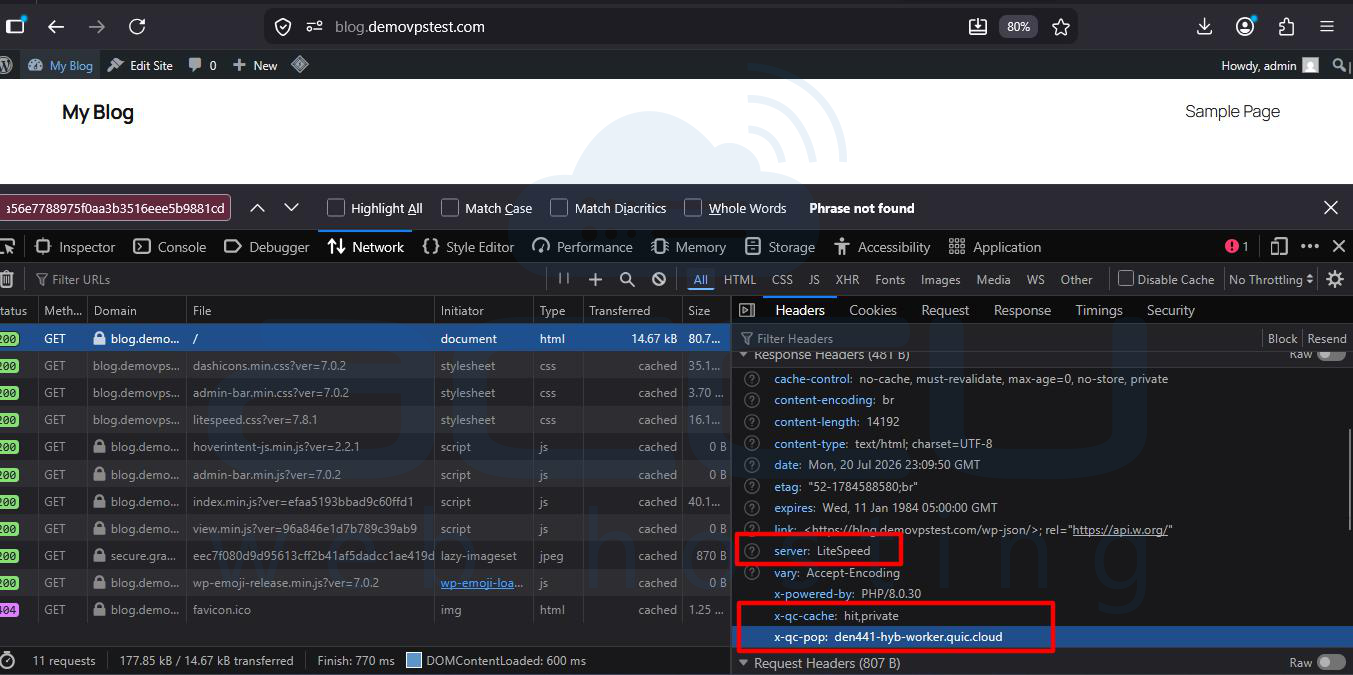
Check the Response Headers.
If QUIC.cloud is serving your site, you may see headers such as:
Server: LiteSpeed
x-qc-cache: hit
or
x-qc-pop: <edge-location>
A cache status of HIT indicates the content is being served from the QUIC. cloud edge cache.
Check DNS
Use online DNS lookup tools to verify your CNAME record resolves correctly.
Test Website Performance
After enabling the CDN, test your website using popular speed testing tools.
Recommended tools include:
-
Google PageSpeed Insights
-
GTmetrix
-
Pingdom Website Speed Test
-
WebPageTest
Compare results before and after enabling QUIC.cloud.
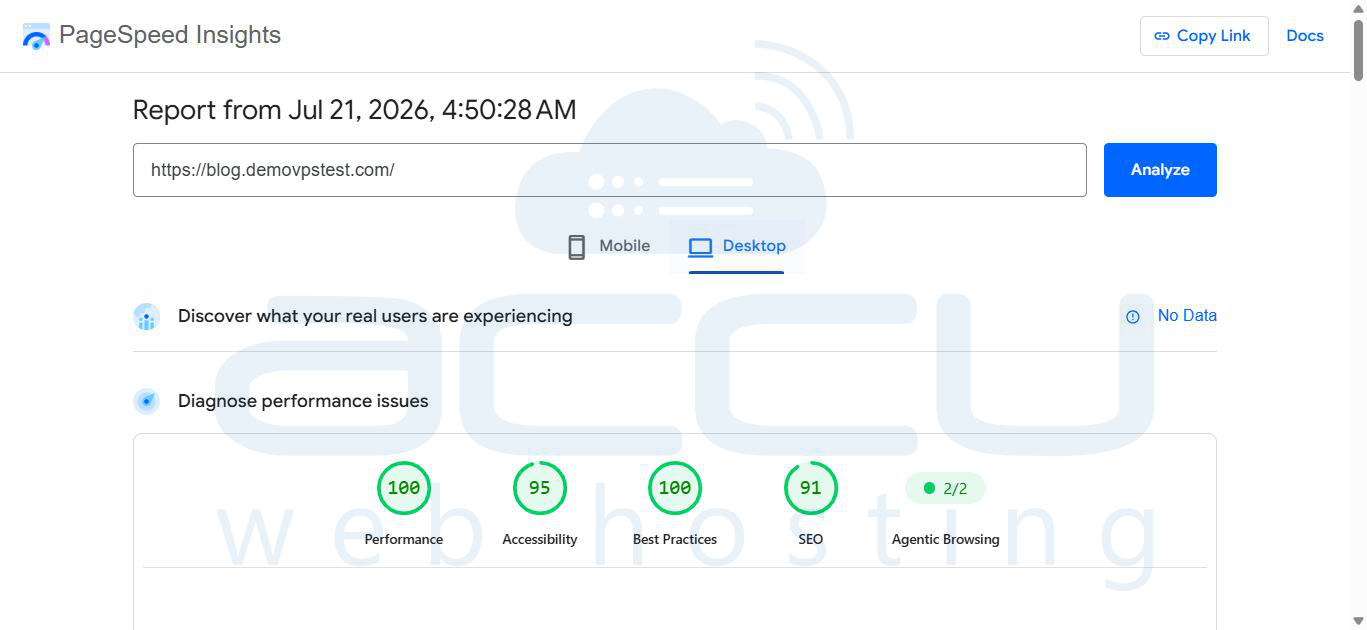
You should notice improvements in:
-
Time to First Byte (TTFB)
-
Largest Contentful Paint (LCP)
-
First Contentful Paint (FCP)
-
Fully Loaded Time
-
Overall Performance Score
Additional Optimization Features
Once the CDN is active, you can enable additional optimization features from the QUIC.cloud dashboard.
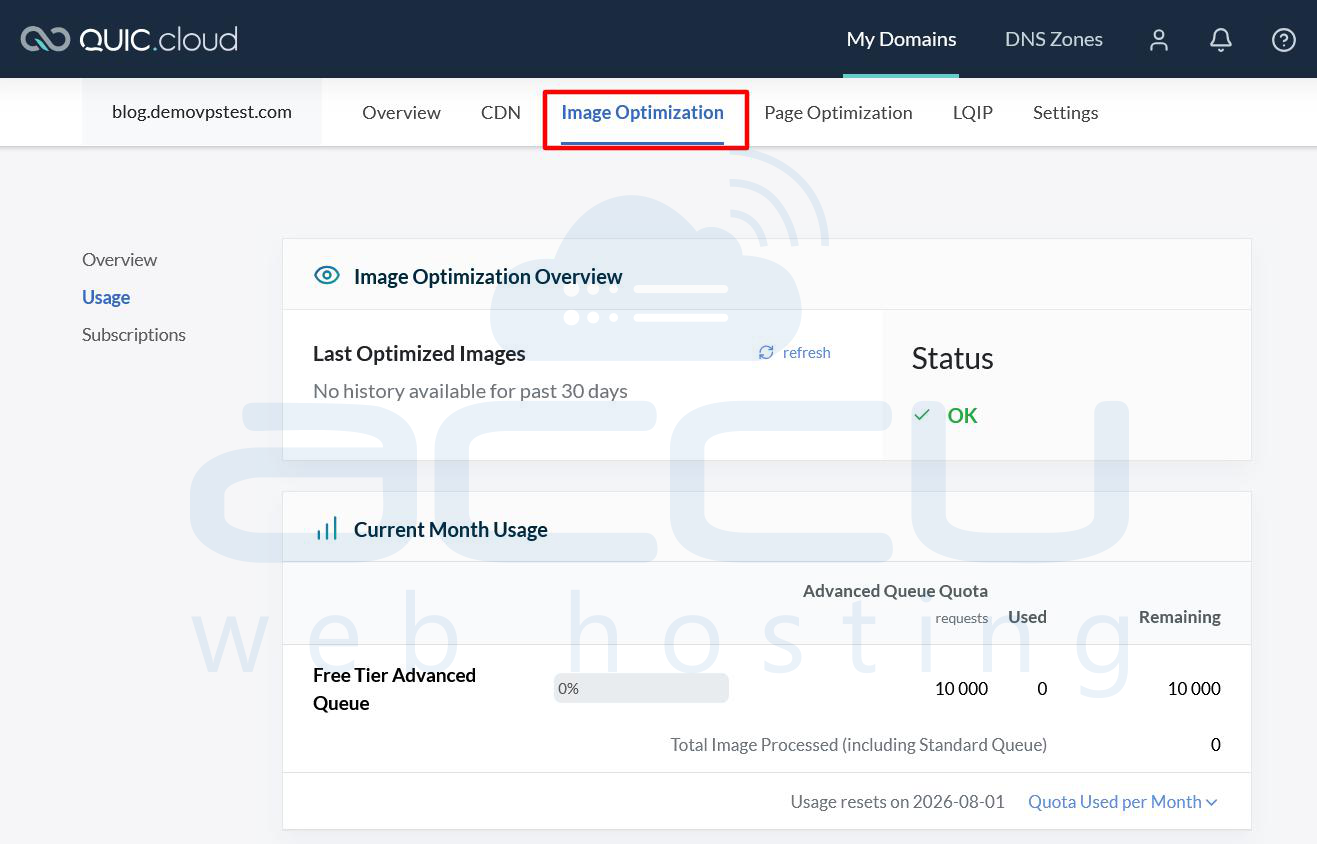
Image Optimization
Automatically compress images without noticeable quality loss.
Benefits include:
-
Smaller image sizes
-
Faster page loading
-
Lower bandwidth usage
CSS Optimization
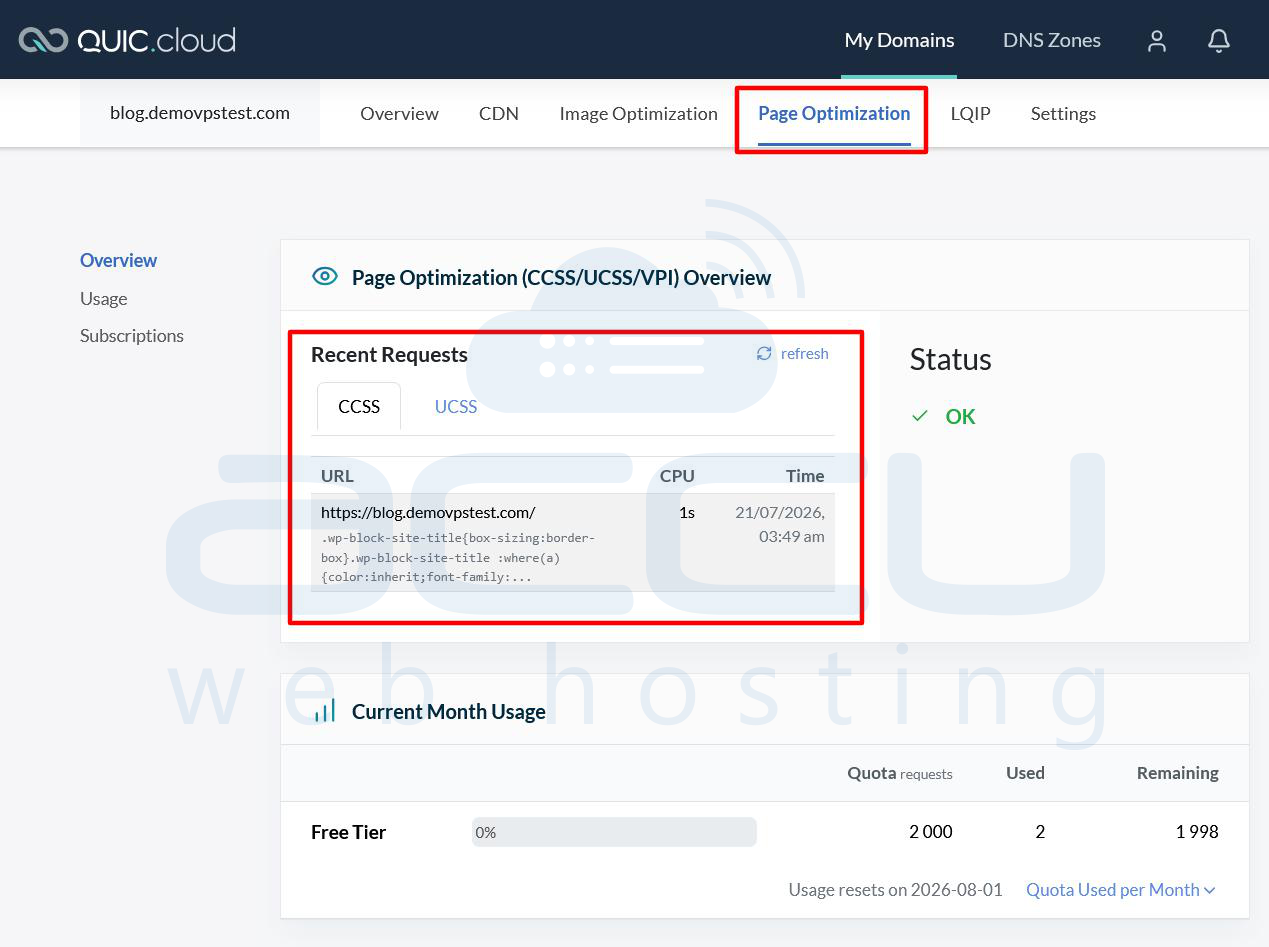
Remove unnecessary characters from CSS files. Benefits include Smaller downloads and faster rendering.
JavaScript Minification: Reduce JavaScript file sizes. This improves browser parsing and execution times.
HTML Minification: Compress HTML pages by removing unnecessary whitespace and comments.
Browser Cache: Enable browser caching so returning visitors load pages faster.
HTTP/3 Support: QUIC.cloud fully supports HTTP/3, providing lower latency and faster secure connections.
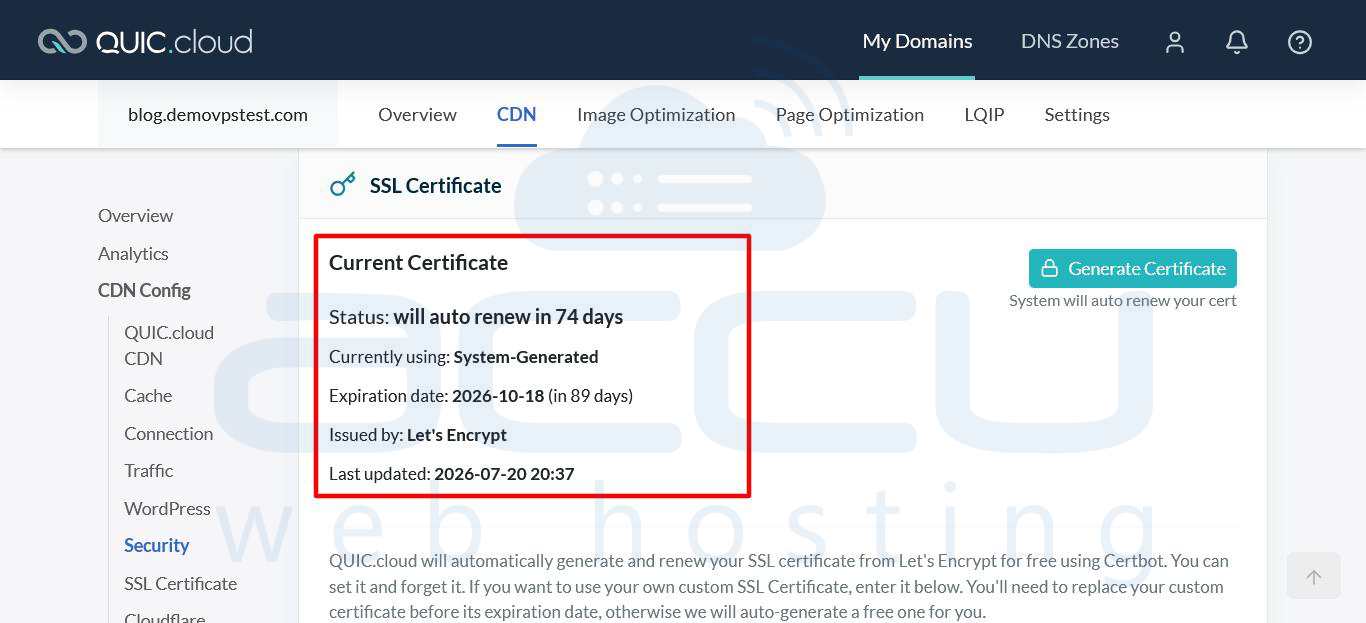
SSL Certificate: Ensure HTTPS is enabled, SSL is active, DNS records point correctly. QUIC.cloud automatically provisions SSL once verification completes.
Conclusion
Enabling QUIC.cloud CDN on your cPanel website using a CNAME record is one of the most effective ways to improve website speed, security, and scalability. The WordPress method using the LiteSpeed Cache plugin is straightforward and requires only a few configuration steps.
Once configured, your website benefits from a globally distributed CDN, advanced caching, free SSL support, DDoS protection, image optimization, and reduced server load. These improvements help deliver a faster browsing experience for visitors while also contributing to better search engine visibility and lower resource consumption on your hosting server.
If you encounter any issues during setup, verify your DNS records, allow time for DNS propagation, and confirm the CNAME status in the QUIC.cloud dashboard. With the CDN active and optimization features enabled, your website will be well-equipped to handle increased traffic while maintaining excellent performance.