Deploying a WordPress environment on AccuWeb Cloud Hosting is an important step toward launching a live website. However, after the hosting environment is created, the domain must be directed to the cloud server so that visitors can access the site. This process is performed through Domain Name System (DNS) configuration, where specific records connect the domain name to the server’s IP address.
The following guide explains how to locate the required DNS information in the AccuWeb Hosting panel and configure the necessary records with your DNS provider.
Steps to locate the required DNS information
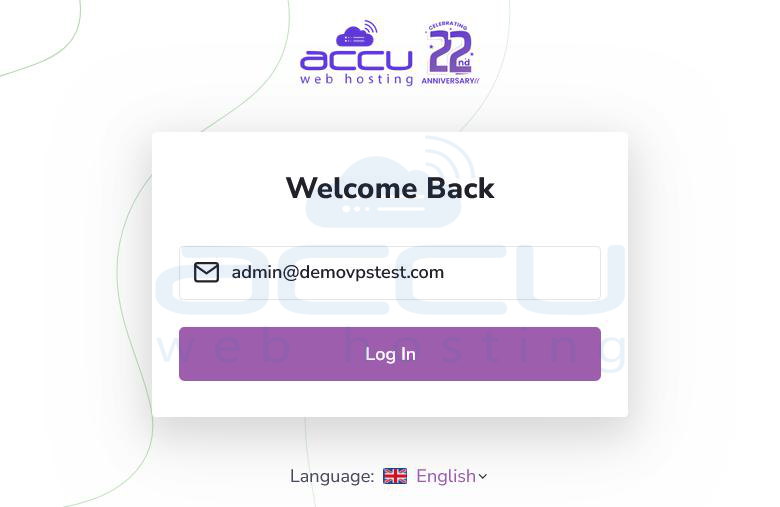
Step 1: Begin by login in to the WordPress Cloud Hosting interface. Enter the email address associated with your hosting account. Select Log In to open the account dashboard. After authentication, the control panel will display the main hosting management interface.
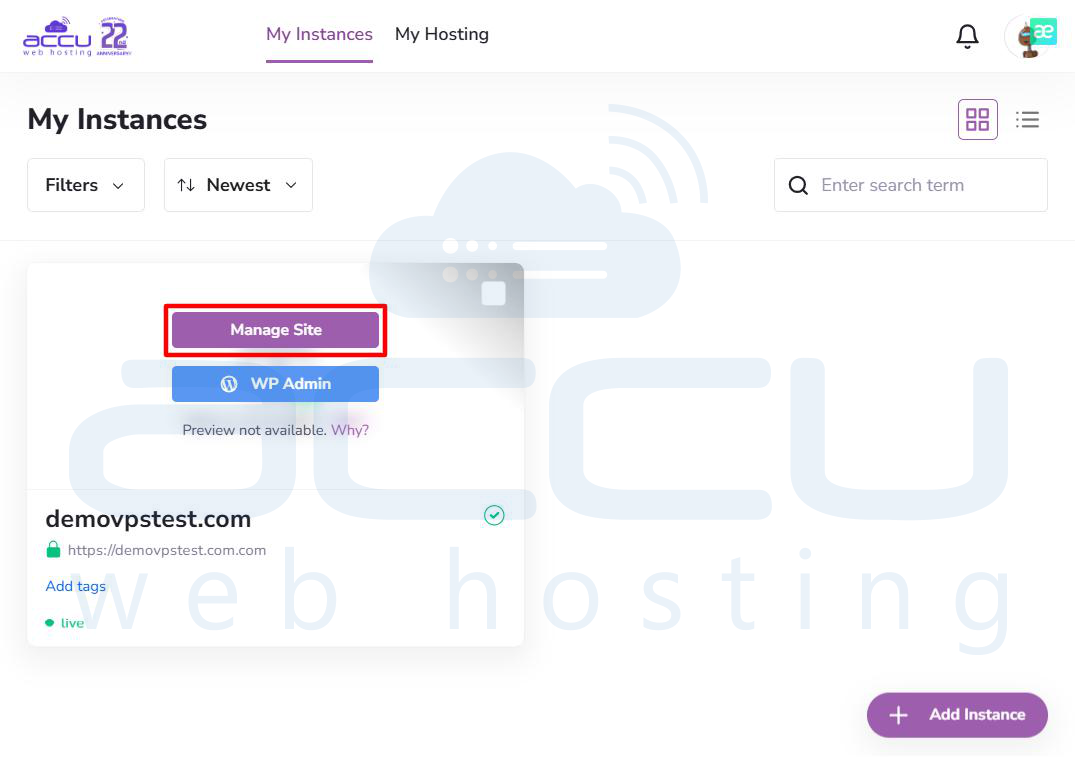
Step 2: The My Instances section lists all active WordPress environments associated with the account.
Locate the WordPress instance linked to the domain you want to configure (for example, demovpstest.com). Move the cursor over the instance card. Select the Manage Site button to open the management view.
This section contains configuration settings and technical information related to the selected WordPress environment.
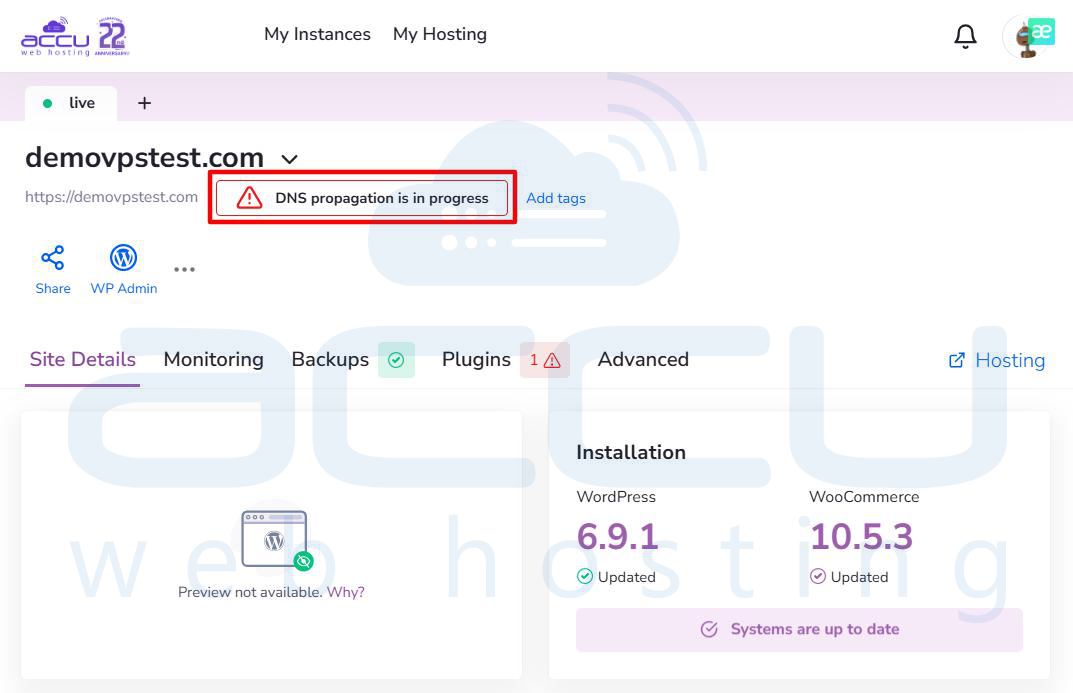
Step 3: Within the Site Details tab, the system verifies whether the domain is already connected to the hosting server.
If the domain is not configured, a notification will appear indicating DNS propagation is in progress. Select the notification or the information icon to view the DNS configuration details required for the domain.
This panel displays the exact DNS values needed to link the domain with the hosting environment.
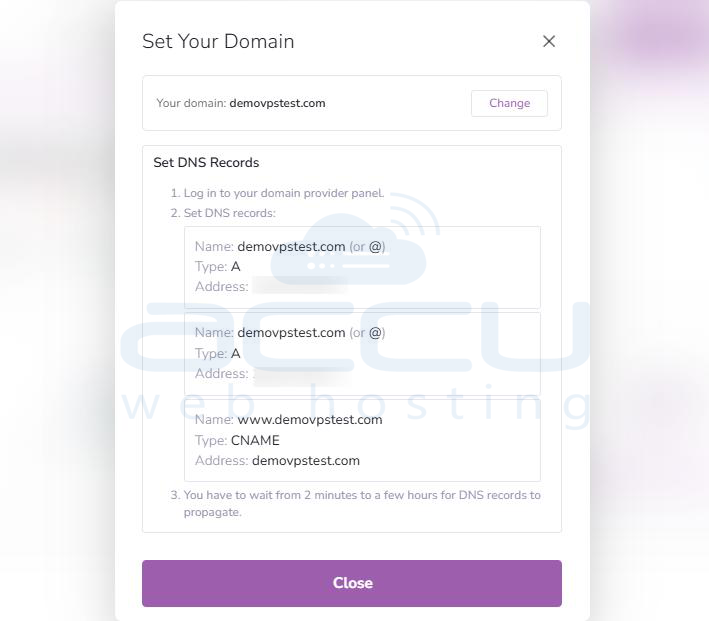
Step 4: A dialog window labeled Set Your Domain will appear. This interface provides the DNS records that must be configured at your domain registrar or DNS provider.
Typically, three records are required:
1 A Record (@): Connects the root domain to the primary server IP address.
2 A Record (@): Connects the root domain to a secondary server IP address for redundancy and improved availability.
3 CNAME Record (www): Directs the www subdomain to the root domain.
These values should be copied exactly as shown in the hosting panel.
Step 5: DNS records must be created where the domain’s DNS is currently managed. This may be your registrar or a separate DNS service.
Common DNS providers include:
- Registrar DNS – DNS management at the domain registration provider.
- Cloudflare – A widely used service offering CDN, security, and performance features.
- Third-party DNS services – Any external nameserver provider used for domain management.
Log in to the selected DNS management platform and create the A records and CNAME record using the information obtained from the hosting panel.
Important Note: DNS Propagation
Once DNS records are updated, the changes must propagate across global DNS servers.
- Propagation time: Updates can appear within a few minutes but typically require 12 to 24 hours for complete global distribution.
- During this period, the website may temporarily display outdated content or appear unavailable in certain regions.
Conclusion
Configuring DNS records is the final step required to connect your domain to the Accu Web WordPress Cloud Hosting environment. By accessing the cloud panel, retrieving the assigned IP addresses, and updating the corresponding A records and CNAME record at your DNS provider, the domain will correctly route visitors to the hosted website. After DNS propagation completes, the WordPress site will become fully accessible through the configured domain name. If you face any issue with DNS update, contact us via chat, ticket or call.
