Introduction:
Installing WordPress on a VPS typically involves several steps, including installing a web server, database, and PHP, as well as configuring security settings. WordOps simplifies all of these tasks and lets you deploy a fully optimized WordPress site using just one command.
WordOps is a free, open-source server management tool developed specifically for WordPress. It uses Nginx, MariaDB, PHP, Redis, and Let’s Encrypt, making it fast, secure, and production-ready.
Easy Setup – Install a LEMP server and WordPress in just a few simple commands.
Faster Performance – Built-in caching tools, such as Nginx FastCGI and Redis, help your website load quickly.
Strong Security – Includes firewall and brute-force protection to keep your site secure.
Free Automatic SSL – Get and renew Let’s Encrypt SSL certificates at no cost.
User-Friendly Dashboard – A clean web interface makes server management straightforward.
With WordOps, you can spend more time on your content and development, and less time on complicated server settings.
Prerequisites:
Before you begin, make sure you have:
A fresh Ubuntu/Debian server (Ubuntu 20.04 or 22.04 or 24.04 recommended)
Root or sudo access
A domain name pointed to your VPS IP address
At least 1 GB RAM (2 GB recommended for better performance)
Step 1: Log in to Your VPS
Connect to your VPS using SSH:
ssh root@your_server_ip
Step 2: Update the System
Update your server packages to avoid compatibility issues:
apt update && apt upgrade -y

Step 3: Install WordOps
Run the following command to install WordOps:
wget -qO wo wops.cc && sudo bash wo
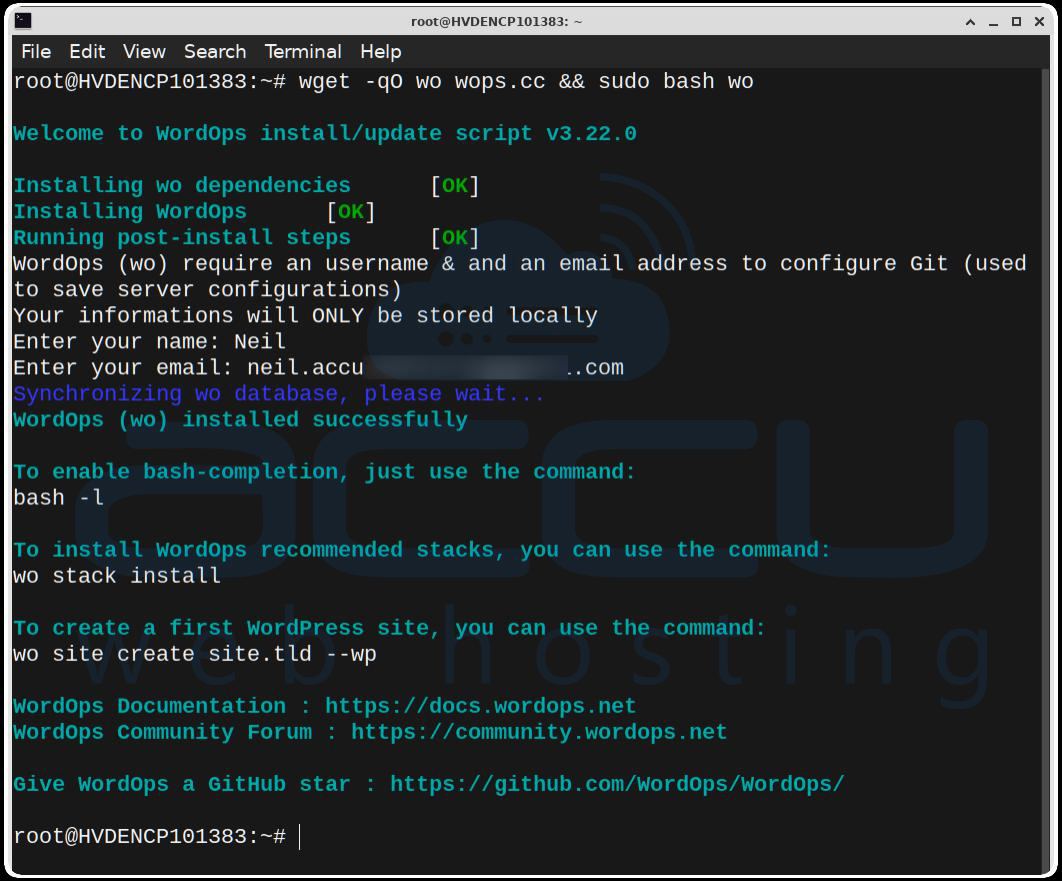
This script installs WordOps along with required dependencies and configures the server.
Step 4: Install LEMP Stack:
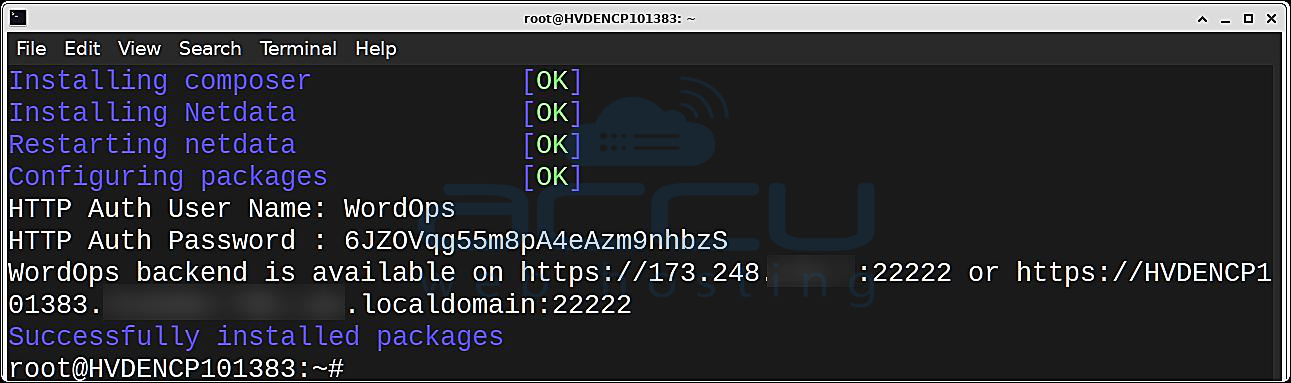
wo stack install
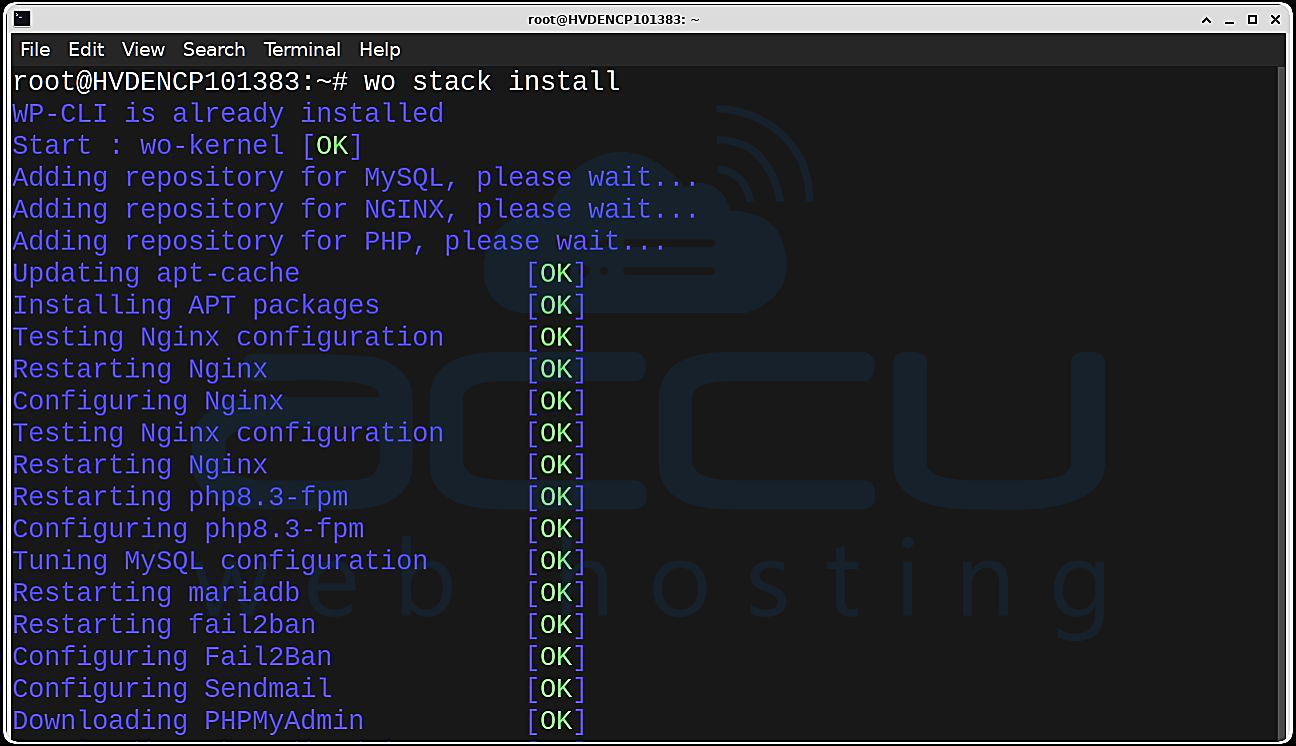
This command will:
Install Nginx, PHP, MariaDB, Redis
Configure firewall rules
Optimize the server for WordPress
Install WordOps CLI
The installation may take a few minutes.
This sets up Nginx, PHP, MariaDB, and other essential components.
Step 5: Create a WordPress Site (One Command)
Once WordOps is installed, deploy WordPress using this single command:
wo site create blog.accuwebtraining.com --wp

This command automatically:
Installs WordPress
Creates a database
Configures Nginx
Sets correct file permissions
Step 6: Enable SSL (HTTPS)
Secure your WordPress site with a free Let’s Encrypt SSL certificate:
wo site update blog.accuwebtraining.com --le --force
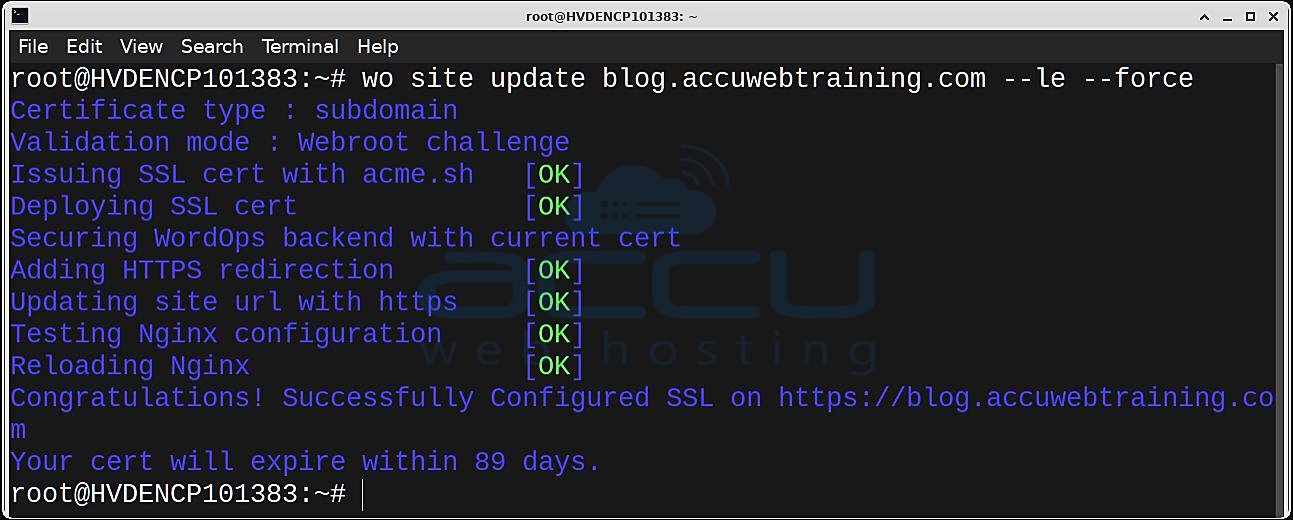
Your site will now load securely over HTTPS.
Step 7: Get WordPress Information
To view WordPress information, run:
wo site info blog.accuwebtraining.com
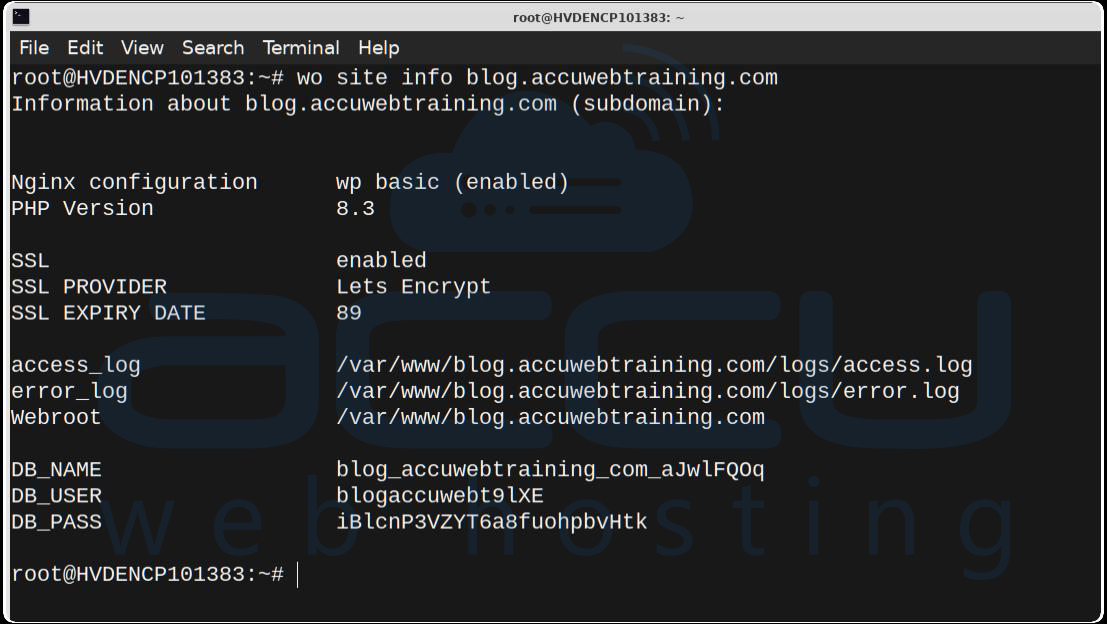
You’ll find:
Website Webroot
SSL Status
PHP Version
Website logs path
Database details
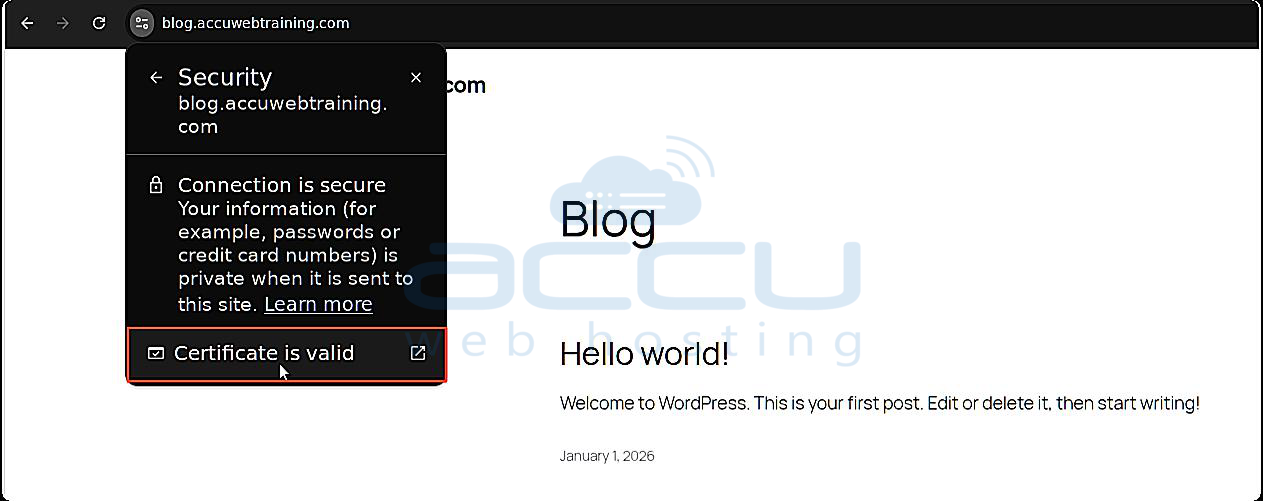
Step 8: Access Your WordPress Website
Website: https://blog.accuwebtraining.com/
Admin Panel: https://blog.accuwebtraining.com/wp-admin
Log in using the credentials provided by WordOps.

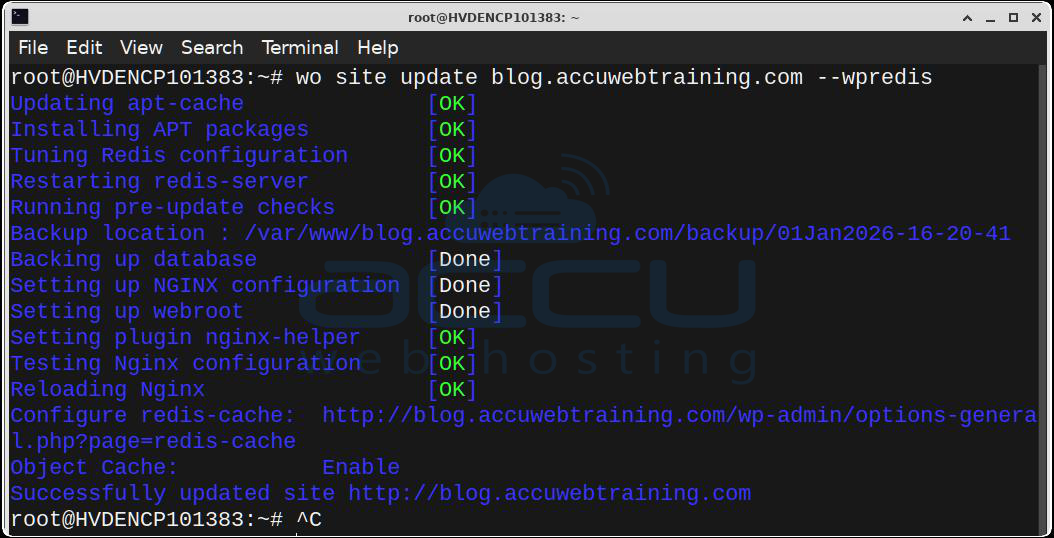
Install WordPress with Caching (Recommended)
For better performance, you may also install WordPress with Redis caching:
wo site update blog.accuwebtraining.com --wpredis
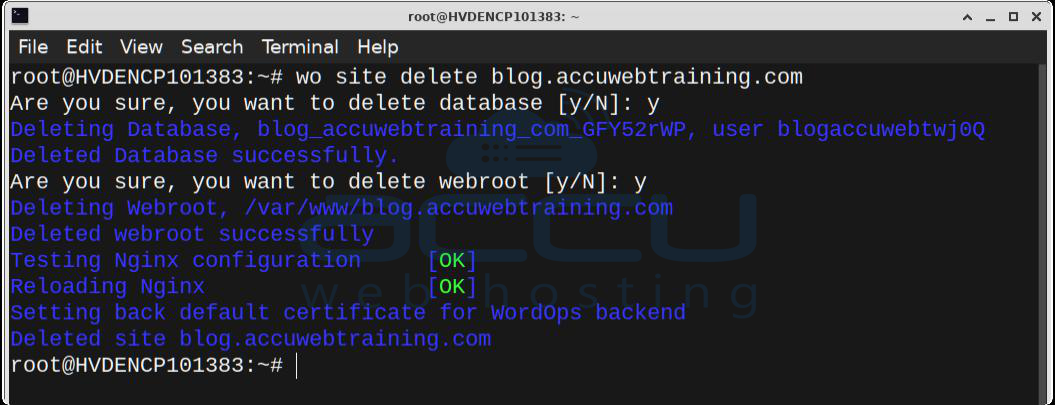
If you no longer require the website, you can also remove it with one command:
wo site delete blog.accuwebtraining.com
Conclusion:
WordOps makes installing WordPress on a VPS quick, easy, and dependable. With a single command, you can set up a fully optimized WordPress website that’s ready for live use. It’s a great option for developers, hosting providers, and anyone who wants a clean, powerful WordPress environment without the hassle of manual setup.
