Converting a static HTML site into a dynamic WordPress theme is a popular way to retain your unique design while gaining access to WordPress’s powerful features, including a user-friendly content editor, a vast library of plugins, and enhanced SEO capabilities.
This guide will walk you through the manual process of transforming your HTML files into a fully functional WordPress theme.
Steps to Converting HTML to a WordPress Theme
Here, we’ll demonstrate different methods you can choose from, each with its own level of difficulty and flexibility.
Converting a WordPress Theme From a Static File
If you want to keep your old HTML website’s design exactly as it is, this method is for you. It’s the most technical option since it requires working with PHP files, but essentially, you’ll just copy and paste your HTML code into WordPress theme files.
Step 1: Prepare Your Files and Folder Structure
Before you start, it's crucial to have everything organized. The key to a successful conversion is to create a well-structured theme folder.
1. Create a new folder on your computer and name it something relevant to your theme, like my-custom-theme.
2. Add the essential WordPress theme files inside this new folder. You will need to create the following files:
- style.css
- index.php
- header.php
- footer.php
- functions.php
Some of these files may be optional, depending on the features and design of your theme.
Step 2: Converting Your Old CSS Into a WordPress Stylesheet
The next step is to bring your old website’s CSS into WordPress. To do this, you’ll need to open a WordPress style.css file and add the below CSS code inside it.
/*
Theme Name: My Theme
Author: Jason
Author URI: https://accuwebhosting.com/knowledgebase/author/jason
Description: A development theme, converted from static HTML to WordPress
Version: 1.0
License: GNU General Public License v2 or later
License URI: http://www.gnu.org/licenses/gpl-2.0.html
*/
This header tells WordPress that the file is a theme stylesheet. You can customize the details, such as the theme name, author, website URL, or description, to match your project.
Once the header is in place, simply paste your old CSS code right below it. Save the file when you’re done, and your WordPress theme will now use your old website’s styling.
Step 3: Break Down Your Old HTML Code
WordPress relies on PHP to fetch and display content from its database; you’ll need to break your old website’s HTML into smaller sections. This allows WordPress to reassemble them properly.
Here’s a simple test HTML code you can use for your index.html file before converting it into a WordPress theme:
<!DOCTYPE html>
<html lang="en">
<head>
<meta charset="UTF-8">
<meta name="viewport" content="width=device-width, initial-scale=1.0">
<title>My Test HTML Site</title>
<link rel="stylesheet" href="style.css">
</head>
<body>
<header>
<h1>Welcome to My Test Site</h1>
<nav>
<ul>
<li><a href="#">Home</a></li>
<li><a href="#">About</a></li>
<li><a href="#">Services</a></li>
<li><a href="#">Contact</a></li>
</ul>
</nav>
</header>
<main>
<section>
<h2>About This Site</h2>
<p>This is a simple static HTML site created for testing WordPress theme conversion.</p>
</section>
<section>
<h2>Our Services</h2>
<ul>
<li>Web Design</li>
<li>WordPress Development</li>
<li>SEO Optimization</li>
</ul>
</section>
</main>
<footer>
<p>© 2025 My Test HTML Site. All rights reserved.</p>
</footer>
</body>
</html>
1. Header.php
Everything from the beginning of your HTML file down to the main content area (including the <head> section and navigation menus). Paste this code into your new header.php file.
Right before the </head> element, insert the code <?php wp_head();?>. This step ensures that WordPress plugins function correctly. Once completed, save the file.
<!DOCTYPE html>
<html lang="en">
<head>
<meta charset="UTF-8">
<meta name="viewport" content="width=device-width, initial-scale=1.0">
<title>My Test HTML Site</title>
<link rel="stylesheet" href="style.css">
<?php wp_head();?>
</head>
<body>
<header>
<h1>Welcome to My Test Site</h1>
<nav>
<ul>
<li><a href="#">Home</a></li>
<li><a href="#">About</a></li>
<li><a href="#">Services</a></li>
<li><a href="#">Contact</a></li>
</ul>
</nav>
</header>
2. Footer.php
Everything from the end of the main content area to the closing </html> tag. Paste this into your new footer.php file.
Before the closing bracket </body>, add this code: <?php wp_footer(); ?> for the same reason as in header.php. When you have finished, save the changes.
<footer>
<p>© 2025 My Test HTML Site. All rights reserved.</p>
</footer>
<?php wp_footer(); ?>
</body>
</html>
3. Main Content
The content area of the page. This goes into the index.php file.
<main>
<section>
<h2>About This Site</h2>
<p>This is a simple static HTML site created for testing WordPress theme conversion.</p>
</section>
<section>
<h2>Our Services</h2>
<ul>
<li>Web Design</li>
<li>WordPress Development</li>
<li>SEO Optimization</li>
</ul>
</section>
</main>
Step 4: Update Your Styles and Create WordPress Structure
First, let’s update your stylesheet reference to match WordPress standards. Inside the header.php file, look for the existing <link> tag in the <head> section. It will look something like this:
<link rel="stylesheet" href="style.css">
OR
<link rel="stylesheet" type="text/css" media="all" href="style.css" />
Replace it with the WordPress version:
<link rel="stylesheet" href="<?php echo get_template_directory_uri(); ?>/style.css" type="text/css" media="all" />
Now save and close header.php.
Next, set up index.php file. It should be empty right now. Paste the following lines inside it:
<?php get_header(); ?>
<?php get_sidebar(); ?>
<?php get_footer(); ?>
This code tells WordPress to pull in your header, sidebar, and footer files. The space between the header and sidebar is where your main content will load using The Loop.
Add Loop
The Loop is what makes your WordPress site dynamic. It retrieves posts from the database and formats them for display. Add this code right after <?php get_header(); ?>.
<?php while ( have_posts() ) : the_post(); ?>
<article class="<?php post_class(); ?>" id="post-<?php the_ID(); ?>">
<h2 class="entry-title"><?php the_title(); ?></h2>
<?php if ( !is_page() ): ?>
<section class="entry-meta">
<p>Posted on <?php the_date(); ?> by <?php the_author(); ?></p>
</section>
<?php endif; ?>
<section class="entry-content">
<?php the_content(); ?>
</section>
<section class="entry-meta">
<?php if ( count( get_the_category() ) ) : ?>
<span class="category-links">
Posted under: <?php echo get_the_category_list( ', ' ); ?>
</span>
<?php endif; ?>
</section>
</article>
<?php endwhile; ?>
After saving, your index.php is now ready as the main template file for your theme.
Next, create a screenshot that showcases the appearance of your theme; it will provide a preview of your website in the WordPress dashboard.
1. Open your website in a web browser.
2. Take a screenshot of the page.
3. Crop the image to a size of 880×660 pixels.
4. Save the image as screenshot.png.
5. Place the screenshot in your theme folder.
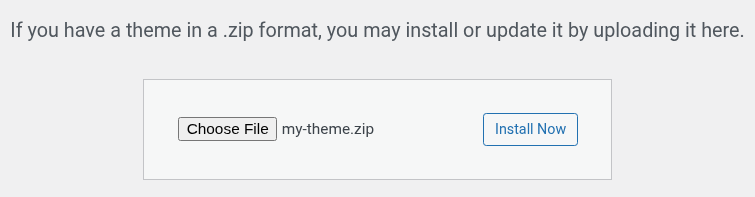
Step 5: Upload Your Theme to WordPress
Once all your theme files are complete, zip the entire folder.
1. Go to your WordPress dashboard.
2. Navigate to Appearance > Themes.
3. Click Add New > Upload Theme.
4. Select your zip file and click Install Now.
5. Finally, click Activate.
Step 6: Test and Debug
Activate your theme in the WordPress dashboard under Appearance > Themes. Check if everything displays correctly. Test responsiveness, menus, widgets, and ensure all assets load properly.
Step 7: Add Extra Templates (Optional)
You can create additional templates for pages, single posts, archives, and custom layouts to make your theme more versatile:
- page.php – for static pages
- single.php – for blog posts
- archive.php – for category or tag archives
Converting Your Old Design with a Child Theme
If you want to keep parts of your old website’s design but don’t want to deal with complex coding, using a child theme is a great solution.
Child themes let you build on top of an existing WordPress theme (known as the parent theme). This way, you get all the features of the parent theme while being able to customize the look and functionality without touching its core files.
Pick a WordPress theme that closely matches your old website’s design. This reduces the amount of customization you’ll need later.
1. Log into your WordPress dashboard.
2. Go to Plugins > Add New.
3. Search for Childify Me, then install and activate it.
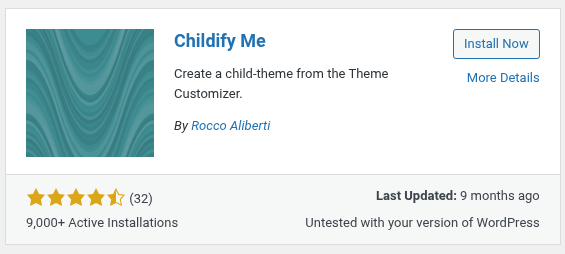
Info: The Childify Me plugin automatically creates the necessary style.css and functions.php files for your child theme.
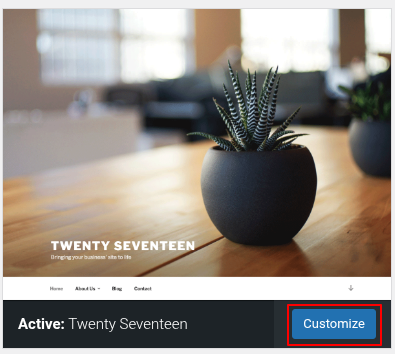
4. Go to Appearance > Themes, make sure your chosen parent theme is active, then click Customize to open the theme’s settings panel.
5. Inside the Customizer, click the Childify Me button. Give your child theme a name (usually similar to the parent theme), then click Create.
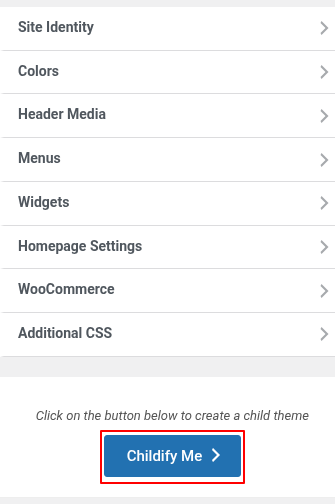
6. Once it’s ready, click Activate & Preview.

Note: The Childify Me plugin only creates the basic child theme structure—it doesn’t migrate your old HTML design automatically. To match your previous layout, you’ll need to edit the template files, enqueue your CSS, and add custom code where necessary.
Now that your WordPress site looks like your old HTML website, the last step is moving over your content. You can use the HTML Import plugin (method 2) or copy the content manually.
