Managing form submissions in WordPress can quickly become overwhelming if you rely on manual exports. Whether you’re collecting leads, orders, or survey responses, automating the export of WordPress form entries ensures that your data is always organized, secure, and available in the format you need. By setting up automatic exports to CSV, PDF, or Excel, you eliminate repetitive tasks and reduce the risk of human error, making data management more efficient and reliable.
Steps to Auto-Export WordPress Form Entries
1. Log in to your WordPress dashboard.
2. Navigate to the Plugins > Add New.
3. Search for WPForms in the search bar.
4. Then, click on Install now and activate the WPForms plugin.
After activating the plugin, you need to activate your license key.
5. To do this, navigate to the WPForms > Settings page and enter your license key. You can find this information in your account area on the WPForms website.

6. Once the license key is activated, navigate to WPForms > Addons, find Entry Automation Addon, then install and activate it.

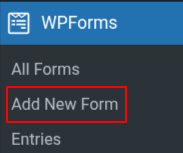
7. Next, choose WPForms > Add New and name that form.
Next, you can either select a premade template, such as a contact form, registration form, or feedback form, or create one from scratch using the drag-and-drop builder.
8. After selecting the template, you can easily add the fields (drag & drop) of your choice.
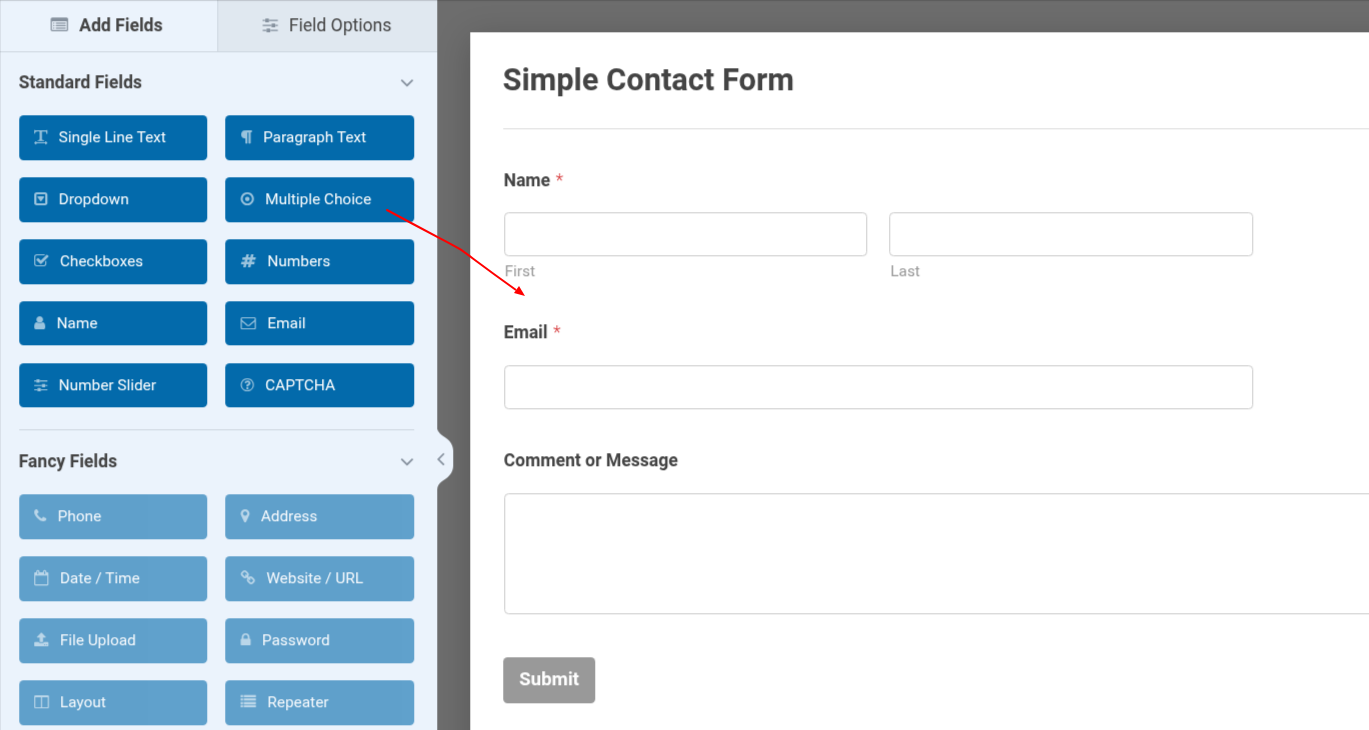
9. After adding all the required fields, click on the Save button at the top of the page.
10. Next, navigate to Settings > Entry Automation.
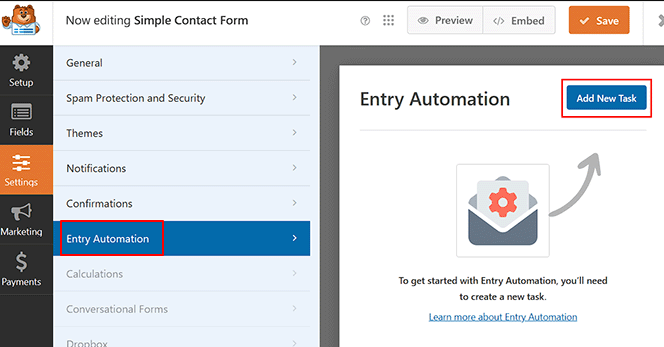
Here, you can manage all aspects related to the automatic export of entries.
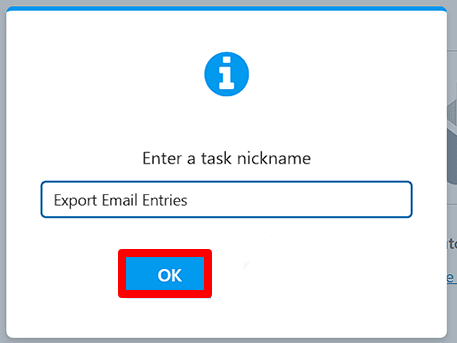
11. Click on the Add New Task button, and a new pop-up window will appear, prompting you to enter a name for your task.
12. After you’ve entered the name, click the OK button to proceed.
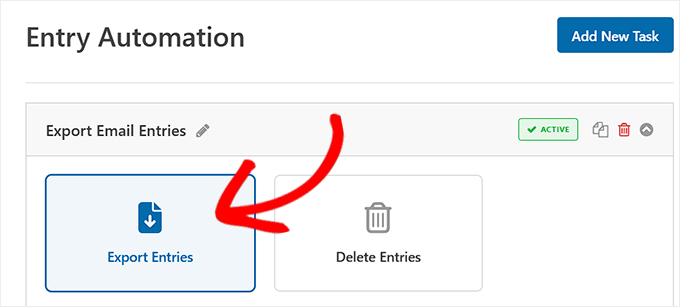
13. Next, you’ll need to choose a task type. WPForms offers two options: "Export Entries" and "Delete Entries." For the current task, select the "Export Entries" option.
14. Next, choose a format for exporting the files.

WPForms offers the following formats:
- CSV: Ideal for use with spreadsheet tools like Microsoft Excel or Google Sheets.
- Excel (XLSX): Preserves basic styling and structure, making reports cleaner and more professional, and is an excellent choice for sharing files with clients or non-technical users.
- PDF: Useful when you need polished reports for meetings or presentations.
- JSON: Best suited for developers or technical users who want to integrate form data into other systems or applications.
15. Next, choose where to deliver this exported file.
- Email: Send the export to one or more email addresses.
- Google Drive: Save a copy of the export directly to your Google Drive account.
- FTP: Upload the export to a server using FTP. This option is intended for advanced users or developers who need to send data to a custom application or a separate server.
- Dropbox: Store the file in your Dropbox folder for easy sharing and access.
Once you select your export destination, WPForms will guide you through the connection process.
For example, if you choose Email, you’ll simply enter the email address where the entries should be delivered.
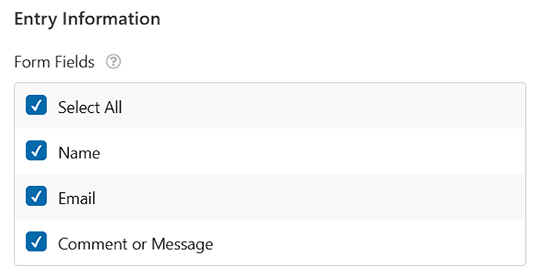
16. Scroll down to the Entry Information section, where you will find all the fields of your form. Please check the necessary fields.
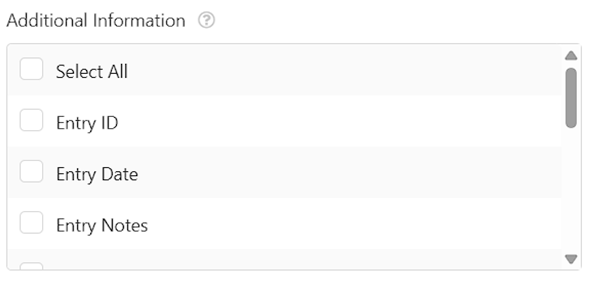
17. In the Additional Information section, you will find information that WPForms tracks automatically.
18. In the 'Filter' section, you can narrow down your export to include only the entries that meet specific criteria.
For example, if your contact form has a dropdown for 'Reason for Contact', you can filter the entries to export only those where the reason is 'Support Request' or 'Business Inquiry'.
This feature helps keep your exports focused on the types of messages that are most relevant to you.

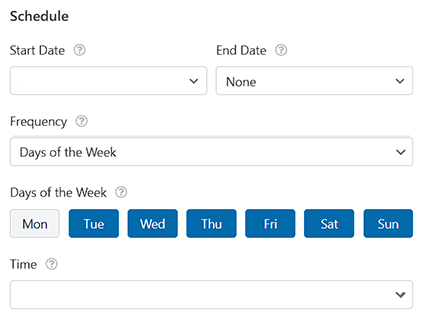
19. Once the settings and filter options are set, schedule the WPForms automatic export by scrolling down the page to find the Schedule option. Then, choose the specific days and times for the export.
Now, the plugin starts automatically exporting the WordPress Form entries at your scheduled time.
You can view all current entries by navigating to WPForms > Tools > Entry Automation. Here, you will be able to:
1. See all forms that have automation tasks configured.
2. Review the types of tasks, their schedules, and current statuses.
3. Confirm whether export or delete tasks have been executed successfully.
