A chatbot is a software application designed to simulate conversation with users, usually over the internet. It can communicate via text or voice and is often used on websites, messaging apps, and social media to answer questions, provide support, or guide users.
There are four main types of chatbots:
1. Rule-based chatbots:
Follow predefined scripts and logic.
2. AI-powered chatbots:
Use natural language processing (NLP) and machine learning to understand and respond to users more naturally.
3. Hybrid Chatbots:
These chatbots use both rules and AI. They follow set rules but can also understand and respond like a smart AI chatbot.
4. Voice Chatbots:
These chatbots talk with users using voice. They can understand what you say and reply by speaking, using voice recognition and speech technology.
Benefits of Using a Chatbot
Adding a chatbot to your WordPress website offers many benefits that can improve both user experience and business performance.
- 24/7 Customer Support: Chatbots can answer visitor questions any time, even when you're not online.
- Saves Time and Effort: They handle common queries automatically, so you don’t have to reply to every message yourself.
- Better User Experience: Visitors get quick replies and help, which makes their experience on your site smoother.
- Increases Conversions: Chatbots can guide users to products, services, or signup forms—helping you get more leads or sales.
- Handles Multiple Users at Once: A chatbot can talk to many people at the same time without getting overwhelmed.
How to Add an AI Chatbot to a WordPress Website?
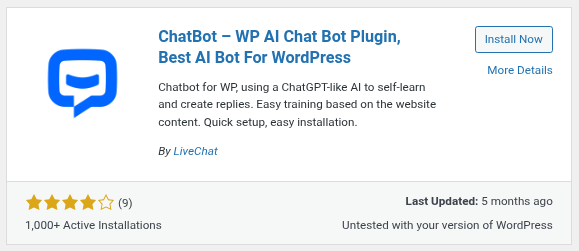
Method 1: Add an AI Chatbot Using the ChatBot Plugin
ChatBot offers advanced customization options, supports multiple languages, and is designed to enhance user experience.
1. Log in to your WordPress dashboard.
2. Go to the Plugins > Add Plugin.
3. Search for Chatbot in the search bar.
4. Click on Install Now and activate it.
5. Access the chatbot from the sidebar and click 'Connect account'.
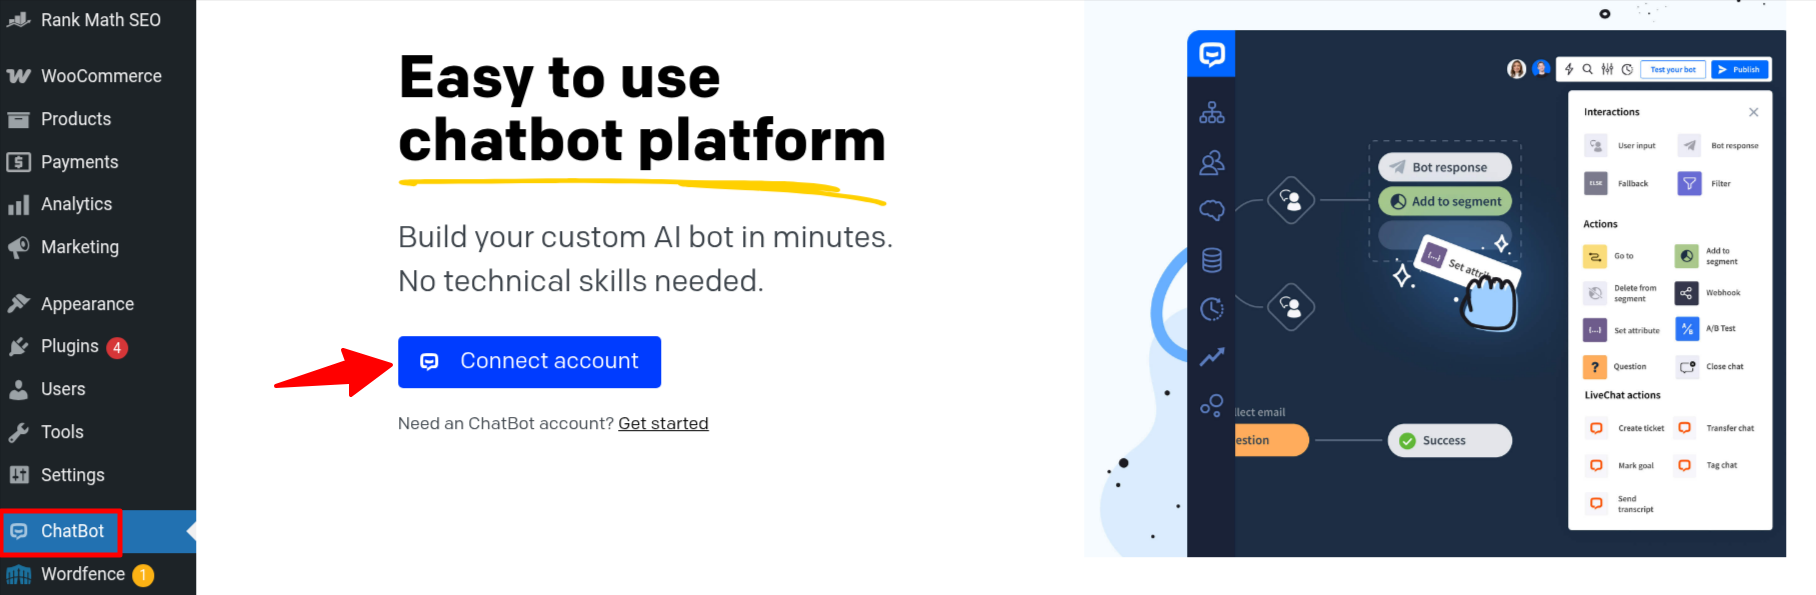
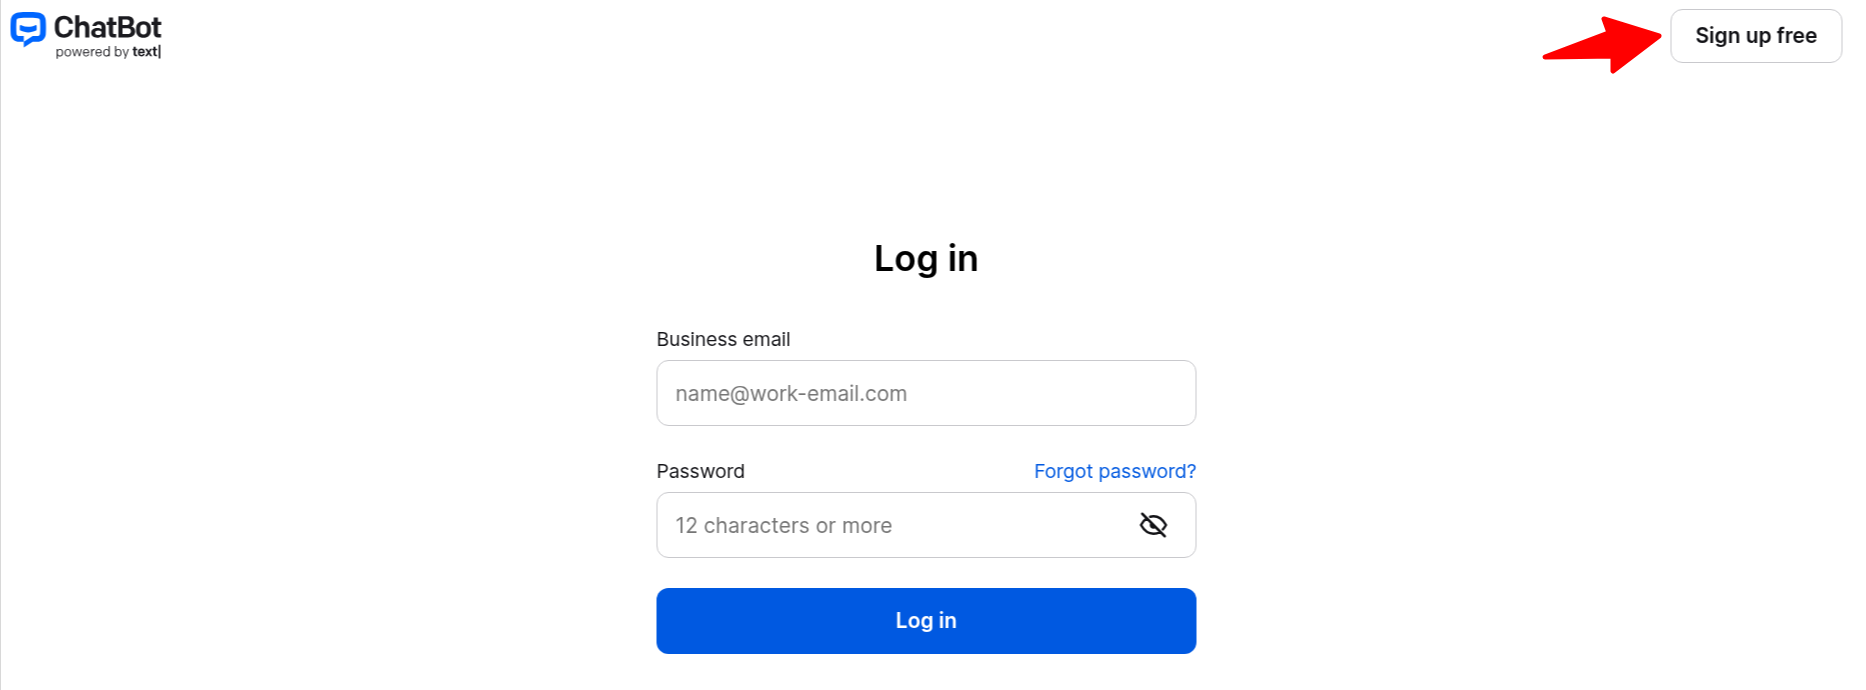
It will redirect you to the chatbot website.
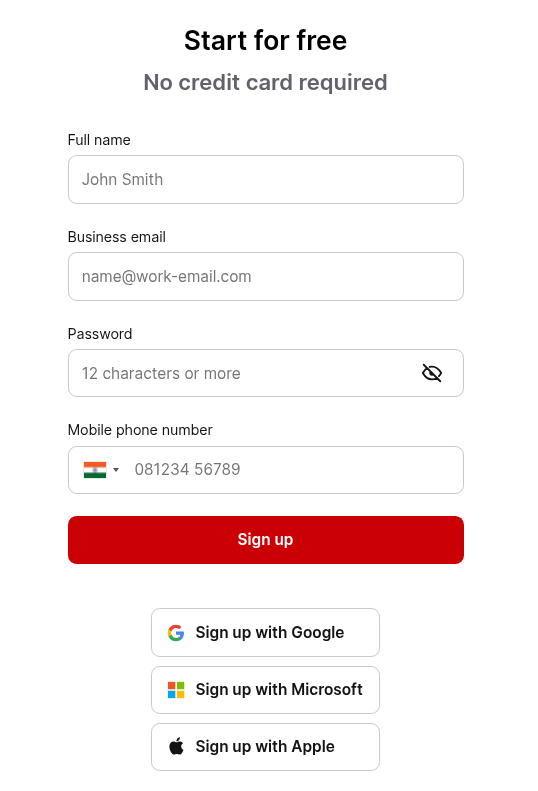
6. Here, click on Sign up free.
7. Add your required information and click on Sign Up.
It will redirect you to a WordPress dashboard. Your WordPress site is now successfully connected to ChatBot.com.
8. Click on the ”Go to dashboard” button.

You’ll now be taken to your ChatBot dashboard.
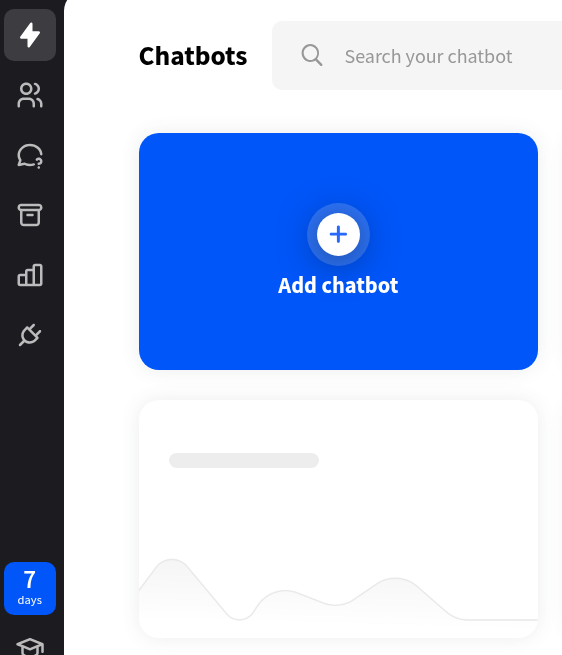
9. Click the ‘Add chatbot’ button at the top.
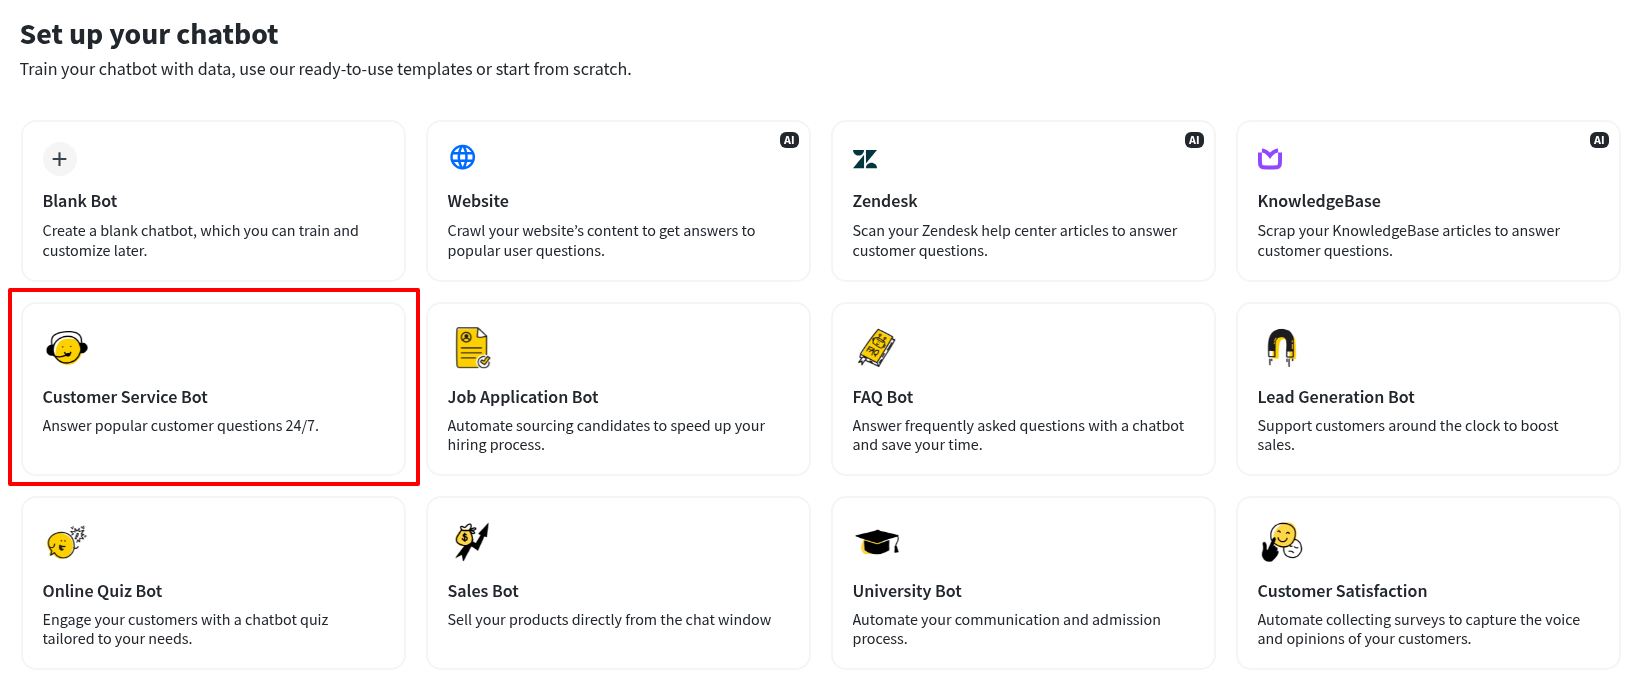
Here you can set up your chatbot. It offers ready-made templates like a customer service bot, a job application bot, an FAQ bot, a lead generation bot, a sales bot, and more.
Or, you can choose ‘Blank Bot’ to create your own custom bot.
For this tutorial:
10. We’ll use the Customer Service Bot template.
Once selected, the chatbot builder will open with a ready-to-use conversation flow.
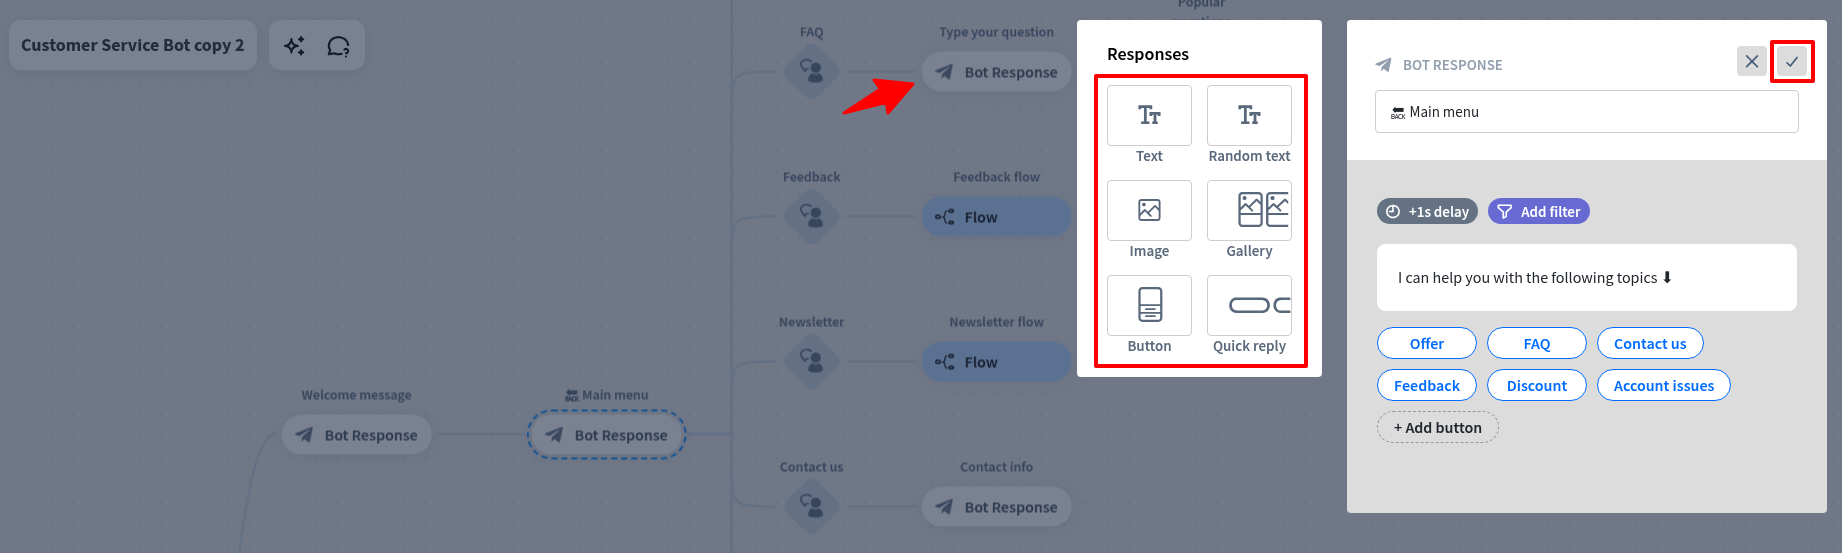
11. To customize the chatbot, click on the 'Bot Response' blocks in the flow editor.
A pop-up will now appear where you can add your chatbot’s replies. You can drag and drop blocks to add text, images, buttons, and more.
12. Once you’ve added the response, click the ‘Save and Close’ button at the top.
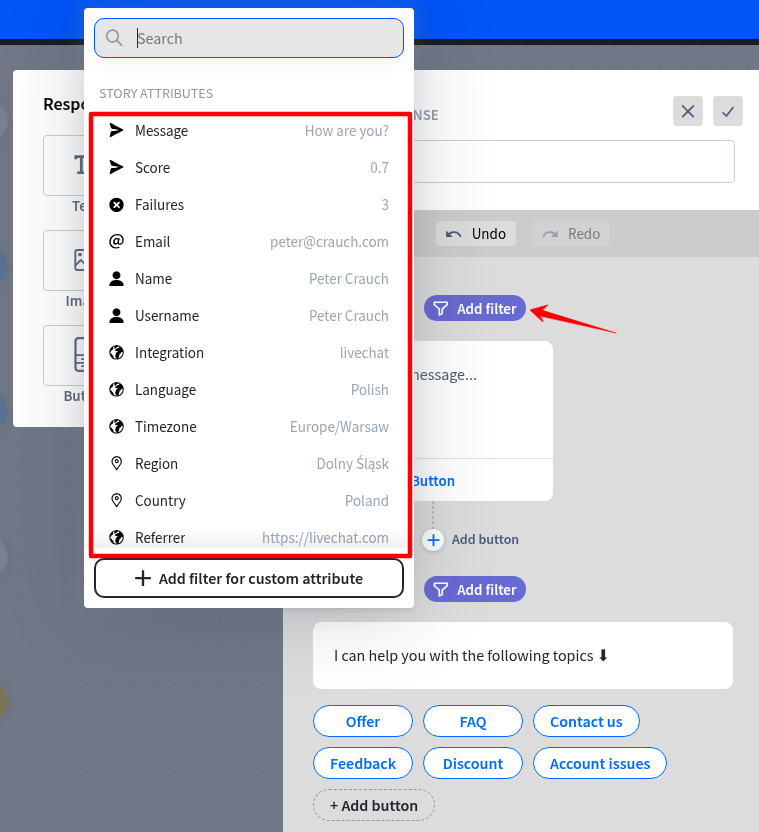
Here are the filter options you can use to customize your chatbot’s replies:
- Message: Make replies more personal based on what the user says.
- Score: Avoid off-topic chats by filtering out messages with low relevance.
- Failures: Stop the bot from replying when it’s likely to make a mistake.
- Email: Verify if an email address is valid and use it to personalize messages.
- Name: Personalize replies using the user's name or block certain names.
- Username: Filter messages that include specific usernames.
- Integration: Show special replies to users of certain tools or platforms.
- Language: Send messages in different languages for multilingual users.
- Time zone: Customize messages based on the user’s time zone.
- Location: Show different messages for users in different countries or regions.
Set conditions for when the chatbot should use a filtered response. The chatbot will only display this message if the user meets the specified filter criteria.
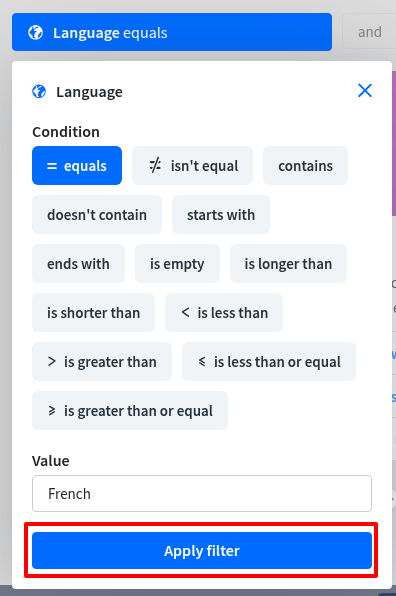
For example, if your website supports multiple languages, you can use the ‘Language’ filter to create a response for each one.
13. Just choose ‘= equals’ as the condition, then type the language (like French).
Now, write your message in French. When a user sends a message in French, the chatbot will reply with the French version you set.
14. After adding your filter, click ‘Apply filter’ to save it.
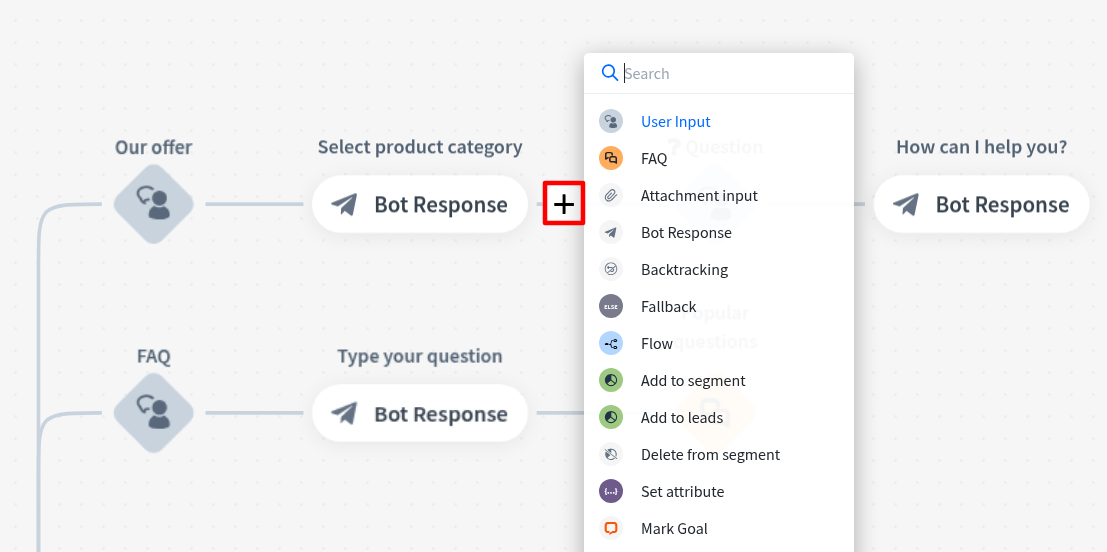
You can also click the ‘+’ button to add more blocks to your chatbot flow. This opens a menu where you can choose different types of blocks, such as:
- User Input: Set up what users can type to trigger a bot response.
- FAQ: Add common questions and their answers.
- Attachment Input: Let users upload files during the chat.
- Bot Response: Add the chatbot’s reply to a message.
- Backtracking: Stop users from going back to previous chats.
- Fallback: Show a default message if the bot doesn’t understand the user.
- Flow: Organize complex conversations in a visual way.
- Add to Segment: Group users based on their data.
- Delete from Segment: Remove users from a group.
- Set Attribute: Save details about the user (like name or email).
- Mark Goal: Mark a chat as successful when it reaches a set goal.
You can also send chat transcripts to an email or tag conversations with keywords for easy tracking.
15. For example, if you select the FAQ block, it will open a section where you can add common customer questions and their corresponding answers.
Your chatbot will then use these answers to help users on your site.
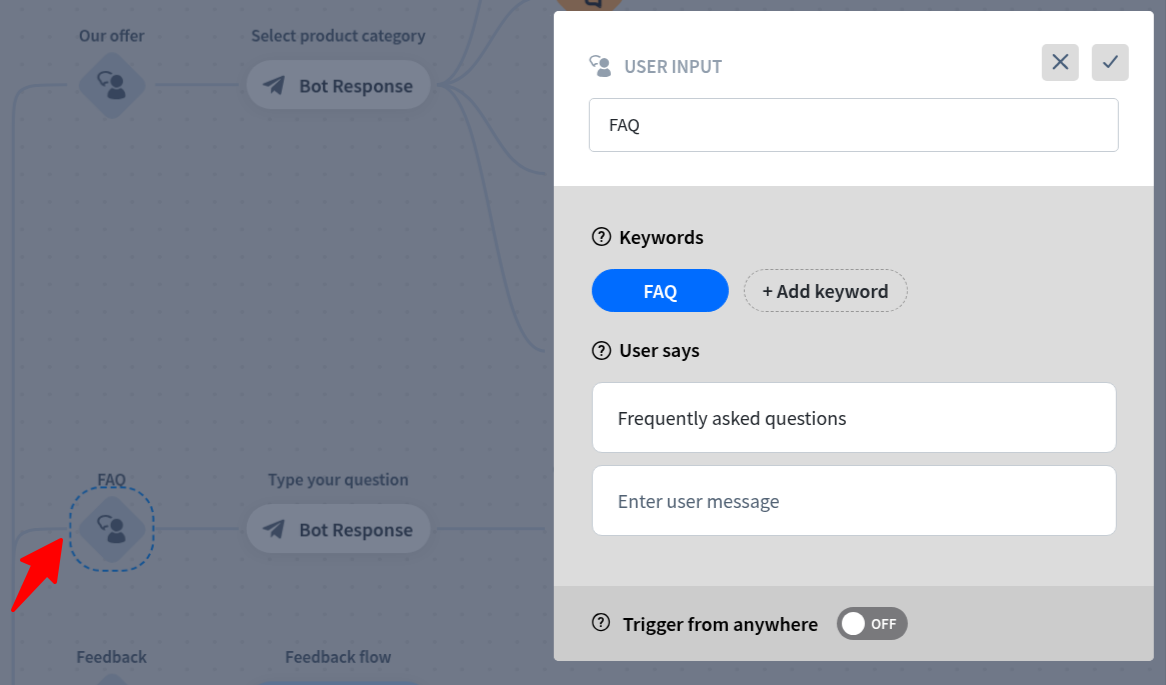
→Add FAQs
16. Next, click on the ‘Main Menu’ block to open the settings. Here, you can add buttons that guide users to different services using the Button block.
Click each button to set where it should take users.
17. For example, you can link it to the FAQ block by choosing ‘Go to block’ (button type), selecting ‘FAQ’, and then clicking ‘Save Settings’.
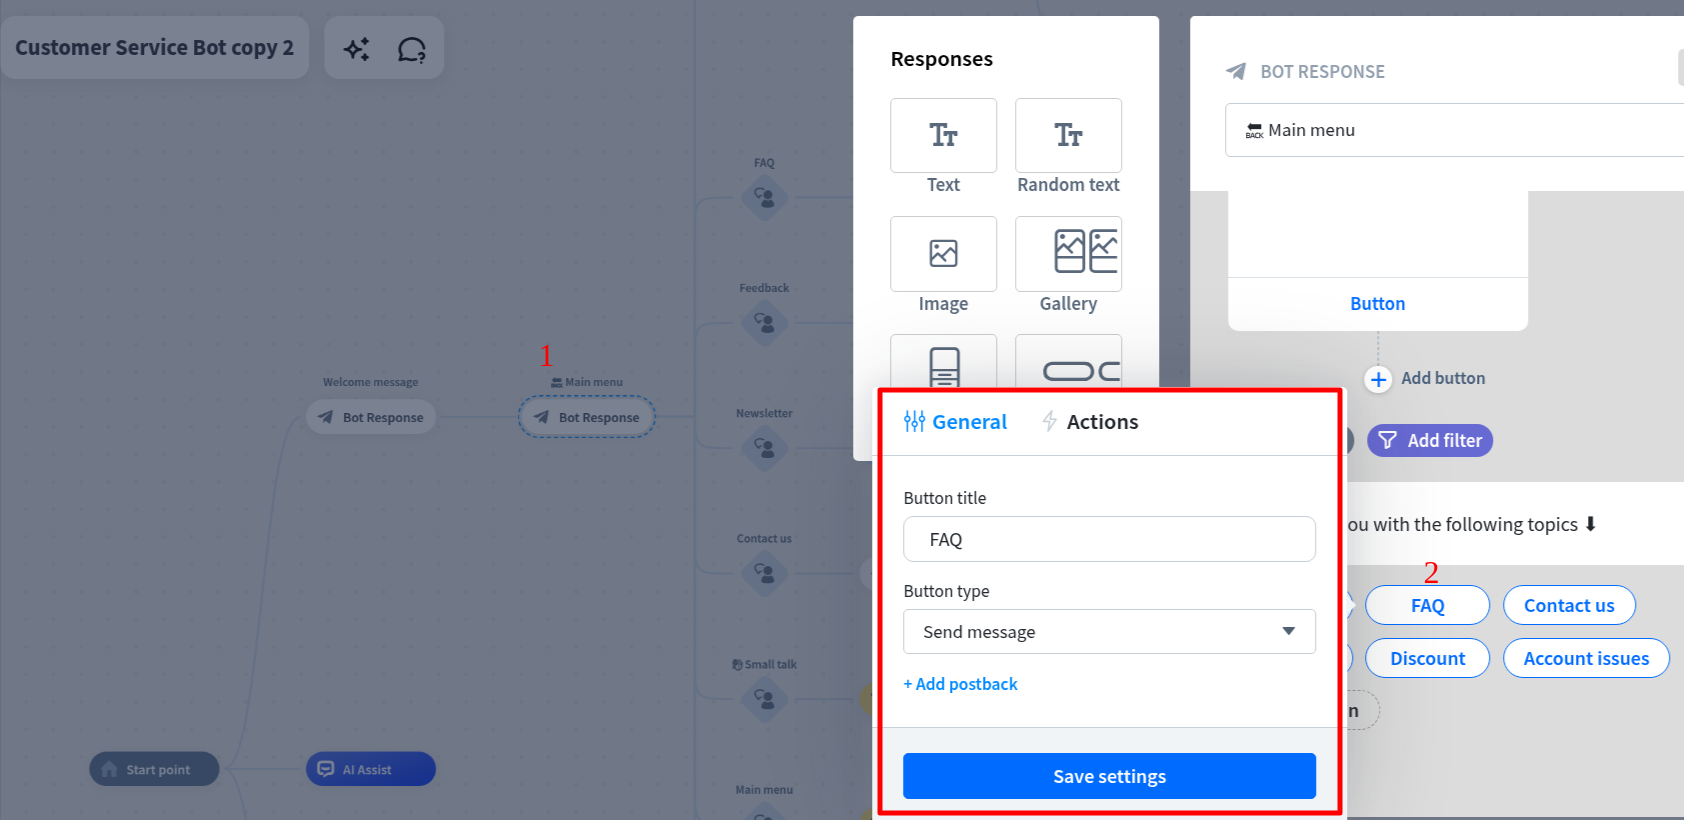
→ Set up buttons in the main menu
Besides FAQs, you can also create buttons for your newsletter signup, contact page, discounts, and other relevant content.
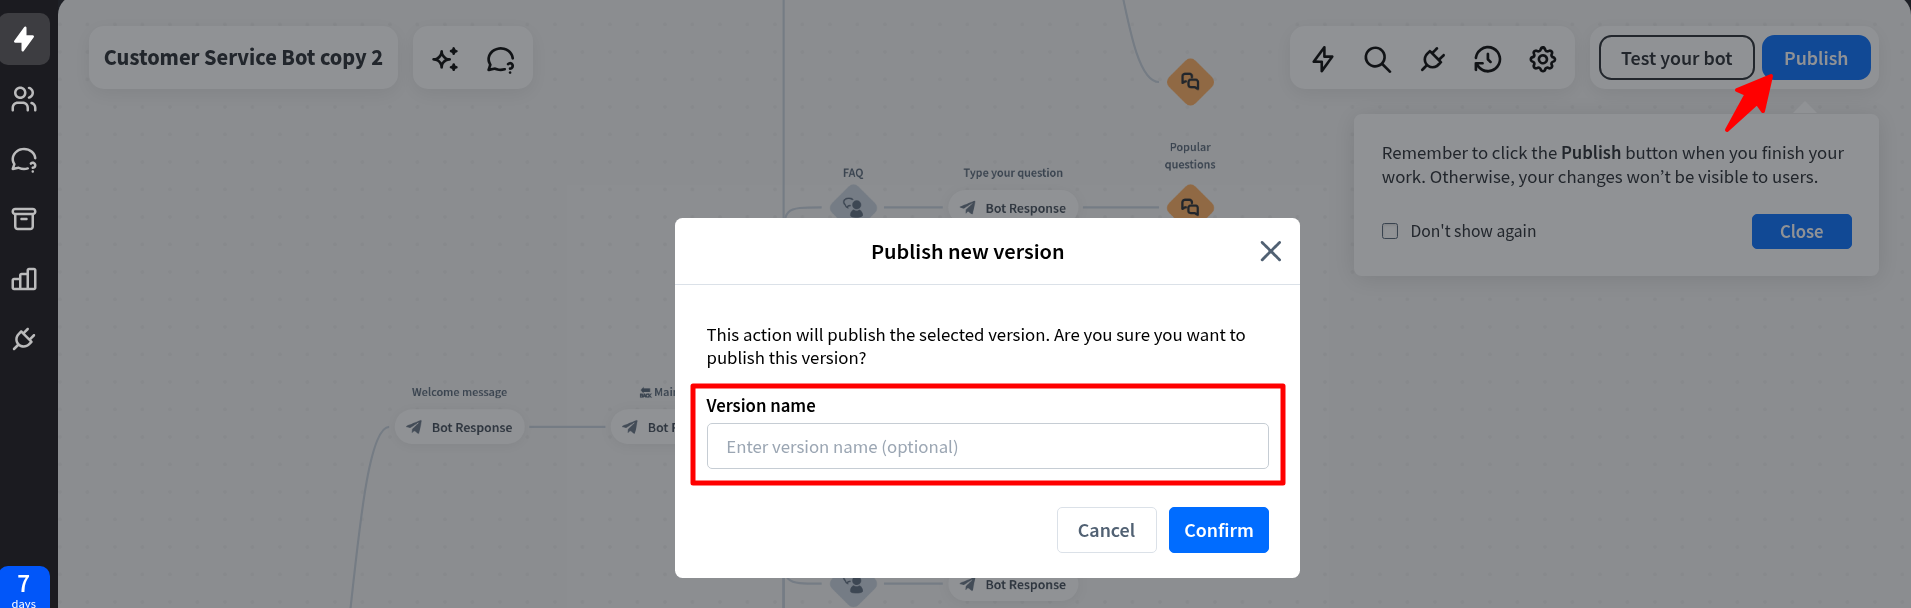
Click the ‘Publish’ button at the top to save everything.
→ Publish the chatbot
A box will appear asking you to name your chatbot. Type the name and click ‘Confirm’ to publish it.
Now, go to your WordPress dashboard and open the ChatBot tab. You’ll see a ‘Choose your bot’ section.
Choose your bot from the dropdown list.
18. If you want to hide the chatbot on mobile, switch ‘Hide chat on mobile’ to On.
19. You can also turn on ‘Hide chat for Guest visitors’ if you want it to show only for logged-in users.
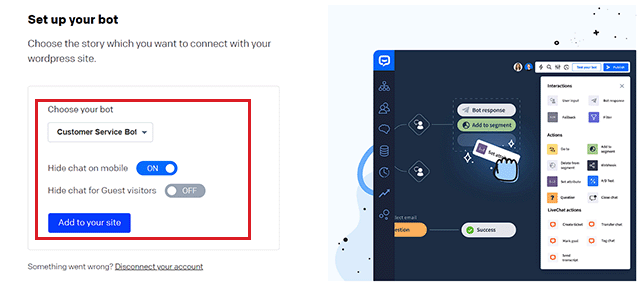
Finally, click ‘Add to Site’.
Now visit your website to see your chatbot live!
Method 2: Add AI Chatbot Using Code
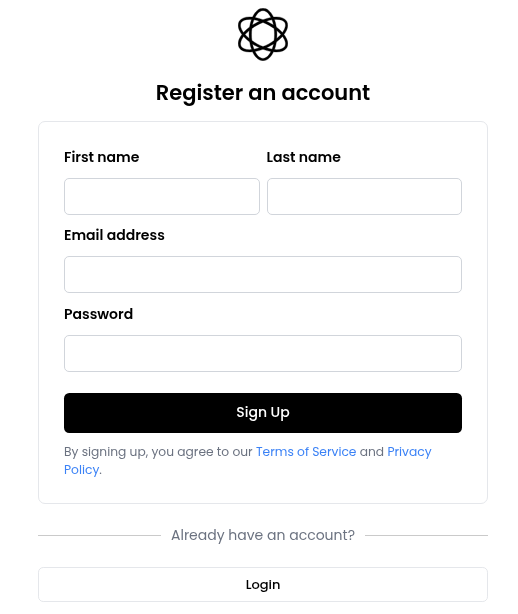
1. Go to Chatling and register your account.
2. After the registration, it redirects you to the dashboard.
3. Navigate to the sidebar menu on the left-hand side, and click on "Add to Website" from the menu.

4. If you have multiple chatbots, select the one you want to integrate with your WordPress site.
5. A text box containing the chatbot embed code will appear.
6. Click the "Copy Code" button below the box to ensure you copy the entire snippet correctly.

Next, you have two options to add a chatbot: the first is to use a plugin, which is beginner-friendly, and the second is to manually add the code to your WordPress theme files.
Option 1: Using Plugin
- Go to the WordPress dashboard.
- Navigate to the Plugins > Add Plugin.
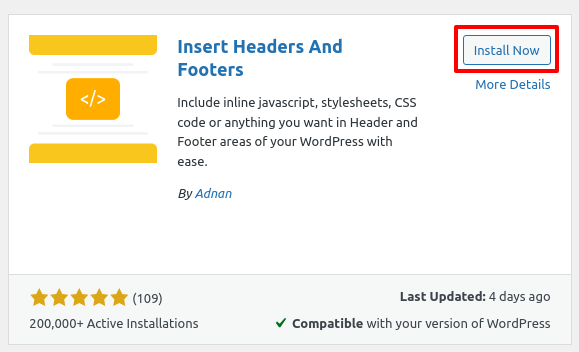
- Install the Insert Headers and Footers plugin and activate it.
- Next, go to the Settings > WP Headers and Footers.
- Paste the earlier copied code inside the “Scripts in Header” section.

- Click on Save Changes.
Option 2: Using Theme File Editor
This method is for users who are okay with editing WordPress theme files. Instead of using a plugin, you'll add the chatbot code directly to your theme’s header file.
This works only with classic WordPress themes, not the newer block-based (FSE) themes.
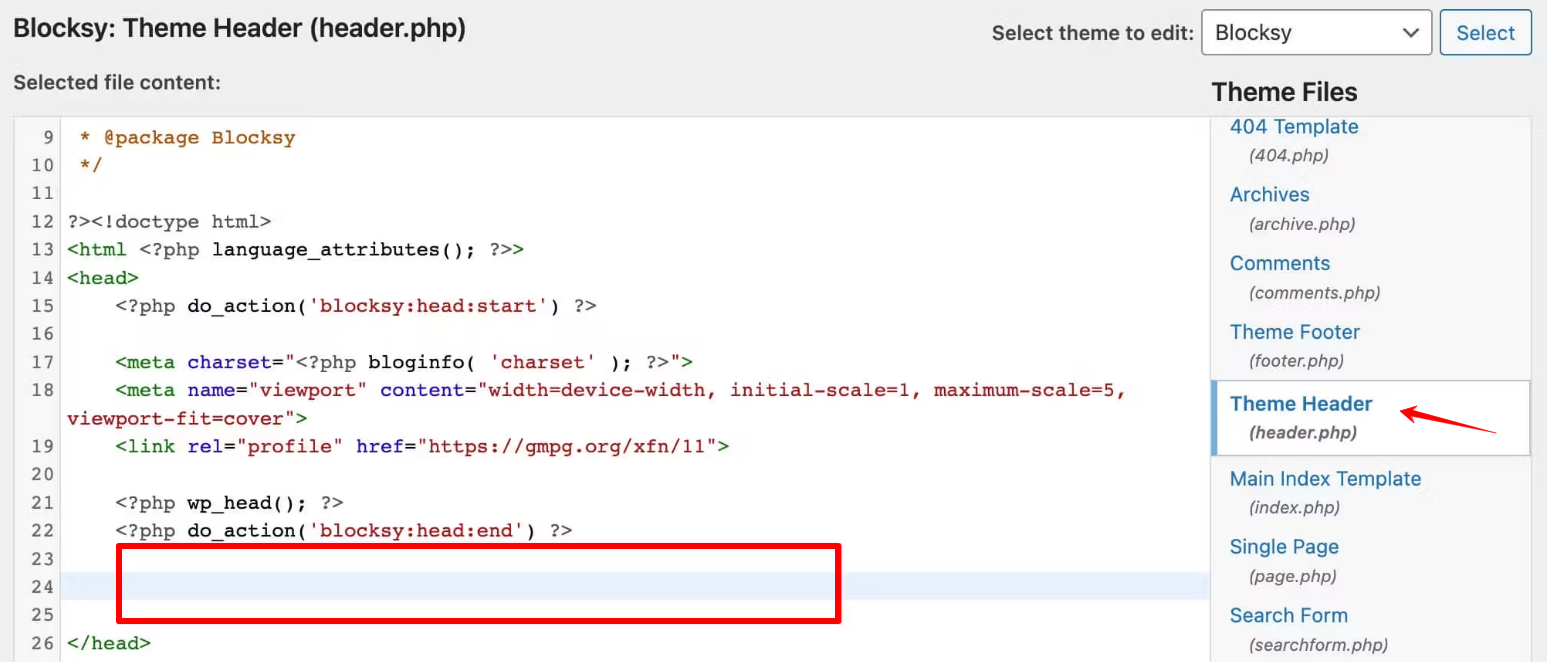
- Log in to your WordPress dashboard.
- Navigate to the Appearance > Theme File Editor.
- Choose the Header.php file.
- Paste the previously copied code before the </head> tag.
- Save your changes.
Method 3: Add AI Chatbot Using Hubspot
1. Log in to your WordPress dashboard.
2. Go to the Plugins > Add Plugin.
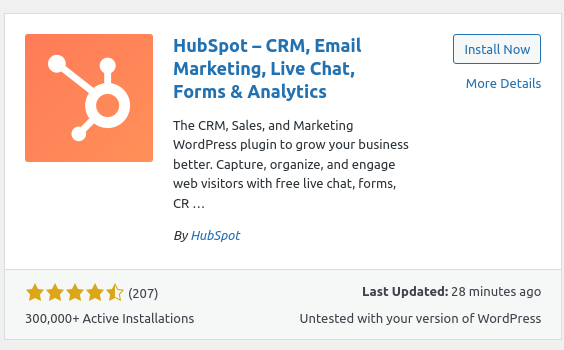
3. Search for the HubSpot plugin and then install and activate it.
4. After activation, go to the HubSpot tab in your WordPress admin menu and enter your email to create a free account.
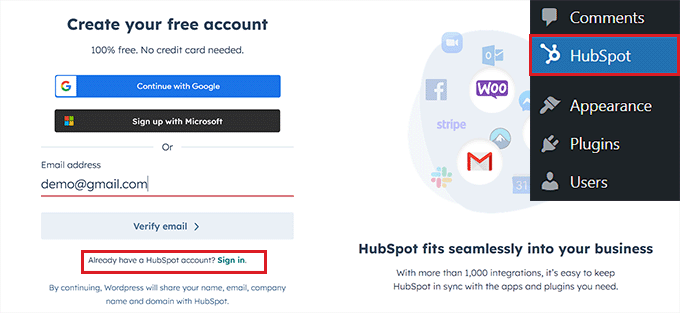
After that, it will ask you some questions; fill it. Hubspot will create an account for you.
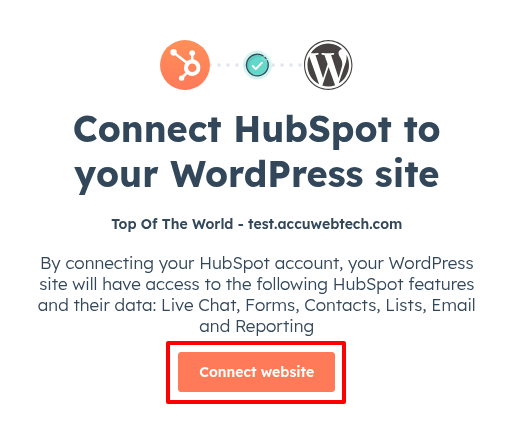
5. Click on Connect Website.
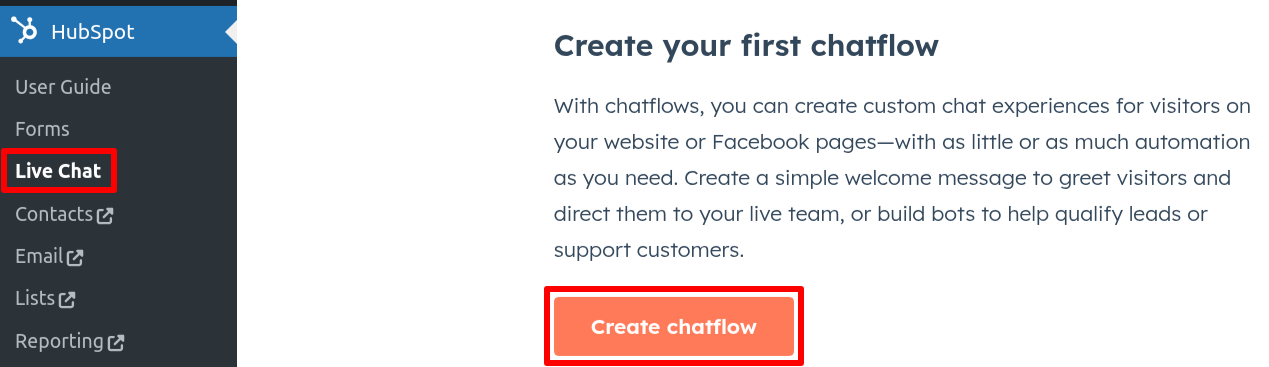
6. Go to HubSpot > Live Chat in your WordPress dashboard and click ‘Create chatflow’.
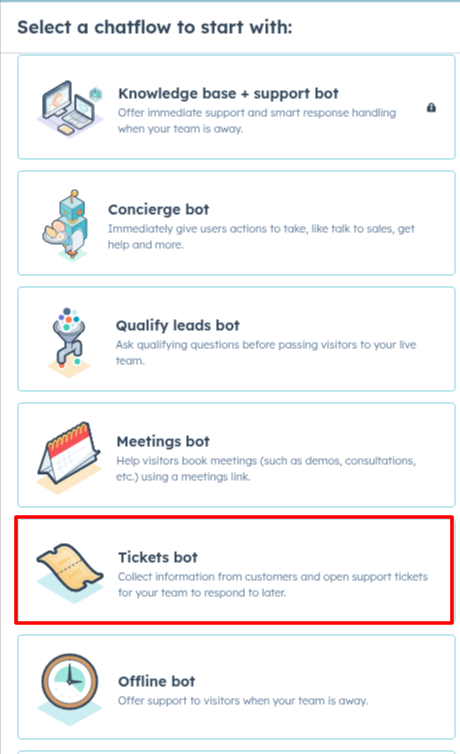
7. Choose a template like a Tickets Bot, Meeting bot, qualify lead bot, Concierge Bot, or create one from scratch.
8. Click ‘Continue in HubSpot’ to build the chatbot inside your HubSpot account.
It will redirect you to a new screen, where you can set the workflow.
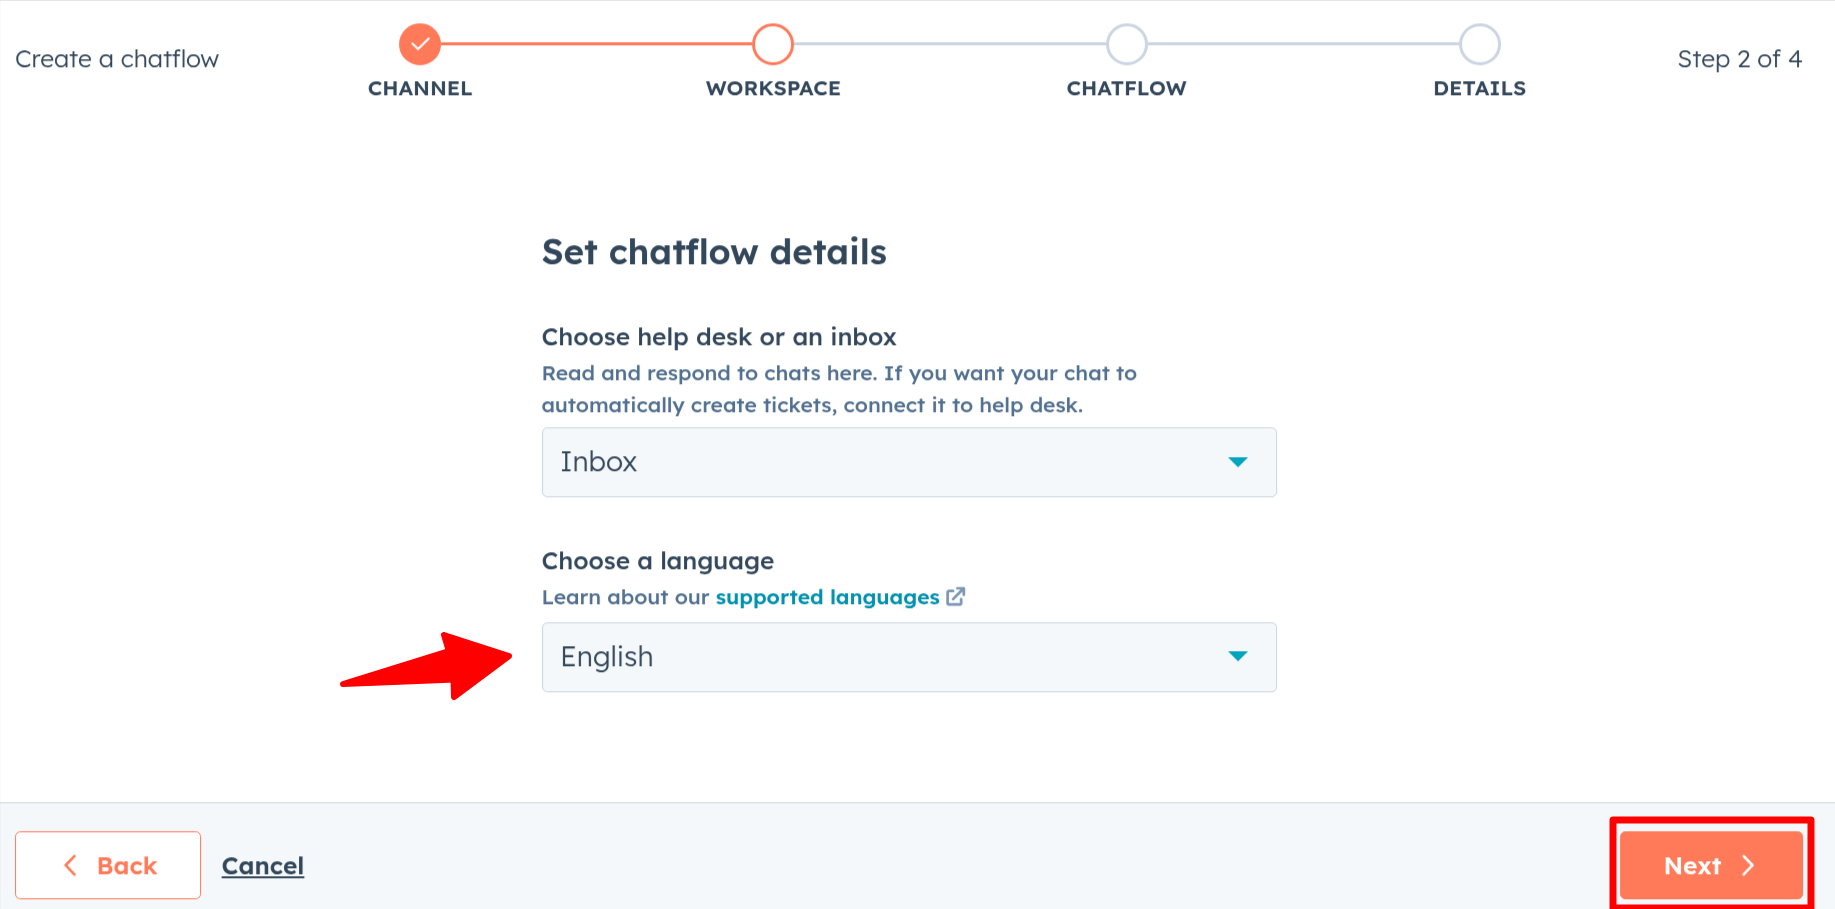
9. Choose Website.

10. Choose the chatbot language and click Next.
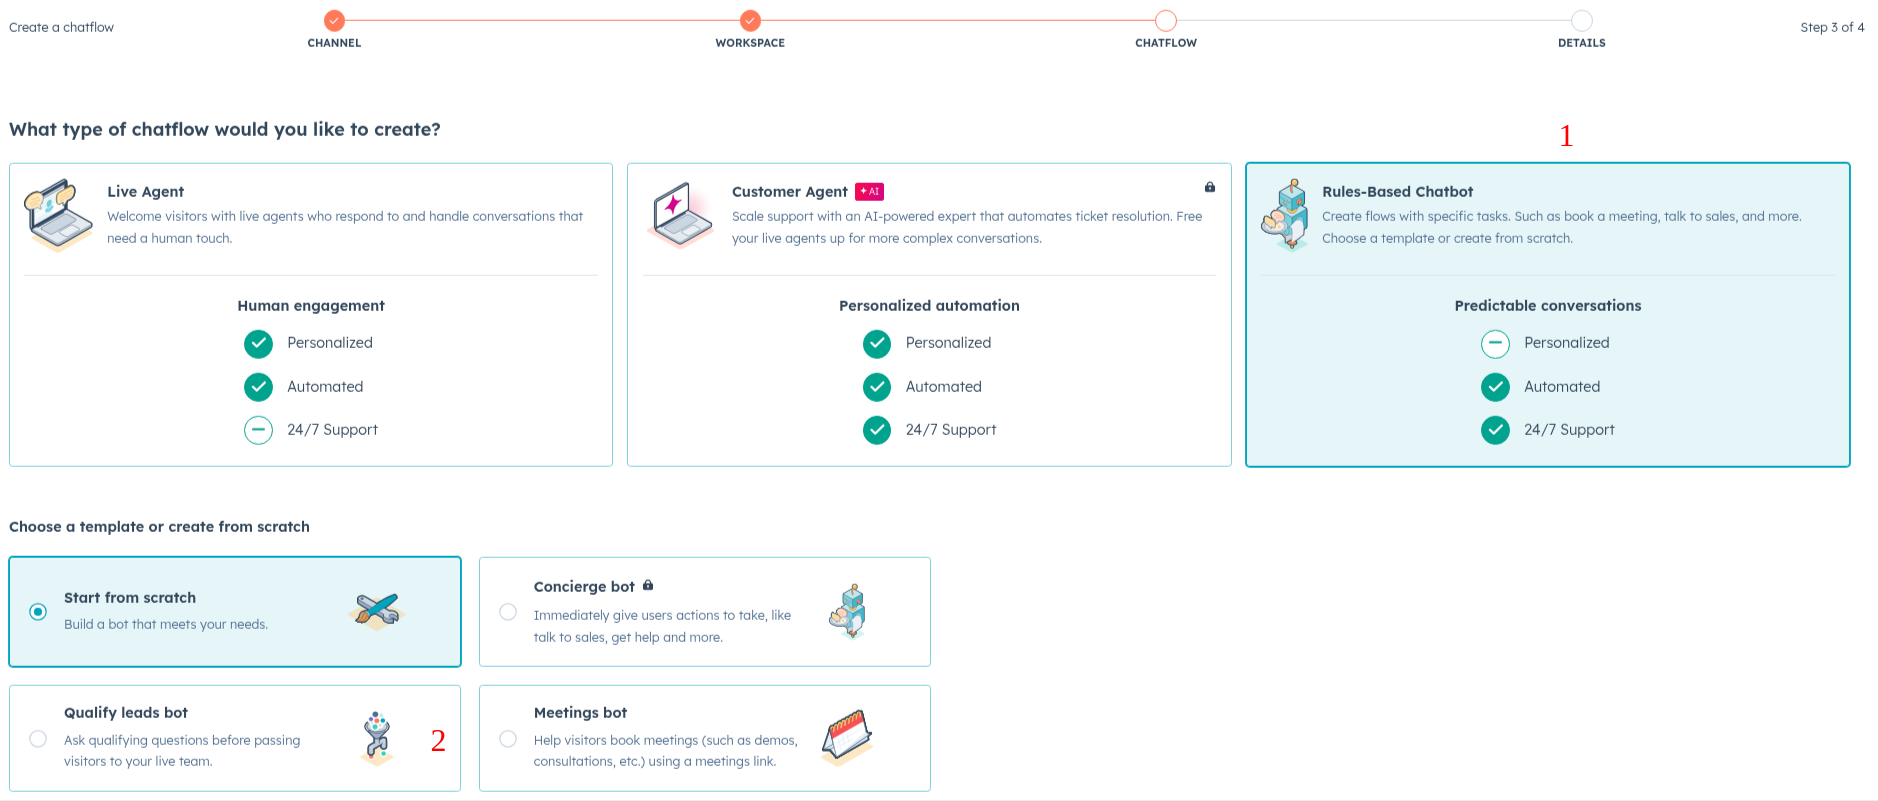
11. Select Rules-based bot > Qualify lead bot.
12. Your chatbot template will open. Click the ‘Options’ tab, then click ‘Edit’ on the first action.
13. Change the message text and action name.
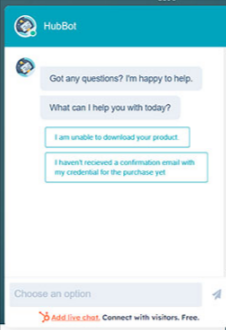
14. Under ‘Your visitors’ responses’, add possible quick replies users might give (like “How to buy?” or “I have a problem”).
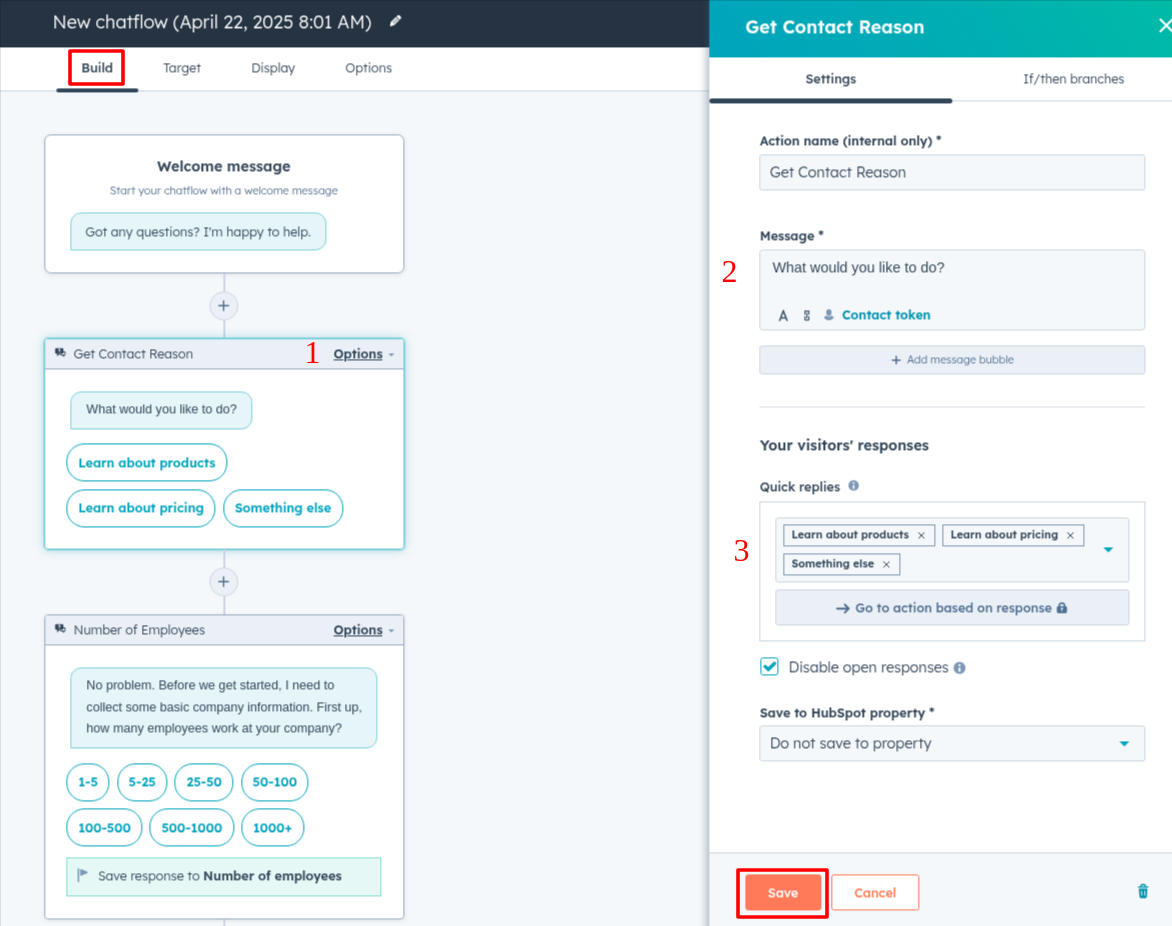
15. Go to the ‘If/Then branches’ tab. Choose what the bot should do if a visitor gives a specific reply.
For example, if a user says they didn’t get a confirmation email, set the bot to ‘Create Ticket’.
16. Click Save to store your settings.
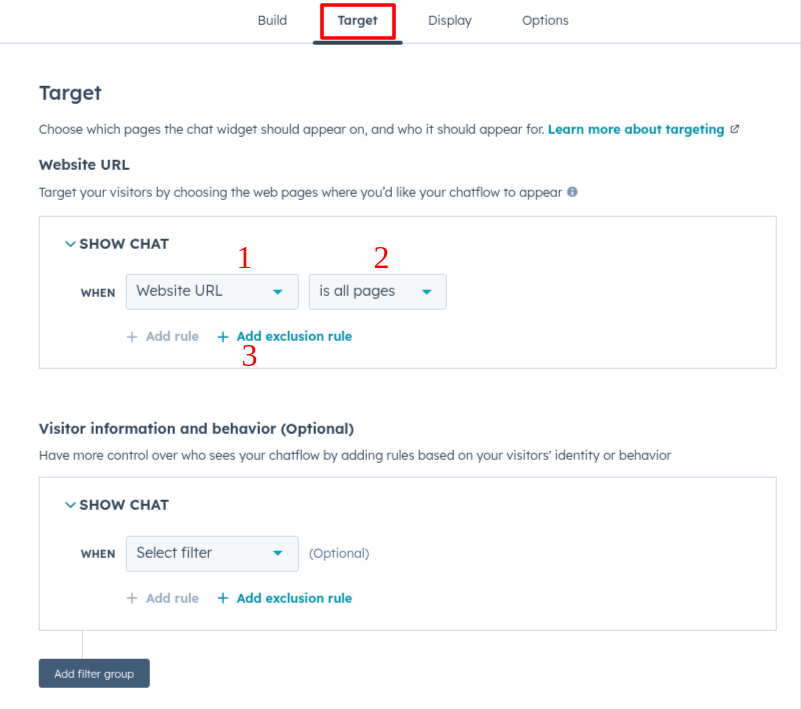
→ Target Tab:
17. Decide which pages should show the chatbot.
18. If you want to hide it on certain pages, click ‘Add exclusion rule’ and enter the page URL.
You can also choose who sees the chatbot (e.g., only logged-in users or contacts).
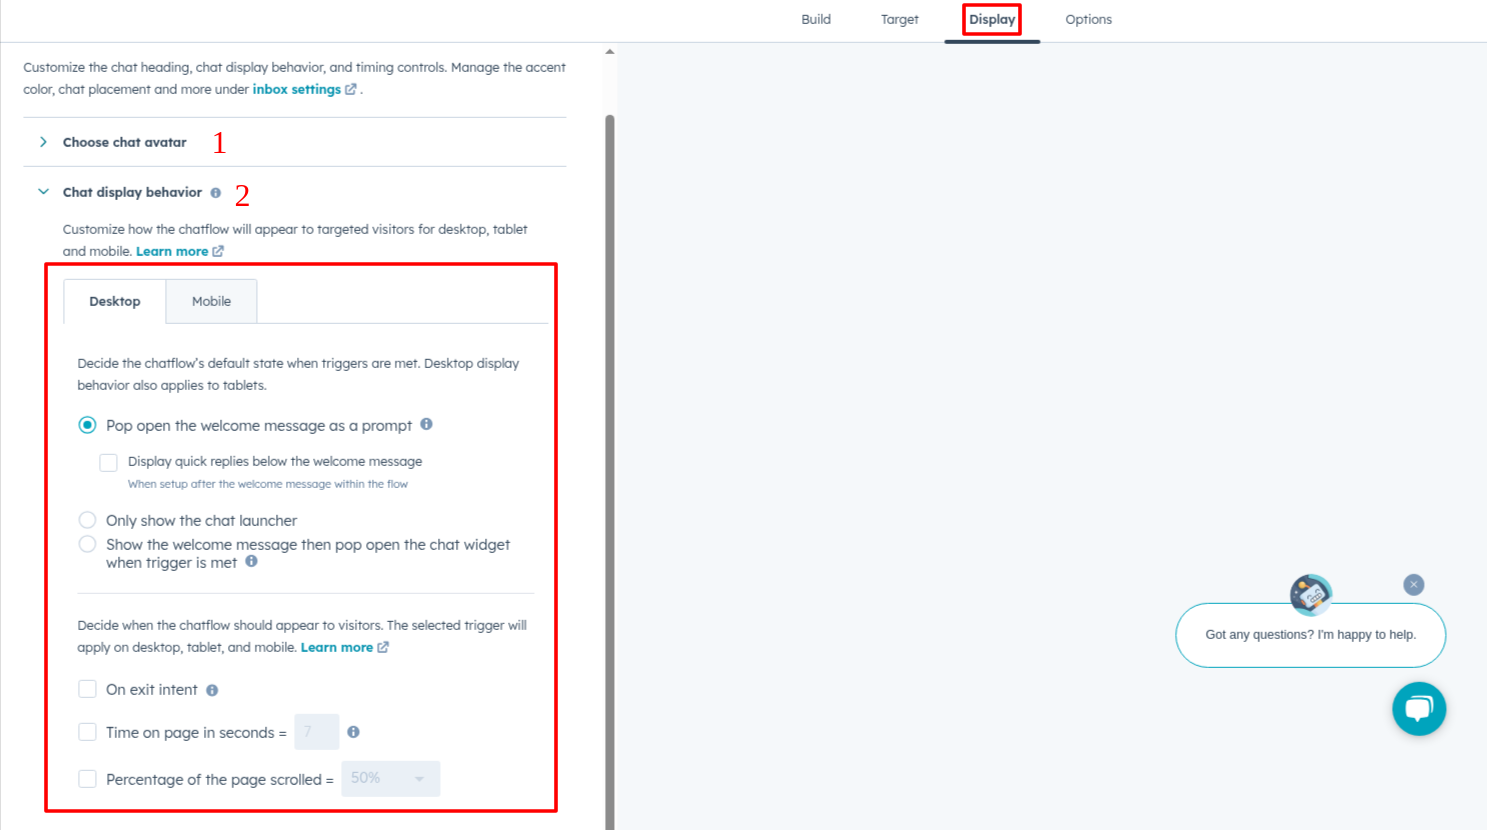
→ Display Tab:
19. Add a name and avatar for your bot.
20. Choose when the bot should appear:
- Immediately (welcome message pops up)
- On click (user must open it)
- Trigger-based (only shows under certain conditions)
You can also set triggers like:
- On exit intent (user is about to leave)
- Time on page
- Scroll depth
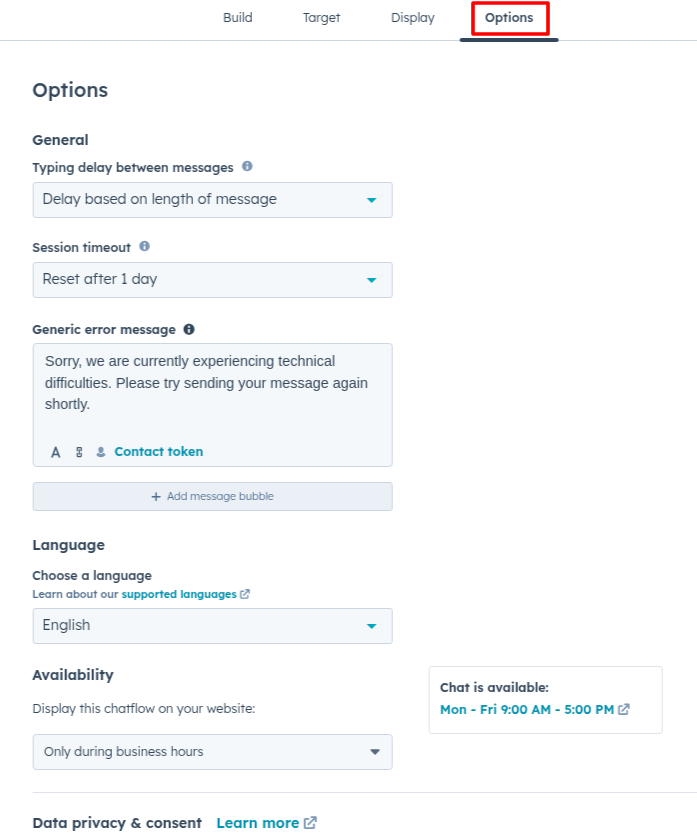
→Options Tab:
Then go to the ‘Options’ tab to set things like:
- Delay before showing the message
- Session timeout
- Bot language
- Availability hours
Save all the changes and test your website.
Before installing any WordPress plugin, it is recommended to check user reviews and ensure compatibility with your WordPress version.
