Image hotspots in WordPress are interactive elements added to images that allow users to click or hover over specific areas to reveal additional information. These hotspots can display text, links, tooltips, or media, making static images more engaging and informative.
In this guide, we’ll explore different ways to add interactive hotspots to your WordPress site, making your images more dynamic and user-friendly.
When to Add Hotspots to Your Images in WordPress?
Hotspots are clickable objects that are displayed when users hover or click on a particular area of an image. Below are instances where you might add them to your images:
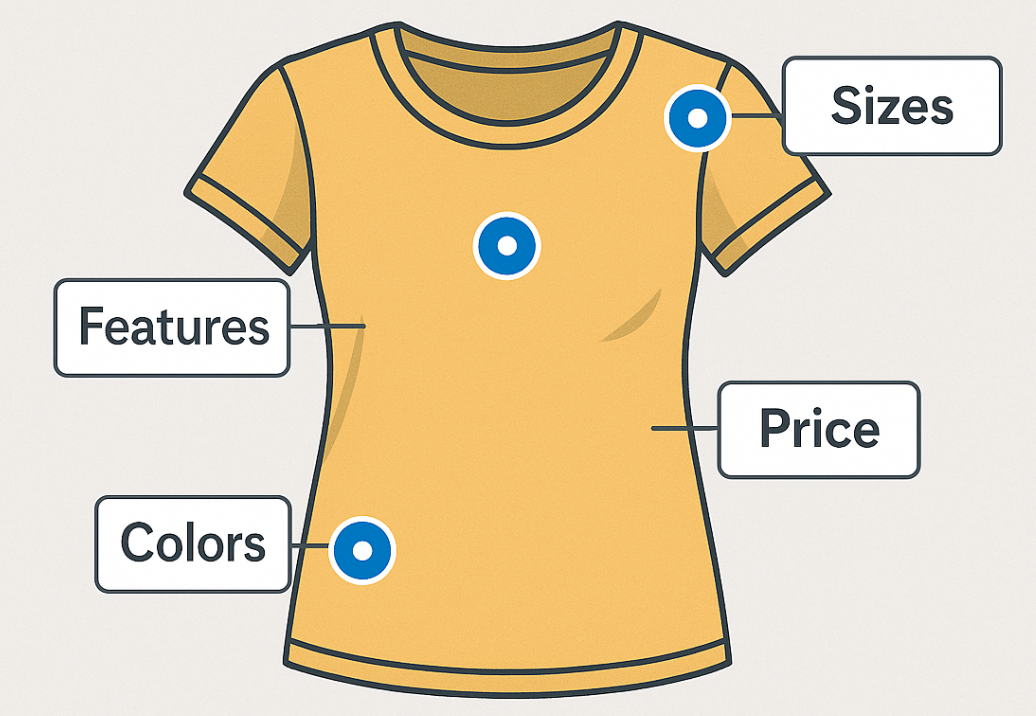
1. Product Images (E-commerce)
If you are displaying products, particularly products with multiple features or close-up views, hotspots can enable the users to access more information in a quick manner, such as sizes, colors, or features.
Benefit: Enhances the shopping experience by providing fast access to information without cluttering the page with too much text.
2. Interactive Tutorials or Guides
If you're designing step-by-step tutorials or guides with images, inserting hotspots on important points of the image can help users receive additional context or directions on what they're looking at.
Benefit: It makes it easy for users to click on certain areas of the image to get a clear explanation, thus facilitating an interactive learning process.
3. Before-and-After Comparisons
If you are demonstrating a change (e.g., before-and-after photos of a project or service), hotspots can be utilized to show changes or differences in certain areas of the picture.
Feature: Clicking over areas will explain specifically what is new, which is useful for showcasing things like remodels, design work, or healthcare changes.
4. Location-based applications (Restaurants, Hotels, etc.)
If you are showing the picture of a hotel, restaurant, or similar location, the use of hotspots can help furnish the user with details about varying rooms, services, or foods on the menu.
Benefit: It facilitates easy access for prospective customers to investigate information regarding the business directly through visual signals.
How to Add Image Hotspots in WordPress?
Method 1: Using a Plugin
Option 1: Add Image Hotspots With Image Hotspot Plugin
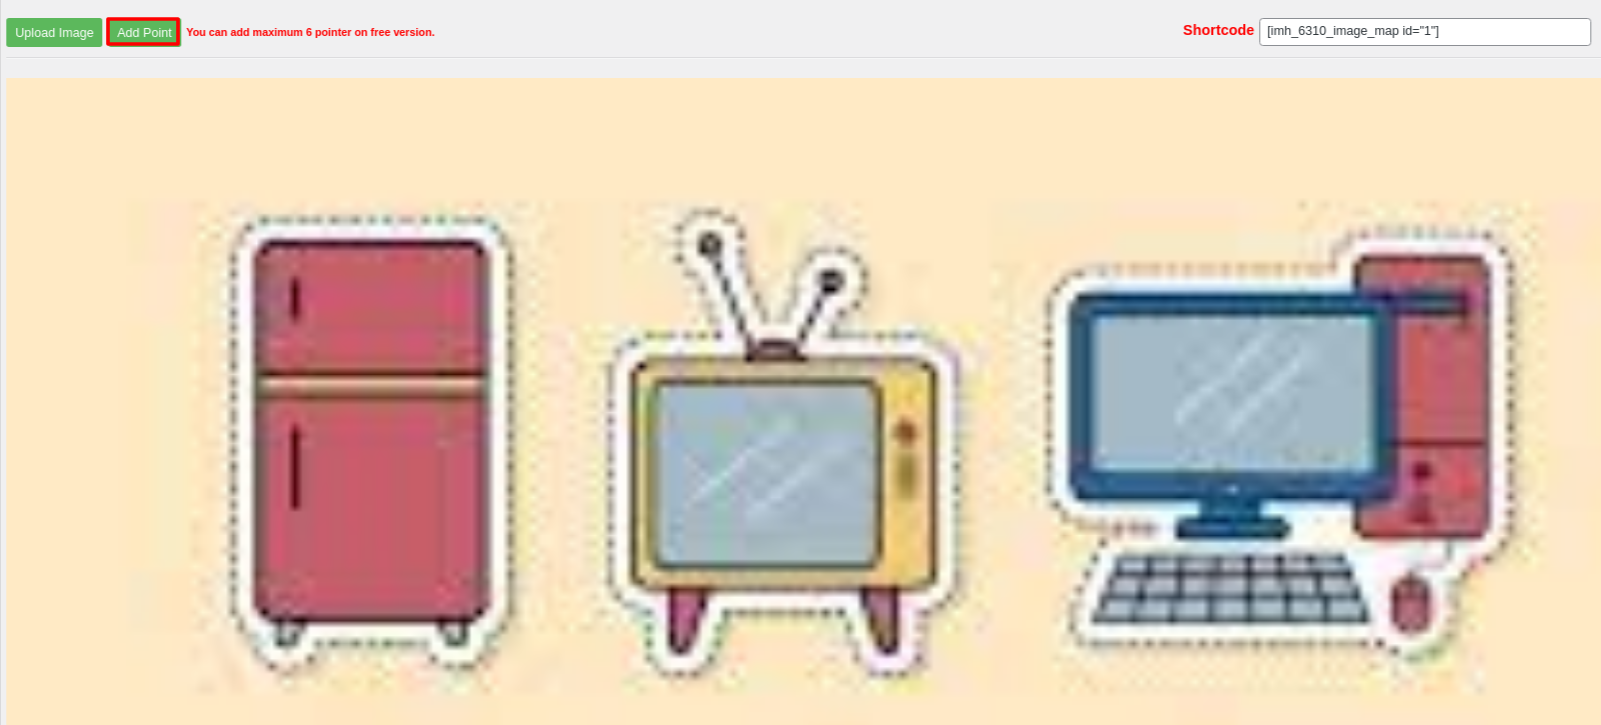
The image hotspot plugin is free, but it only allows adding up to 6 hotspots to one image.
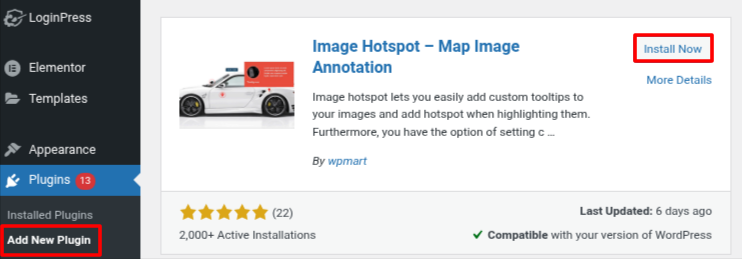
- Log in to your WordPress dashboard.
- Go to Plugins > Add New Plugin.
- Search for the Image Hotspot plugin.
- Click on Install Now and then activate it.
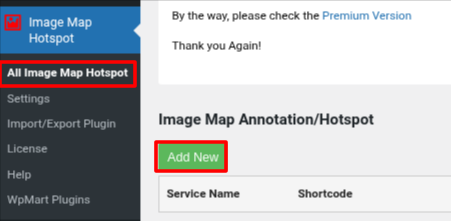
- Next, navigate to Image Map Hotspot > All Image Map Hotspot.
- Click on Add New.
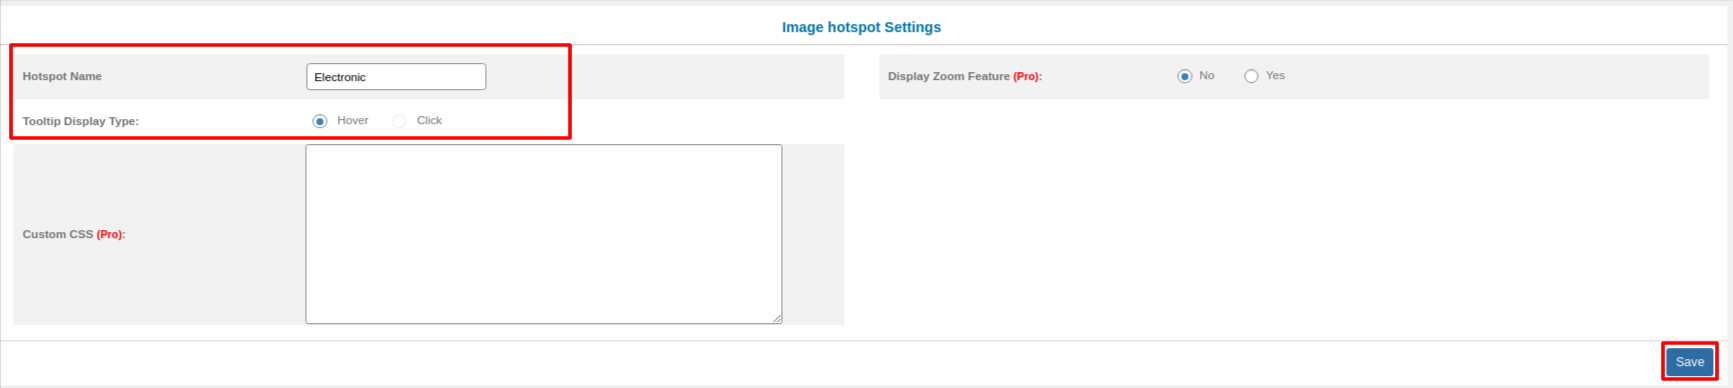
- Add a title for the image and choose how tooltips display. The interactive hotspot’s tooltips can appear either by hovering or clicking.
- Next, upload your image by clicking on Upload Image.
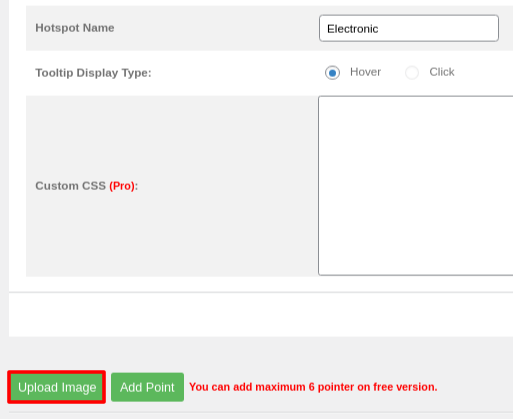
- Click on Add Point to add a hotspot.
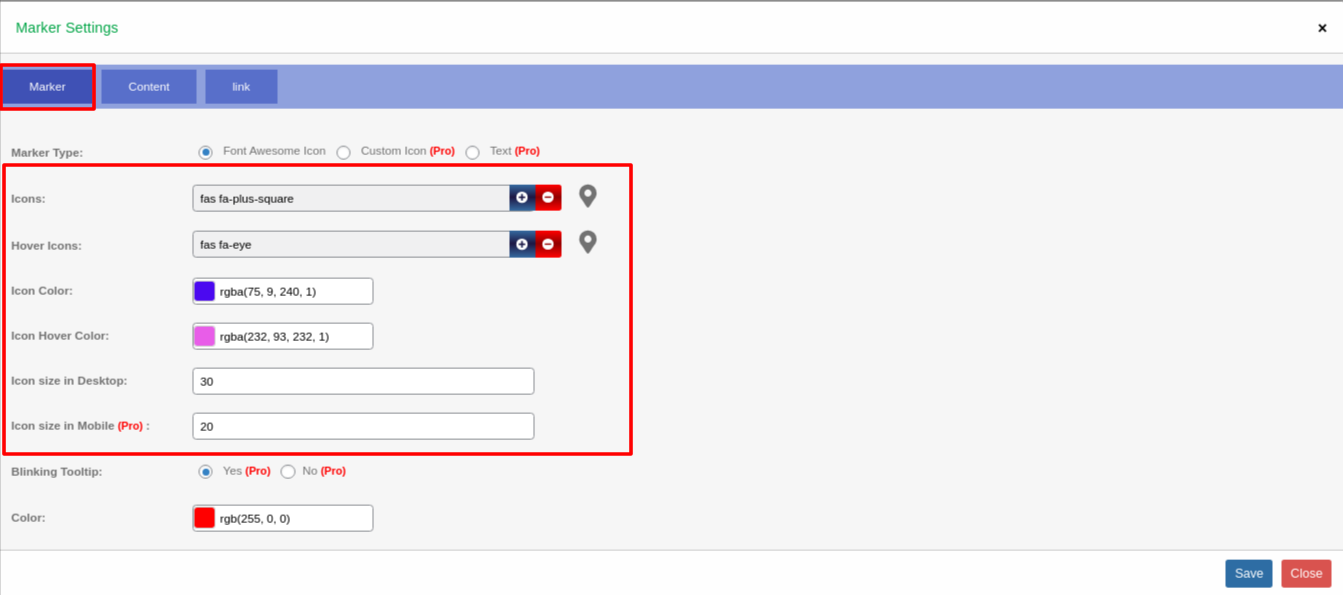
- Go to the ‘Marker’ tab.
- Click ‘+’ to change Icons (default symbol) and Hover Icons (appears on hover/click).
- Select an icon; there are many icons to choose from, and press ‘Close.’
- Set different colors for icon and hover states.
- Set the icon size and click on Save.
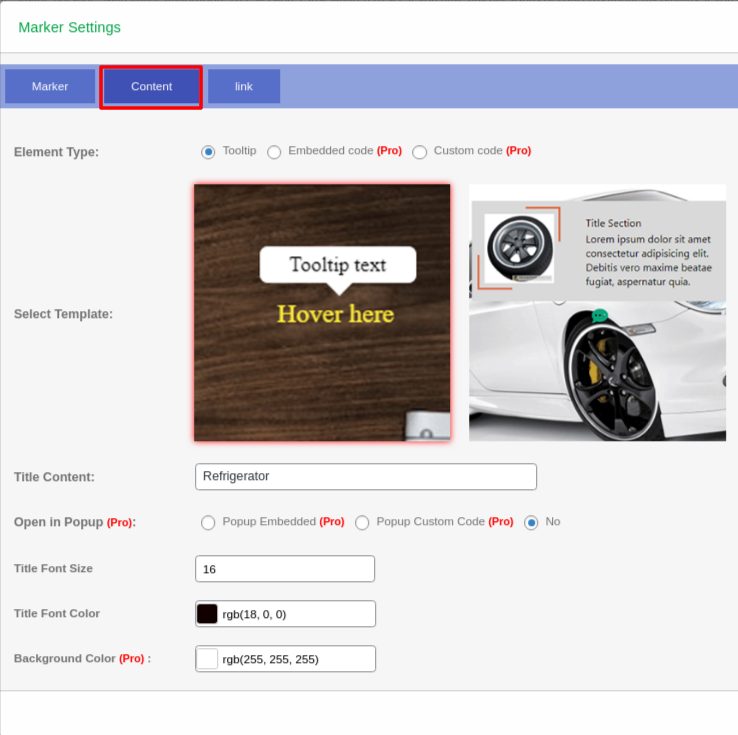
- Scroll the page up and choose the Content tab.
Here, you can customize the tooltip’s text and appearance.
- Set the title, font color, and size.
- In the ‘Link’ tab, enable linking, enter the URL, and choose whether it opens in a new tab.

- Drag the hotspot to its desired position.
- Repeat steps to add more hotspots.
- Click ‘Save’ and copy the generated shortcode.

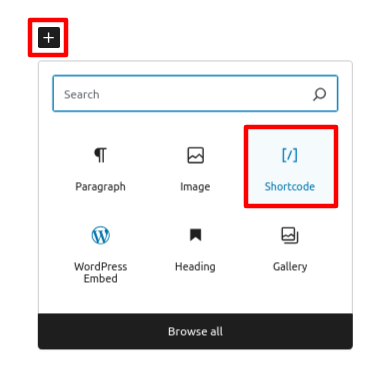
- Paste it into a shortcode block on your page, post, or widget.
Option 2: Using Image Hotspot Block Plugin
- Log in to your WordPress dashboard.
- Go to Plugins > Add New Plugin.
- Search for the Image Hotspot Block plugin.
- Click on Install Now and then activate it.

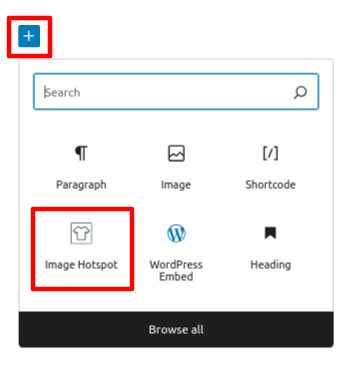
- Go to your page or post, click on the page, or from the left sidebar, choose Image Hotspot from the Gutenberg editor.
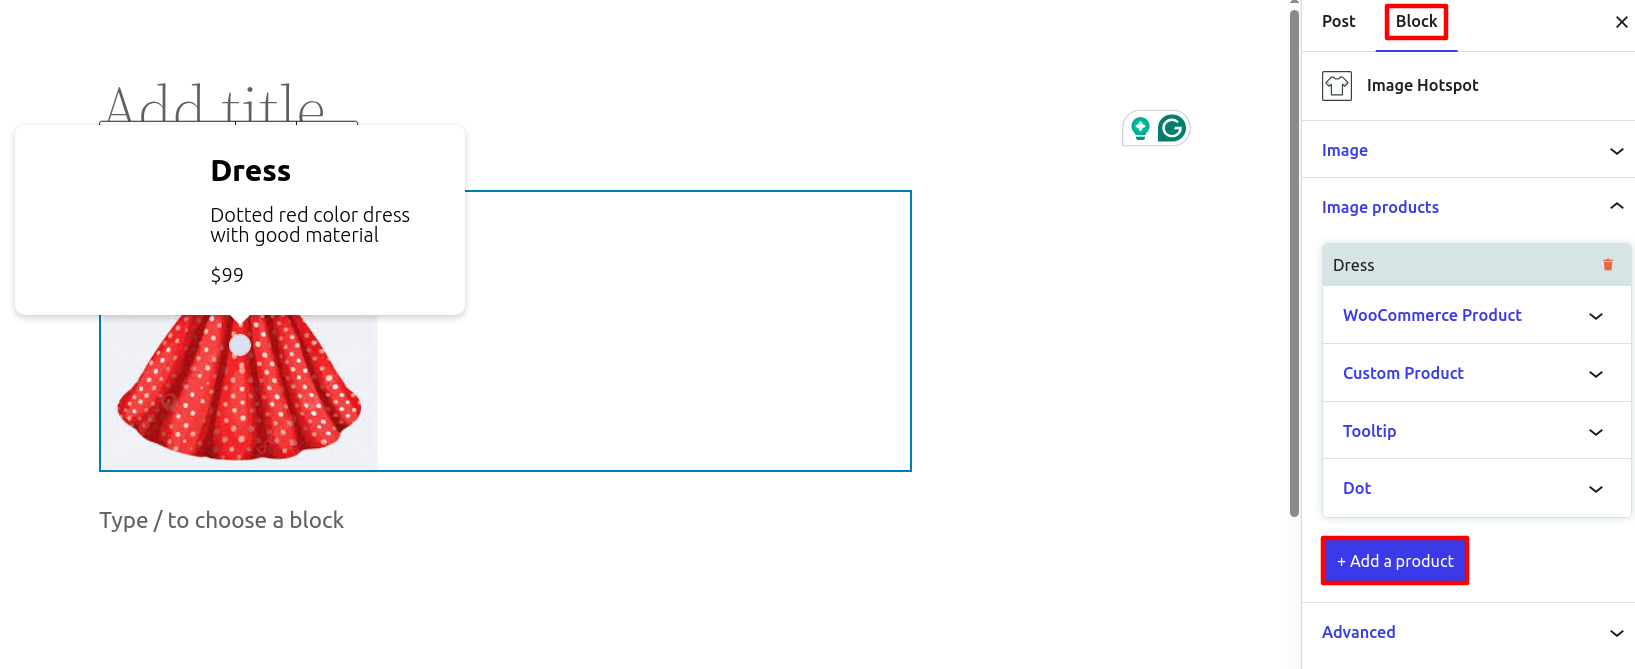
- Choose the image and click on Select.
In the Block tab, you can add multiple image hotspots. Move them to your desired position using the cursor with CTRL (in Windows) and Command (⌘) key (in Mac OS). And then add a description, price, and custom link.
Method 2: Using Page Builder
While creating image hotspots in WordPress using tools like SeedProd or Elementor is possible, we don’t recommend this method for beginners or those looking for a free solution. The image hotspot block is only available in the paid version of SeedProd, which means you'll need to purchase a plan and install the plugin if you're building a custom landing page or theme.
Similarly, if you’re using Elementor, image hotspots can be added using premium plugins like Premium Addons PRO or Qi Addons, but these features are only accessible through Elementor Pro.
Using Elementor
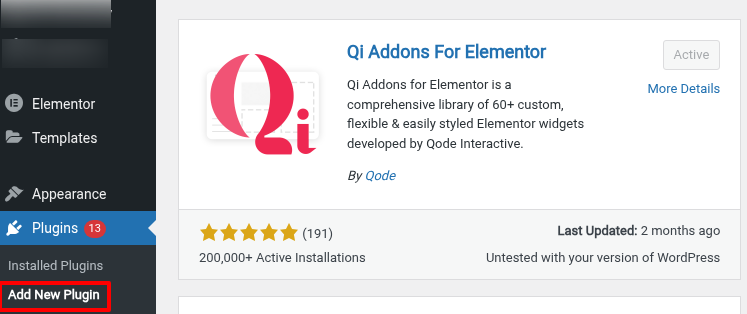
1. In your WordPress dashboard, navigate to Plugins > Add New.
2. Search for Qi Addons for Elementor.
3. Click Install Now, then Activate.
4. Open the page or post where you want to add the image hotspot.
5. Click Edit with Elementor to launch the Elementor editor.
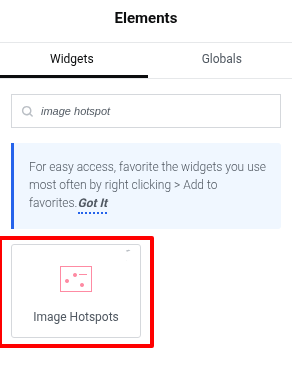
6. In the Elementor panel, search for Image Hotspots.
7. Drag and drop the Image Hotspots widget onto your page.
8. In the widget's settings, click on the Image section.
9. Upload a new image or select one from your media library.
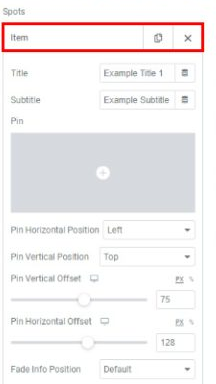
10. Under the Items section, you'll see default hotspot items. You can add new hotspots by clicking Add Item or remove existing ones.
11. Set the Title and Subtitle to define the information displayed when users hover over the hotspot.
12. Choose an Icon for the hotspot marker. You can select from the icon library or upload a custom SVG icon.
13. Adjust the Horizontal Position and Vertical Position to place the hotspot accurately on the image. Use the Offset options for fine-tuning.
14. Determine the Fade Info Position, which controls where the information appears relative to the hotspot.
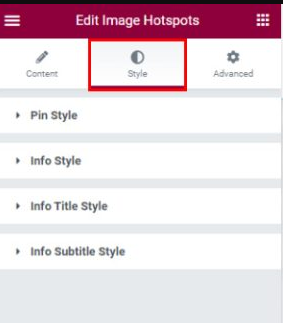
15. Navigate to the Style tab to customize the appearance of the hotspots:
- Pin Style: Change the size, color, and background of the hotspot pins.
- Info Style: Adjust the styling for the information box that appears on hover, including typography and colors for the title and subtitle.
- Title and Subtitle Styles: Further refine the typography, color, and spacing for the title and subtitle within the info box.
16. Use the responsive settings to adjust hotspot positions for different devices, ensuring that hotspots align correctly on various screen sizes.
17. Click Save or Publish to make the interactive image live on your site.
Image hotspots in WordPress help make static images more interactive and engaging by adding clickable areas with useful information. You can achieve this using plugins, page builders, or custom code, depending on your preferences.
This feature enhances user experience and is a great way to showcase products, locations, or important details visually. There are other plugins also available like Image Hotspot by DevVN, Draw Attention.
