
As your website grows, you may want to change certain things, like your WordPress username.
However, WordPress does not have a built-in option for this. If you go to the Users tab and select Profile, you’ll see that the username field is greyed out and cannot be changed.
Because of this, you’ll need to use a different method to update your username.
In this article, we’ll explain three ways to do it: editing the WordPress database, creating a new user, and using a plugin. But first, let’s look at why changing your username might be a good idea.
Why You Might Want to Change Your WordPress Username?
Your WordPress username, along with your password, is what gives you access to your site.
One of the main reasons to change it is security. Hackers often use automated tools to guess login details through brute-force or dictionary attacks, where bots repeatedly try different username and password combinations. In fact, brute-force attacks increased by 274% in the last four months of 2021.
If your username is something common like admin, it becomes an easy target, putting your website at risk.
Other reasons to change your username include:
- It looks too similar to another username on your site.
- A new username better matches your site’s branding or content.
- You made a typo or mistake when creating it.
- You’re transferring the site to someone else and need to update the username.
No matter the reason, picking a secure and unique username is important for protecting your website.
How to Change Your WordPress Username?
Now, let’s go over how to change your WordPress username.
Method 1: Change Your Username Using phpMyAdmin
This method involves editing your website’s database and requires some technical knowledge. If you're a beginner, proceed carefully.
Step-by-Step Guide:
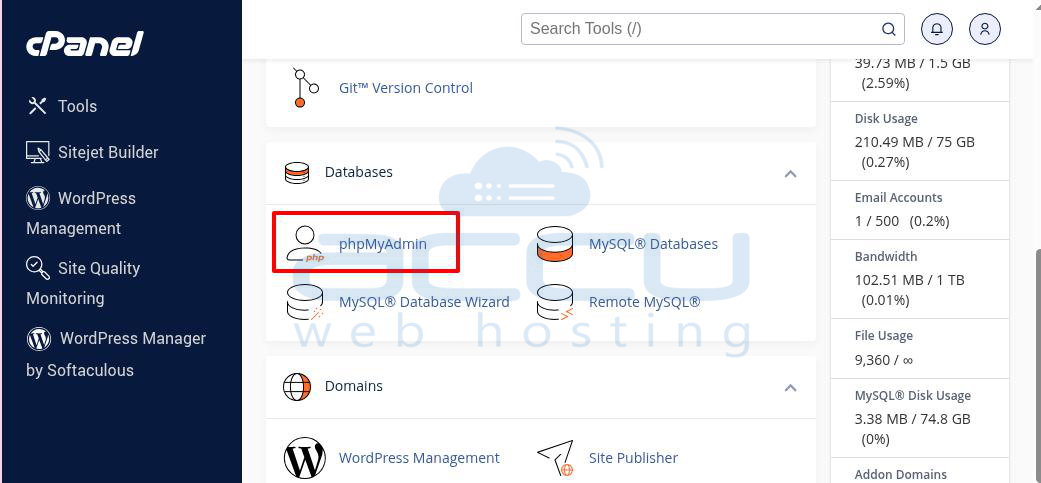
Step 1: Log in to your cPanel account.
Step 2: Go to the Database section and click on phpMyAdmin.
Step 3: In phpMyAdmin, find and click on the wp_users table. (The name may vary but usually ends with _users.)
Step 4: Look for your username under the user_login column.
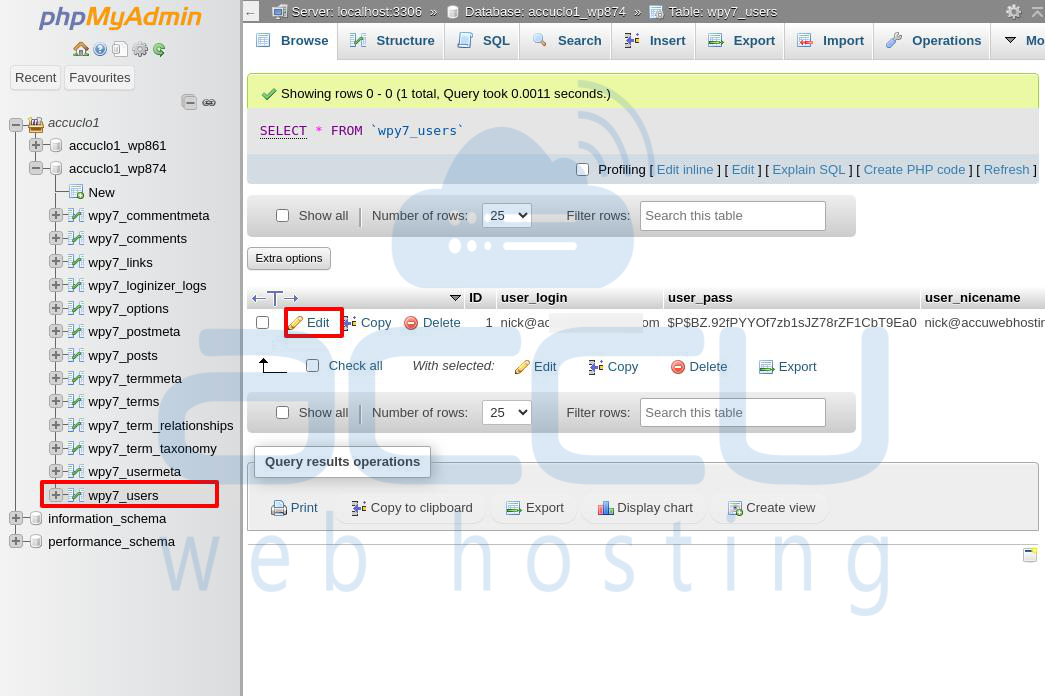
Step 5: Click Edit next to your username.
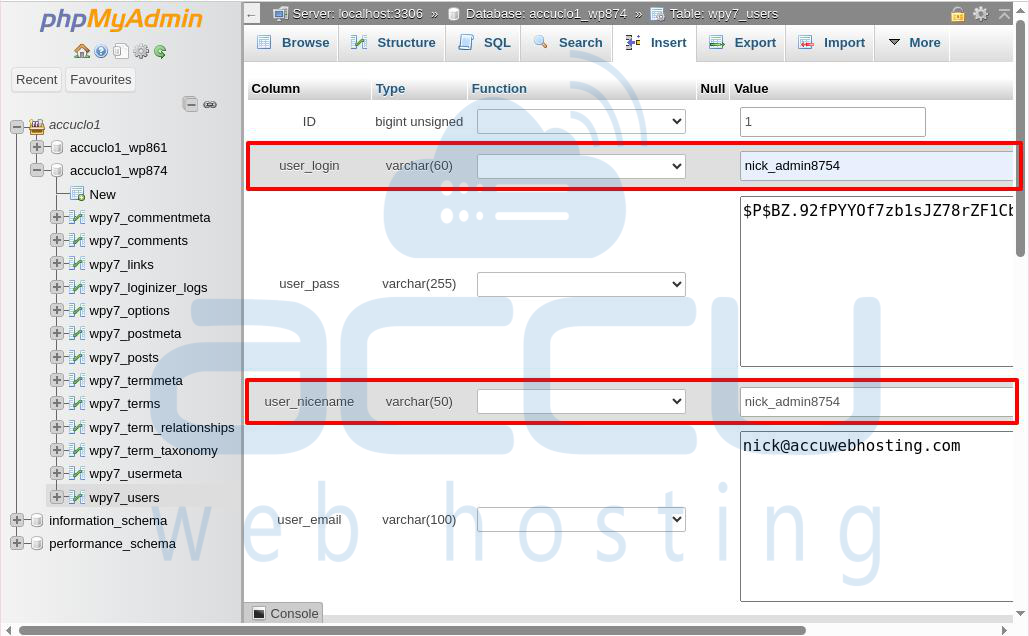
Step 6: Find the user_login row and enter your new username in the Value field.
- You may also want to update the user_nicename field (it should match your new username).
- The display_name field controls how your name appears on blog posts and profiles—update it if needed.
Step 7: Click Go to save the changes.
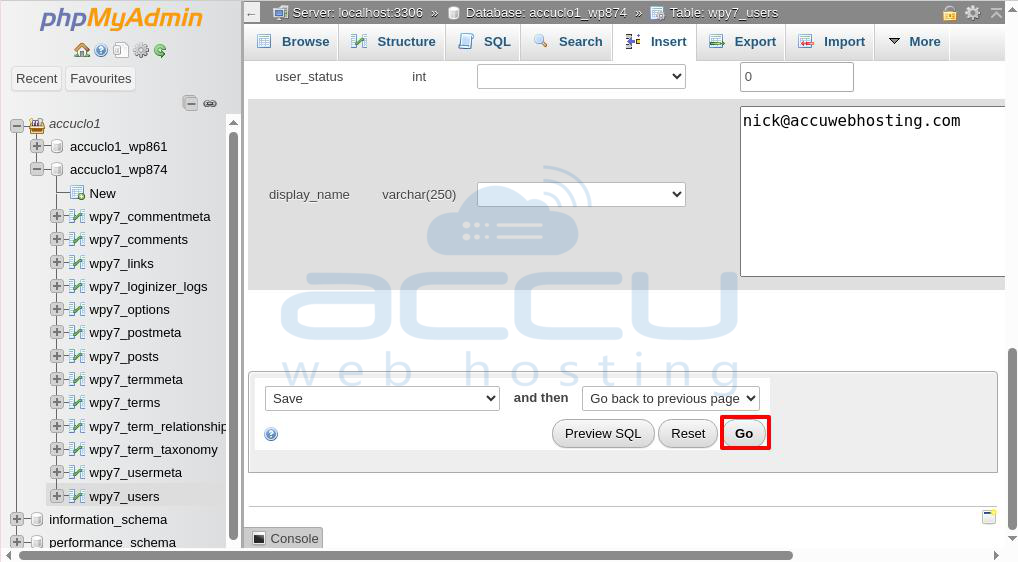
Your WordPress username is now updated!
Method 2: Create a New WordPress User and Delete the Old One
Another easy way to change your WordPress username is by creating a new account and deleting the old one. This method is simpler than editing the database.
Below is a step-by-step guide to creating a new admin account and transferring all posts and permissions from the old username.
Steps to Follow:
Step 1: Log in to your WordPress dashboard and go to Users -> Add New.
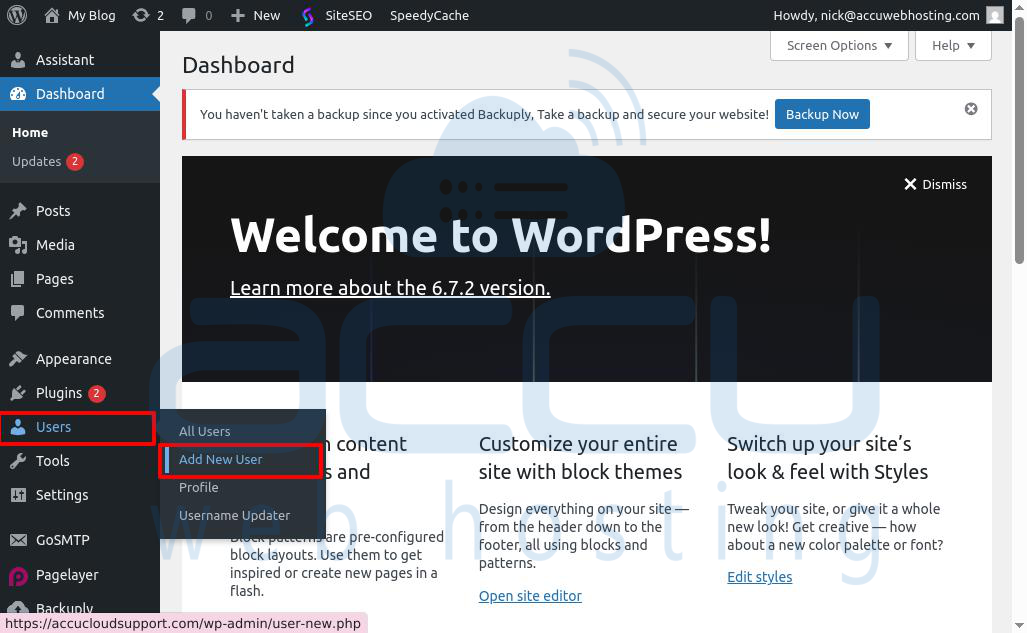
Step 2: Fill in the required details, including a new username, email, and password.
You must use a different email for now, but you can change it later.
Step 3: Set the role for the administrator to ensure full access.
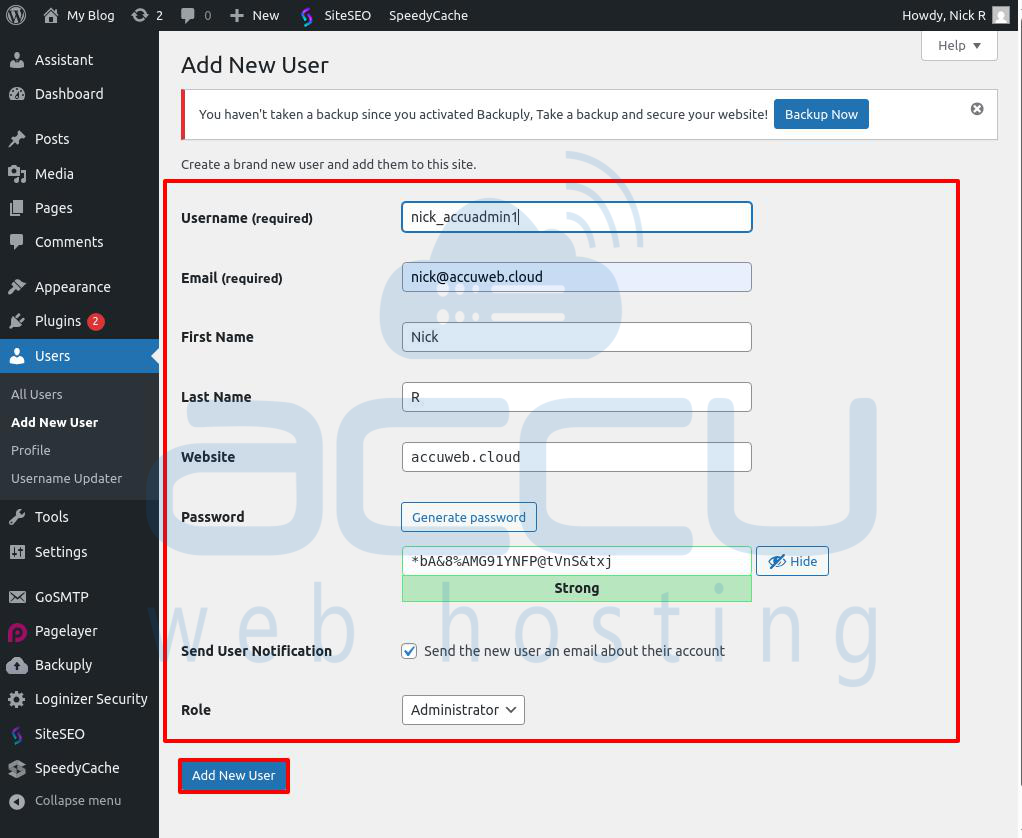
Step 4: Click Add New User to create the account.
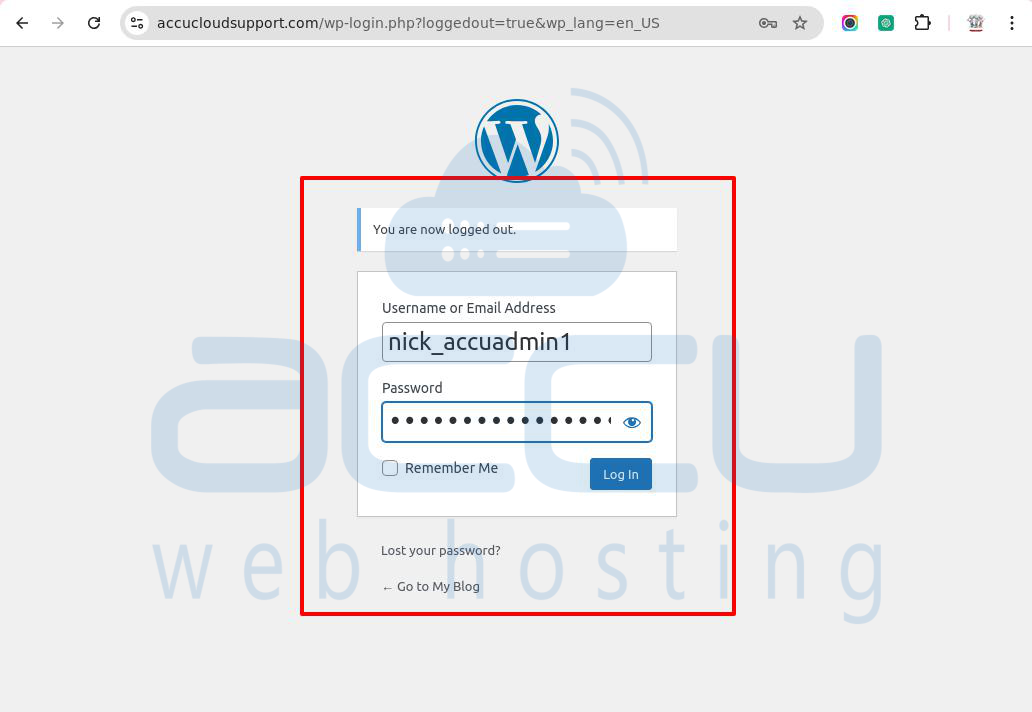
Step 5: Log out and log back in using your new admin account.
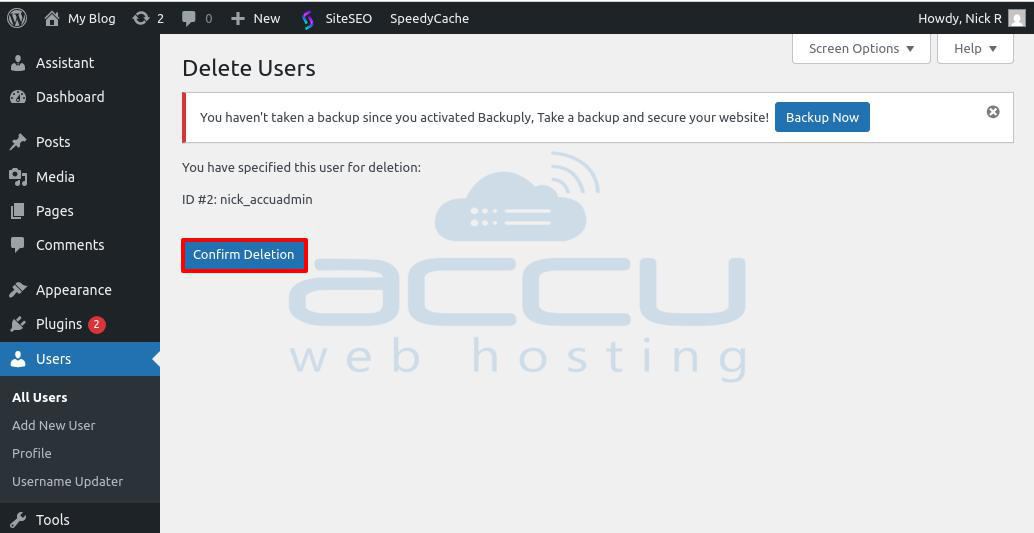
Step 6: Go to Users -> All Users, find the old admin account, and click Delete.
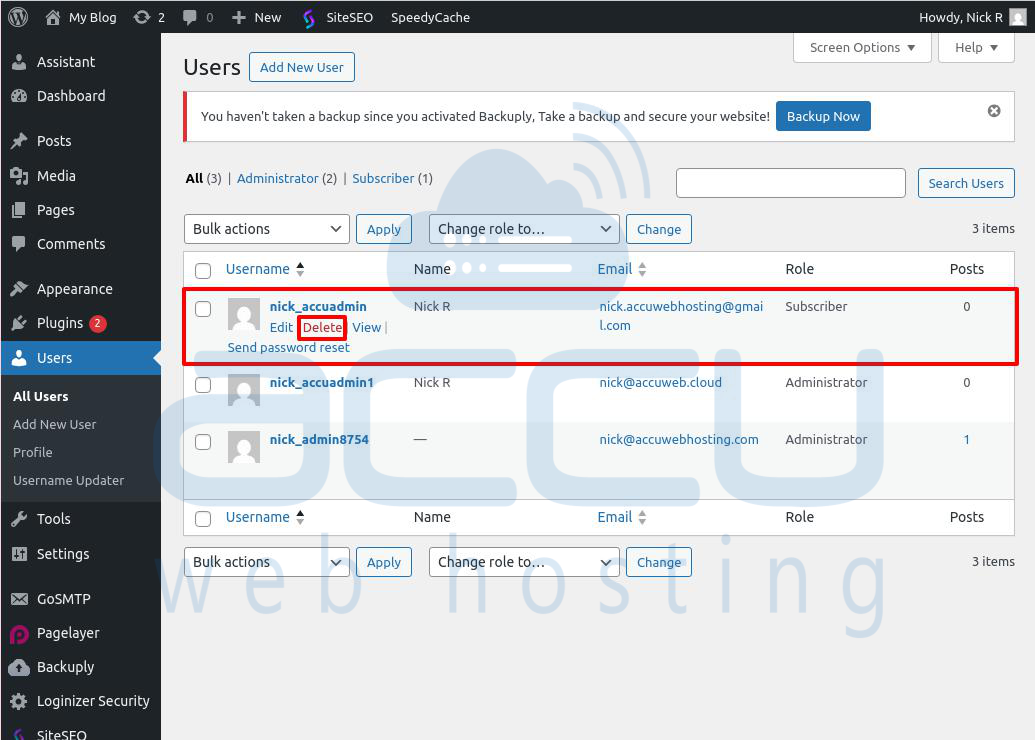
Step 7: WordPress will ask if you want to reassign the old account’s posts. Select "Attribute all content to" and choose your new username.
Step 8: Click Confirm Deletion to remove the old account.
Your new WordPress account is now fully set up, and all posts and permissions have been transferred.
Method 3: Use a Plugin
The easiest way to change your WordPress username is by using a plugin. A username changer plugin lets you update your username directly from the WordPress dashboard.
There are several plugins available for this, but in this guide, we’ll use Easy Username Updater as an example.
Steps to Change Username Using a Plugin:
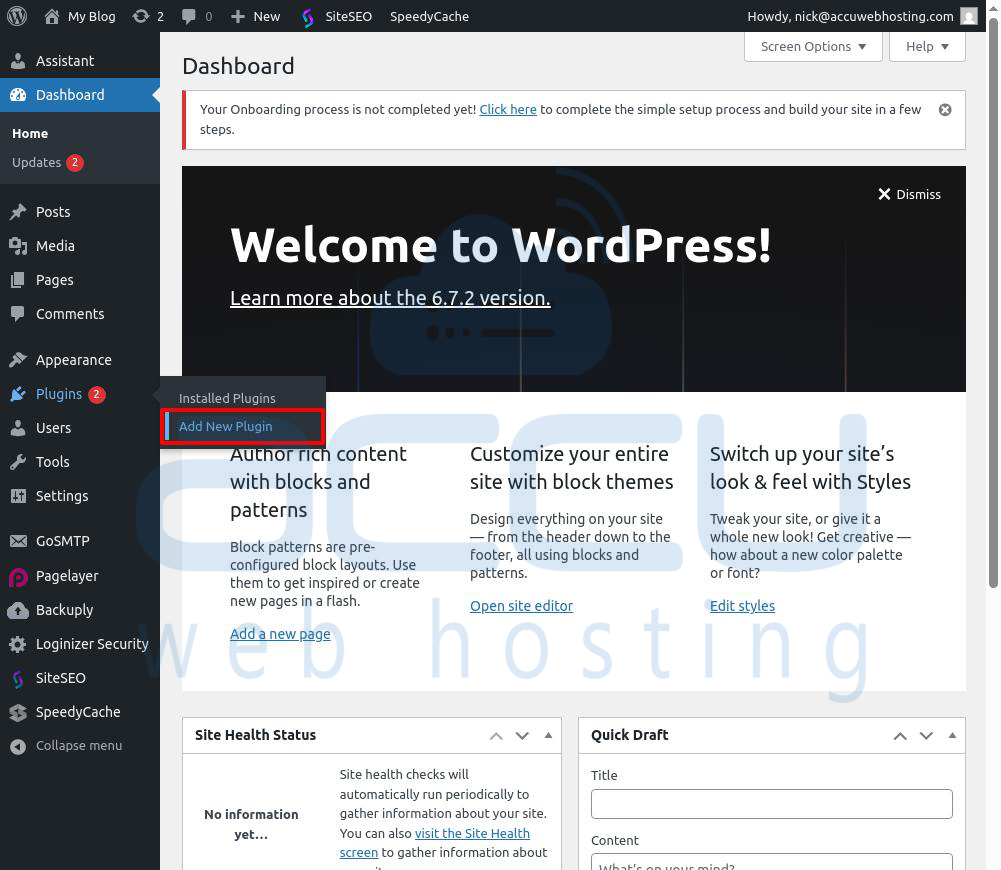
Step 1: Go to your WordPress dashboard and navigate to Plugins -> Add New.
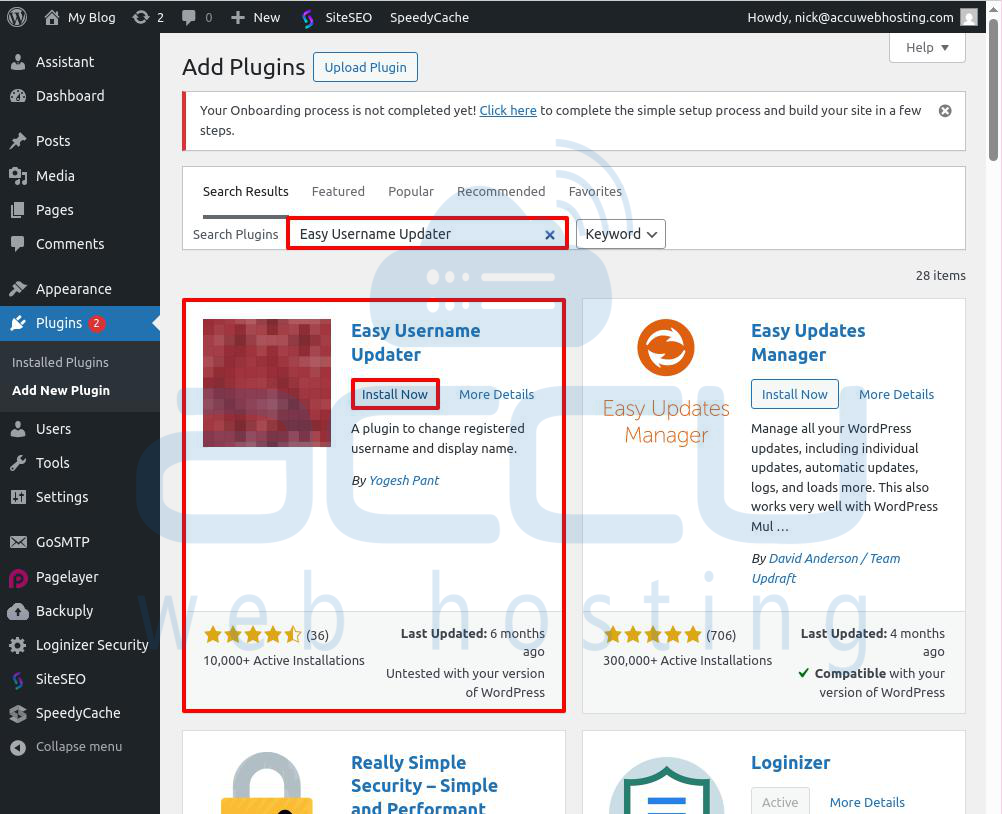
Step 2: In the search bar, type "Easy Username Updater" and press enter.
Step 3: Find the plugin in the results and click Install Now.
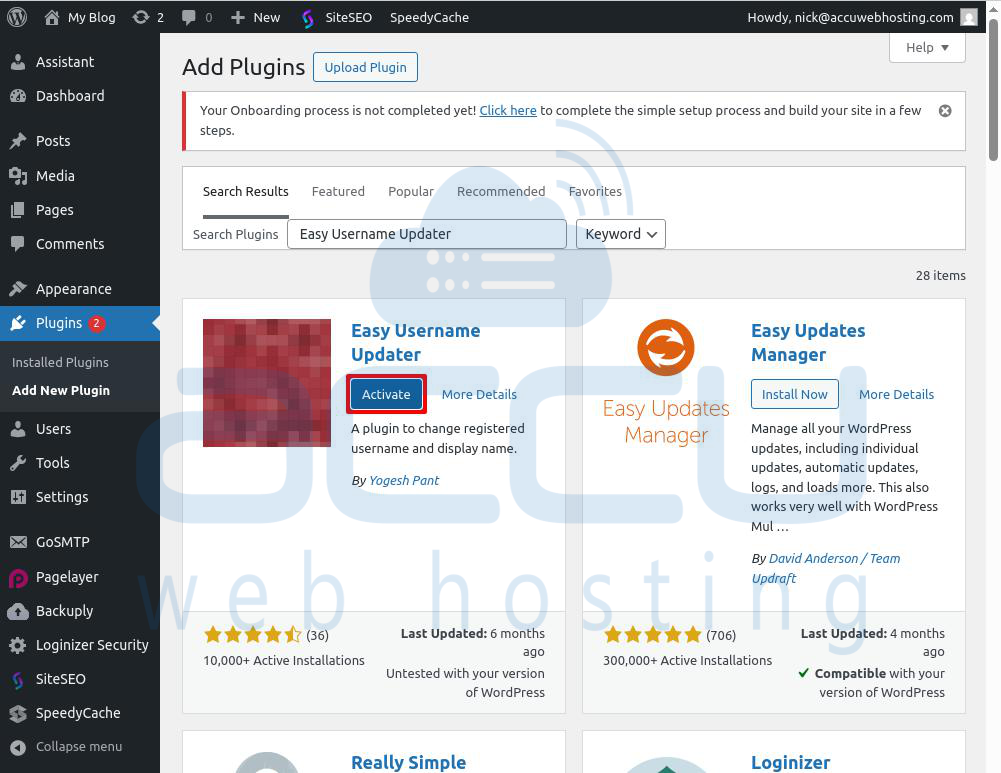
Step 4: After installation, click Activate to enable the plugin.
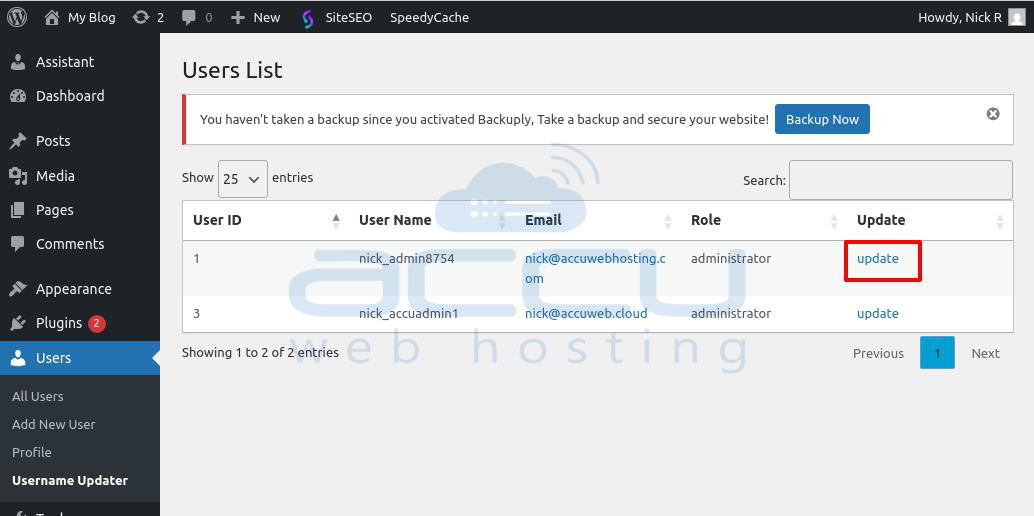
Once activated, a new Easy Username Updater option will appear under the Users menu.
Step 5: Click on it to see a list of all users, along with their emails, roles, and user IDs.
Step 6: Find the username you want to change and click Update next to it.
Step 7: On the next screen, enter your new username in the provided field.
Step 8: (Optional) Check the box to send an email notification about the username update.
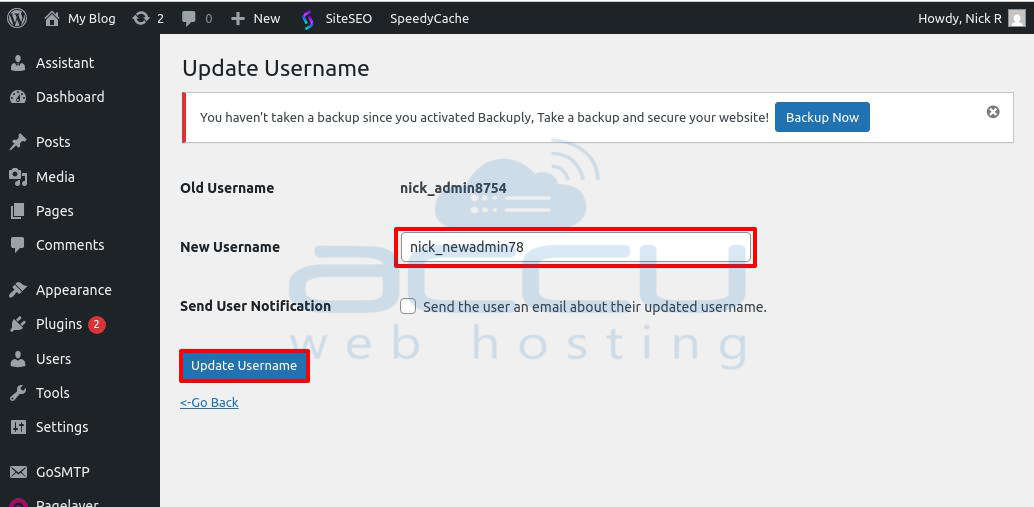
Step 9: Click Update Username to save the changes.
- Double-check the user list to make sure the username has been updated.
- If the plugin doesn’t work, make sure it’s compatible with your other installed plugins. Different plugins may have slightly different steps, but the process is generally similar.
Conclusion
Changing your WordPress username can be useful for security, branding, or transferring ownership. Since WordPress doesn’t allow username changes by default, you can use these three methods:
Edit the database via phpMyAdmin – Directly change the username in the wp_users table (backup your site first).
Create a new account and delete the old one – Transfer all content to the new username before deleting the old account.
Use a plugin – Install a username changer plugin to update it easily from the WordPress dashboard.
Always use a unique and secure username to keep your website safe from hackers!