Dealing with a new idea can be frustrating. When you run a WordPress website, you must use your technical skills. You probably know that millions of websites are hacked yearly, and you don't want your site to be one of them.
The wp-login or wp-admin page isn't the only place hackers can try to break into your site. WordPress's XML-RPC feature lets other systems talk directly to your site, which can create a big vulnerability.
Login security is a significant part of WordPress security. People often try hard to hide their login pages or not use 'admin' as a username. Turning off XML-RPC is crucial and might be more effective than other security measures.
What is XML-RPC?
XML-RPC is a protocol created by Dave Winer in 1998 for exchanging information between computer systems over a network. It uses HTTP for transport and allows complex data to be transmitted and processed.
What is the Xmlrpc.php file, and why should it be disabled?
XML-RPC is a WordPress feature that uses HTTP and XML to transmit data between systems. WordPress must interact with other systems, like posting from a mobile device using xmlrpc.php for remote access. This file also handles trackbacks, pingbacks, and functions from plugins like Jetpack and other websites.
The old xmlrpc.php file is included in every WordPress setup, but it's best to disable it to protect your site from security risks. Even though REST API has replaced XML-RPC, WordPress keeps it for backward compatibility. This means older WordPress versions can still function smoothly without updates.
XML-RPC is vulnerable to specific types of attacks:
DDoS attacks via pingbacks: If XML-RPC is enabled, attackers can exploit pingbacks to overload your site with requests from other pages linking to yours, potentially causing a DDoS attack. The more secure REST API now handles pingbacks.
Brute force attacks: XML-RPC exposes login information during requests, making the xmlrpc.php file a target for hackers attempting to guess passwords or usernames.
Method 1: Disable XML-RPC with .htaccess from cPanel:
If your website uses XML-RPC, you can check it using a tool called XML-RPC validator. To disable XML-RPC on WordPress sites, you can use plugins or do it manually through cPanel's File Manager. Here are the steps to disable XML-RPC in cPanel:
Step 1: Log in to your cPanel with your username and password.
Step 2: Go to the file manager and navigate to the root folder, usually named 'public_html'.
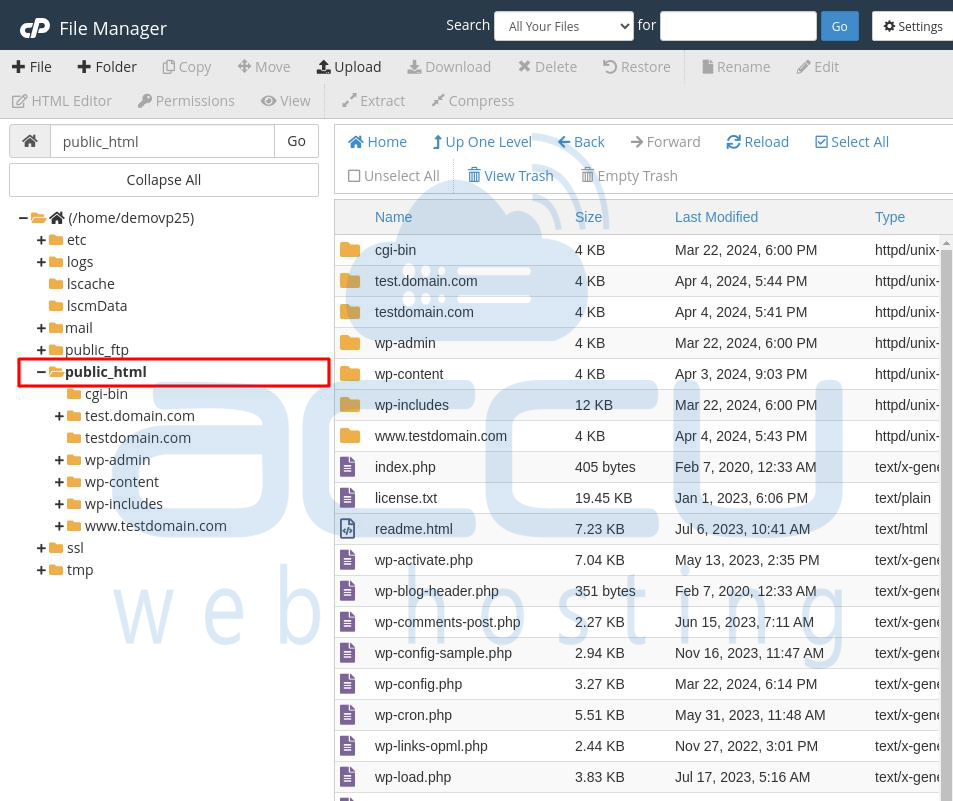
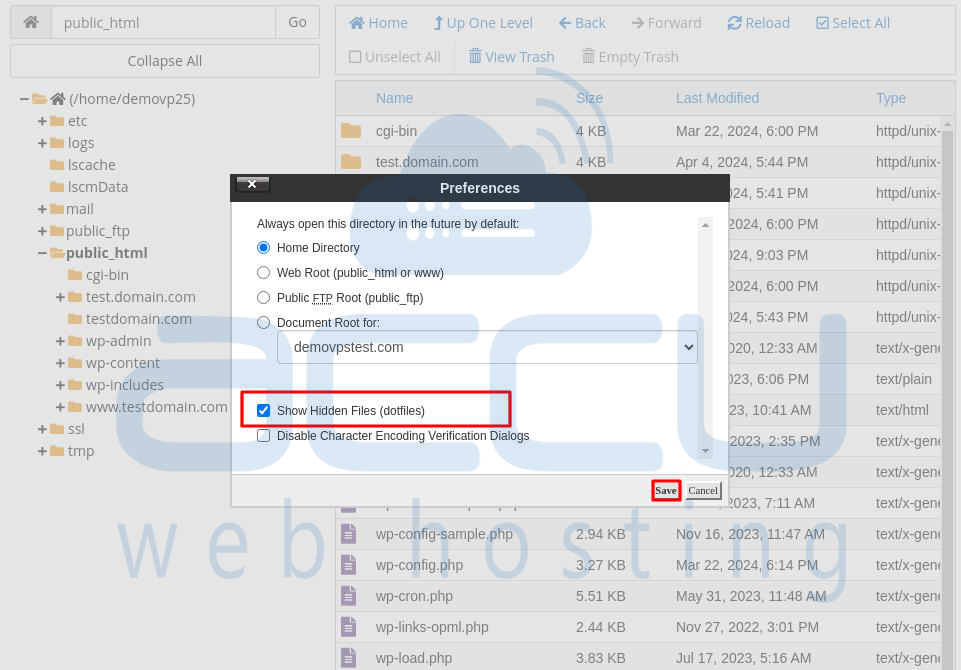
Step 3: Look for the .htaccess file in the public_html directory. If you don't see it, enable the display of hidden files by clicking the gear icon in the top-right corner.
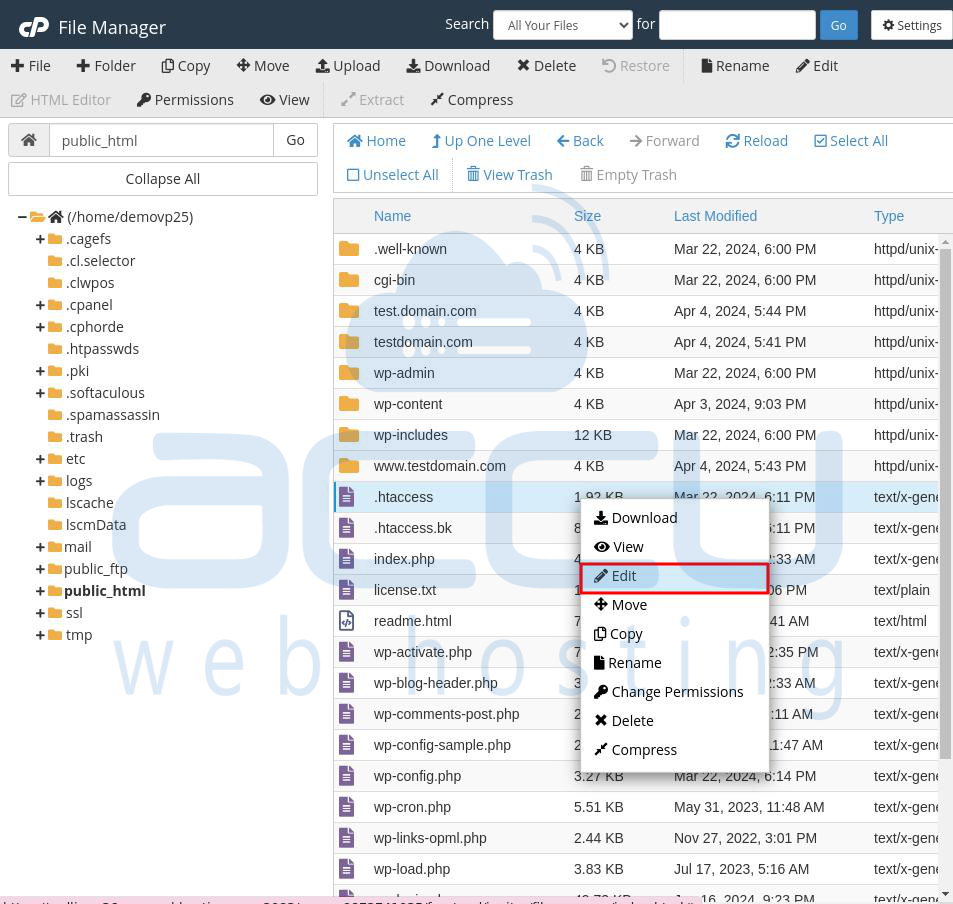
Step 4: Right-click on the .htaccess file and select 'Edit'.
Step 5: A new popup will appear for editing. Click 'Edit' to open a new tab in the browser.
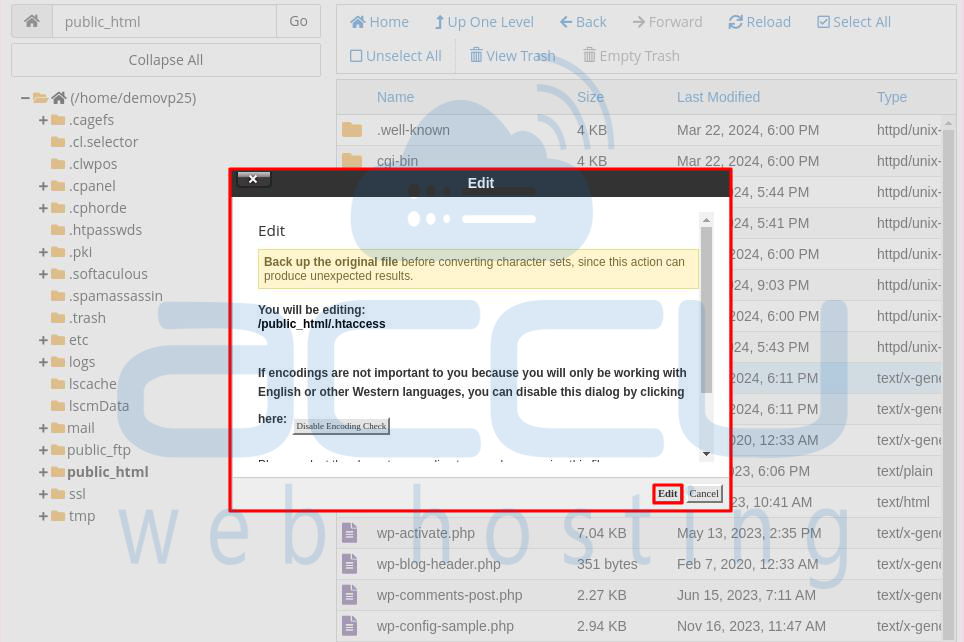
Step 6: Copy and paste the following code into the .htaccess file. Then, click the Save Changes button to save it.
# Block XML-RPC
<Files xmlrpc.php>
order deny, allow
deny from all
allow from // IP
</Files>
After adding this code, the xmlrpc.php file on your website will be disabled, improving security and reducing potential threats.

Method 2: Disable WordPress XML-RPC With a Plugin
The easiest and quickest way to disable XML-RPC in WordPress is by installing a plugin. In this tutorial, I'll use a plugin called "Disable XML-RPC" developed by Philip Erb.
Here are the steps:
Step 1: Log in to your WordPress admin dashboard.
Step 2: Go to Plugins -> Add New Plugin.
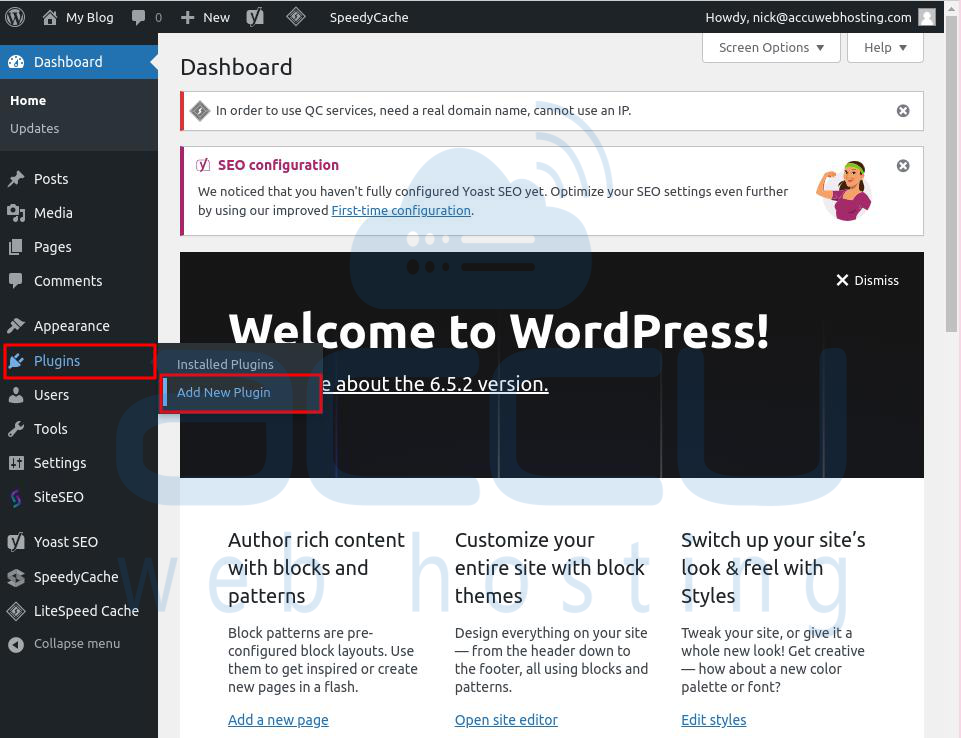
Step 3: Search for "Disable XML-RPC" and install it.

Step 4: Click on Activate to activate the plugin on your site. This will disable the xml-rpc.php file.

That's it! Like garlic keeps vampires away, activating the "Disable XML-RPC" plugin on your WordPress site will disable XML-RPC.
If you want to keep XML-RPC active but remove specific abused features, consider using the "Disable XML-RPC Pingback" plugin instead.
Method 3: Disable xmlrpc.php using custom code (Without a plugin)
Another way to turn off XML-RPC on your WordPress site is by using a filter. This method involves creating a custom plugin and adding a simple line of code. It's a bit complex, so we recommend backing up your site first. You can use BlogVault for an easy backup. Here's how to set it up:
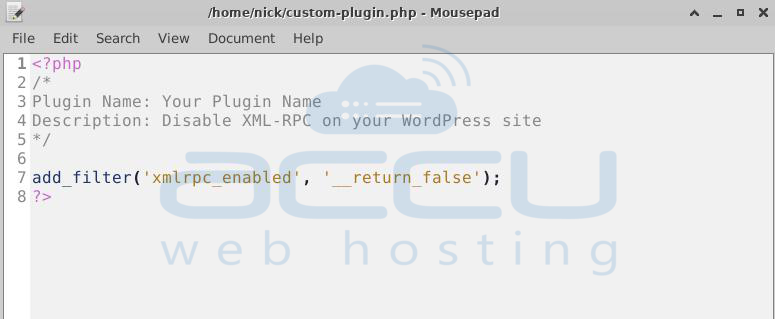
Step 1: Open a text editor and create a new file named "your-plugin-name.php" (replace "your-plugin-name" with any name you like).
Step 2: Copy and paste the following code into the file:
<?php
/*
Plugin Name: Your Plugin Name
Description: Disable XML-RPC on your WordPress site
*/
add_filter('xmlrpc_enabled', '__return_false');
?>
This code creates a custom plugin that disables XML-RPC on your site.
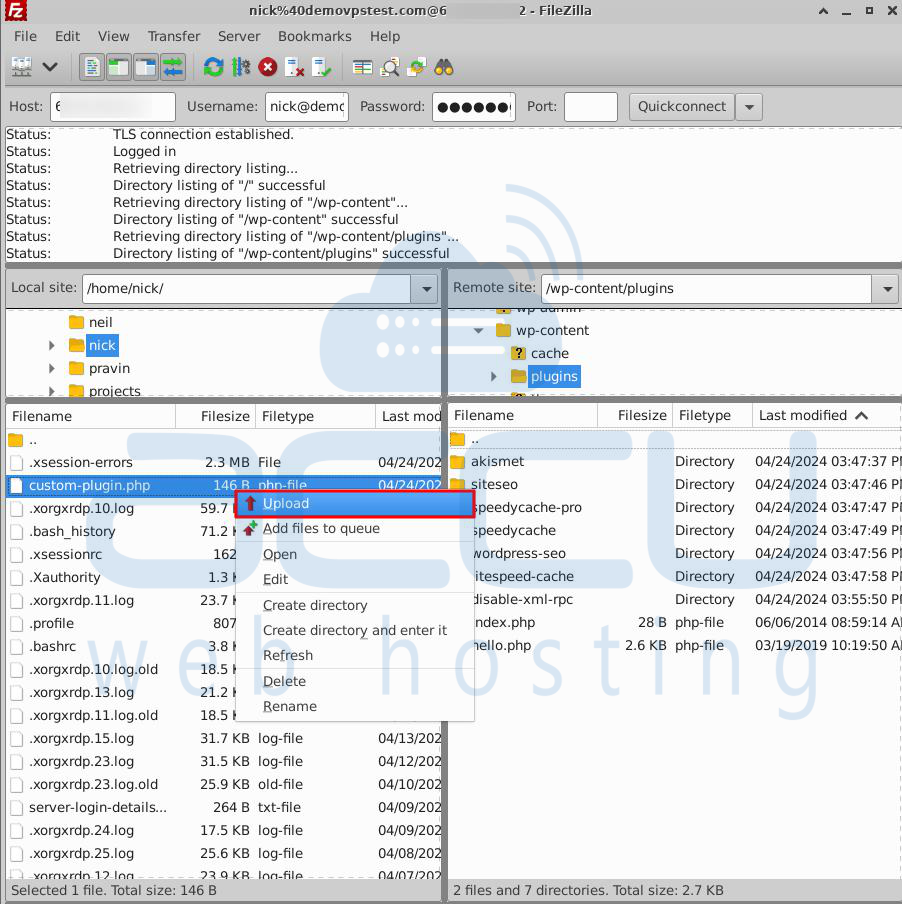
Step 3: Save the file and upload it to your WordPress site's wp-content/plugins directory using FTP or your web hosting file manager.
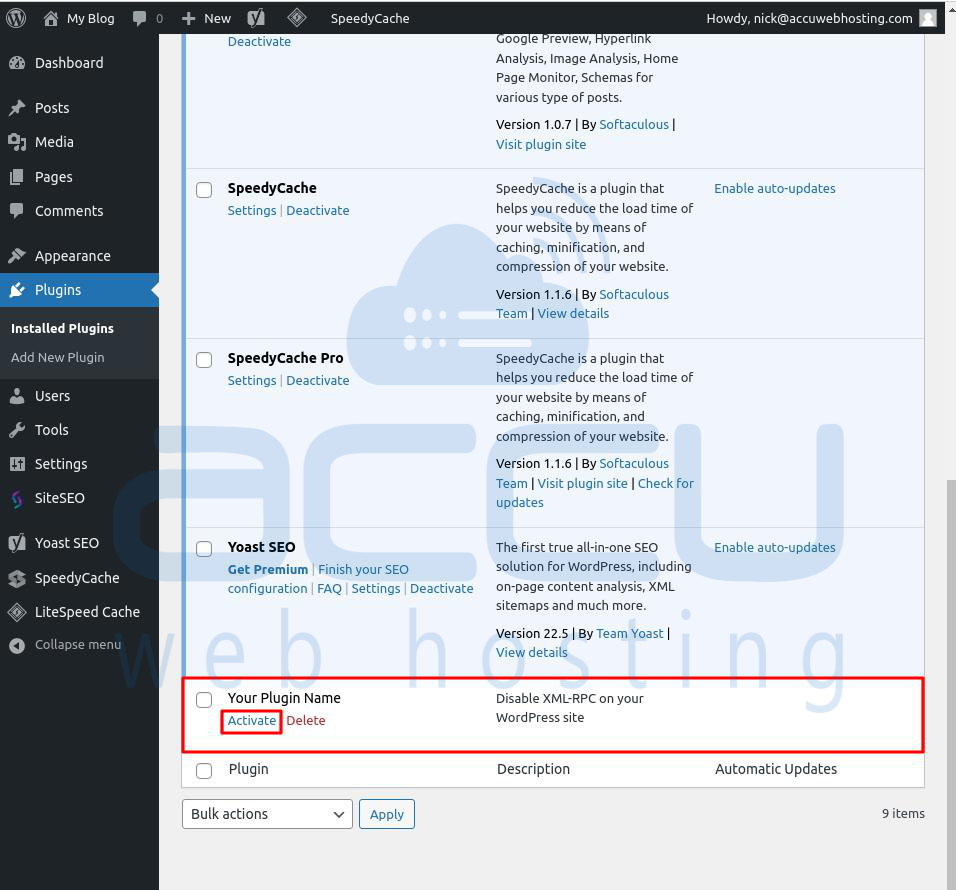
Step 4: Activate the plugin by going to Plugins -> Installed Plugins and clicking "Activate" next to your plugin.
Using XML-RPC can also pose a risk of a DDoS attack, where hackers send pingbacks to many sites simultaneously. The xmlrpc.php feature can support these attacks by providing hackers with numerous IP addresses to carry out the attack.
Conclusion:
XML-RPC was a helpful way for apps and services to talk to WordPress. However, the REST API is more commonly used for this purpose. WordPress still includes the xmlrpc.php file for compatibility reasons, but it's unnecessary to keep it enabled because it can create security issues that malicious users may exploit.
To disable XML-RPC in WordPress, install and activate the Disable XML-RPC plugin or modify the .htaccess file.
Disabling XML-RPC can slightly improve your website's security, but it won't protect against malware, DoS attacks, hacking attempts, or other threats. For comprehensive security for your WordPress site, consider using MalCare. It offers daily automatic malware scans, easy malware removal, a strong firewall, IP address blocking, real-time security alerts, and a user-friendly interface for quick access to features.
