An XML sitemap is a file that lists all the content on your website in a particular format. It helps search engines find and understand your content better, which can attract more visitors and improve your SEO.
However, some WordPress SEO plugins already have sitemaps included. This means your site might have two sets of sitemaps, confusing search engines and making your SEO worse. To avoid this, use an SEO plugin for your sitemap. Many popular WordPress SEO plugins offer extra features like Video Sitemaps, News Sitemaps, and RSS Sitemaps, which can help your site improve in SEO.
WordPress has its own XML sitemap feature, which automatically turns on when you install your site. However, it doesn't have all the fancy SEO stuff.
What's an XML Sitemap?
An XML sitemap helps search engines understand what's on your website, allowing them to rank your site better on search result pages. It shows your website's content in a way that search engine bots can easily read and understand. It puts all your website's stuff in a format called XML, making it simple for search engines to find and understand your website's content.
Why Turn Off the Default Sitemap?
-> Many SEO plugins, like Yoast SEO or All in One SEO, already have a sitemap feature. Turning off the default one prevents you from having two sitemaps, which can confuse search engines.
-> If you don't have many pages on your site, you might not need the default sitemap.
-> Sometimes, the default sitemap can cause problems with other plugins or themes. Turning it off can help fix these issues.
How do you disable the default WordPress sitemap?
Let’s see how you can easily disable the default WordPress sitemap. There are four ways to disable the default WordPress sitemap.
1. Disable WordPress Default wp-sitemap.xml using Plugin
2. Disable WordPress Default wp-sitemap.xml without Plugin
3. Using Theme functions.php
4. Using WPCode Snippet
Method 1: Disable WordPress Default wp-sitemap.xml using Plugin
We'll use a plugin to stop the default wp-sitemap.xml made on WordPress.
Step 1: Login into your WordPress Dashboard.
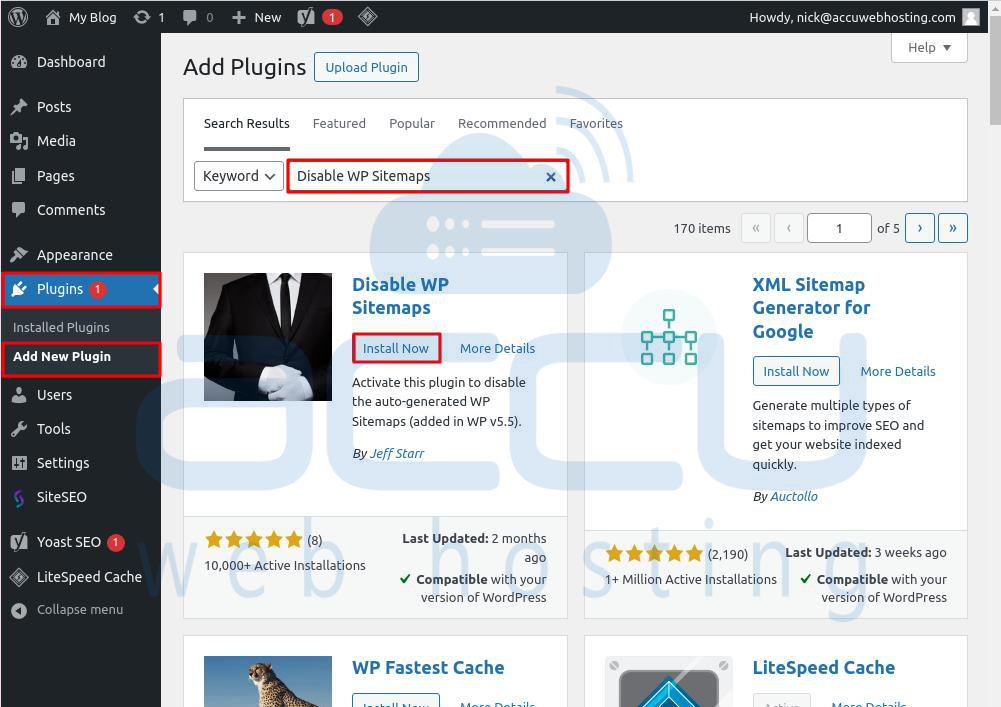
Step 2: Go to the Plugins -> Add New Plugin option.
Step 3: Look for a plugin called 'Disable WP Sitemaps' and click the Install Now button to install it.
Step 4: After that, click on the Activate button to activate it.
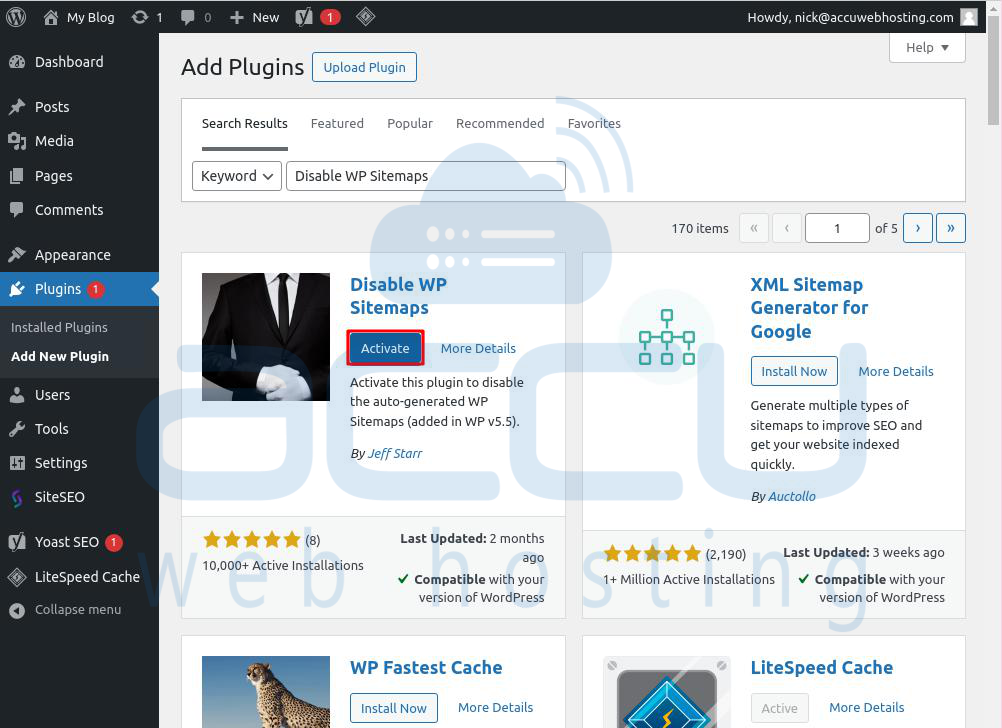
Step 5: After it's activated, your WordPress site's default XML sitemap will disappear, and a 404 error page will appear.
Method 2: Disable WordPress Default wp-sitemap.xml without Plugin
Now, we will remove the default wp-sitemap.xml on WordPress without using any plugins. We will use a PHP function code for this, which helps improve WordPress's security and performance. It also protects against any potential harm from third-party plugins. Here's how to do it:
Open File Manager via cPanel and go to the public_html -> wp-content -> themes. Select the active themes folder and open the functions.php file in the editor mode.
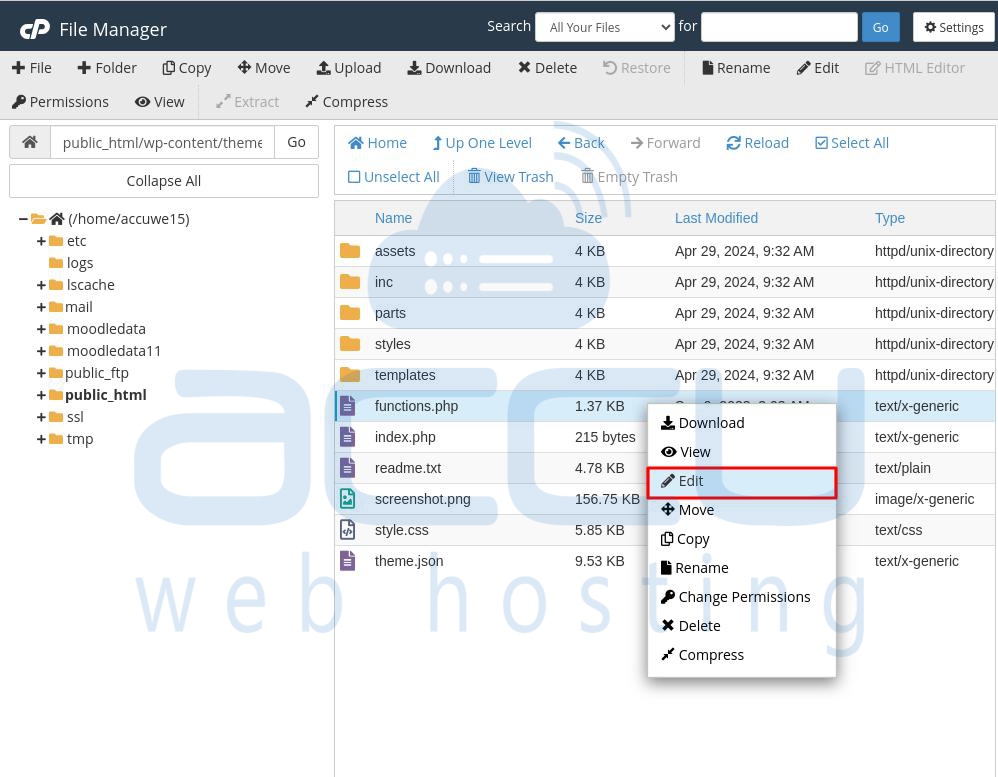
Add the following PHP function code:
add_filter( 'wp_sitemaps_enabled', '__return_false' );

But be aware that this only hides the XML sitemap and keeps all the functions. If you want to remove WordPress XML sitemap functionality completely, insert the below-mentioned code in the functions.php file of your theme:
add_action( 'init', function() {
remove_action( 'init', 'wp_sitemaps_get_server' );
}, 5 );
Method 3: Disable Default wp-sitemap.xml using Theme Function.php
To remove WordPress's default XML file, go to the Theme Editor in the Themes section of WordPress. Then, find the functions.php file and add the following code at the end of functions.php. Save it, and WordPress's default XML file will be deleted soon after.
add_filter( 'wp_sitemaps_enabled', '__return_false' );
But be careful! Adding code to your functions.php file can cause problems if there's even a small mistake. We suggest using WPCode to add custom code to WordPress instead.
Method 4: Disable Default wp-sitemap.xml Using WPCode Snippet
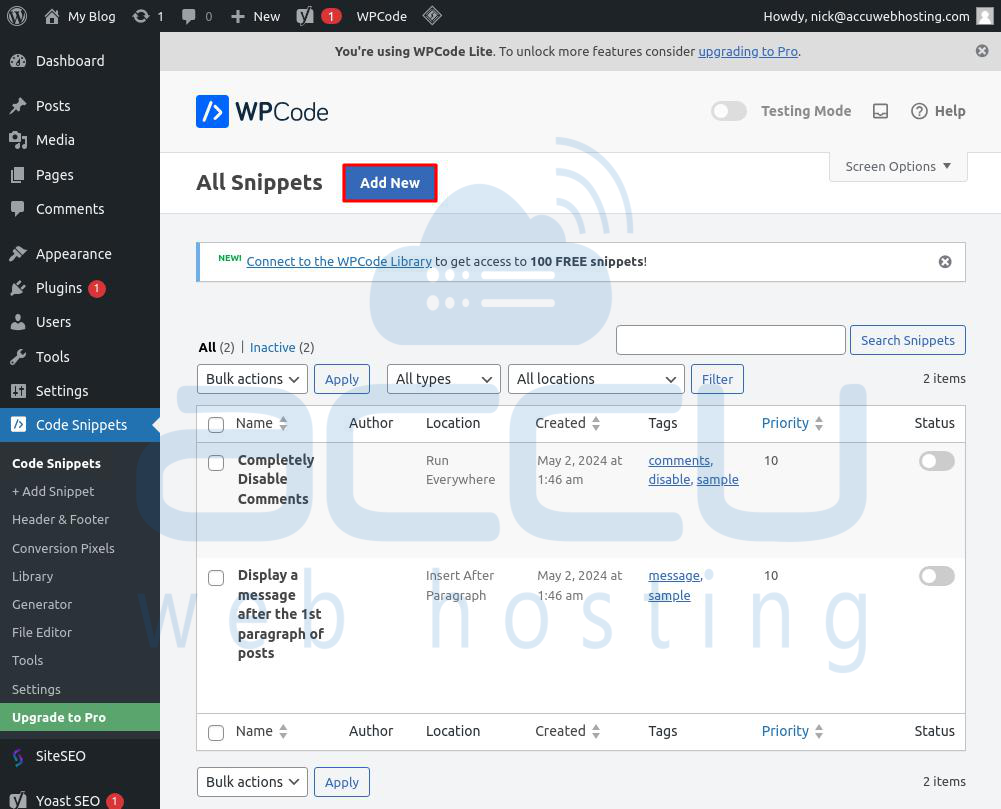
First, go to the new Code Snippets section in the left-hand menu of your WordPress dashboard. This will take you to the ‘All Snippets’ page.
Then, click on the ‘Add New’ button.
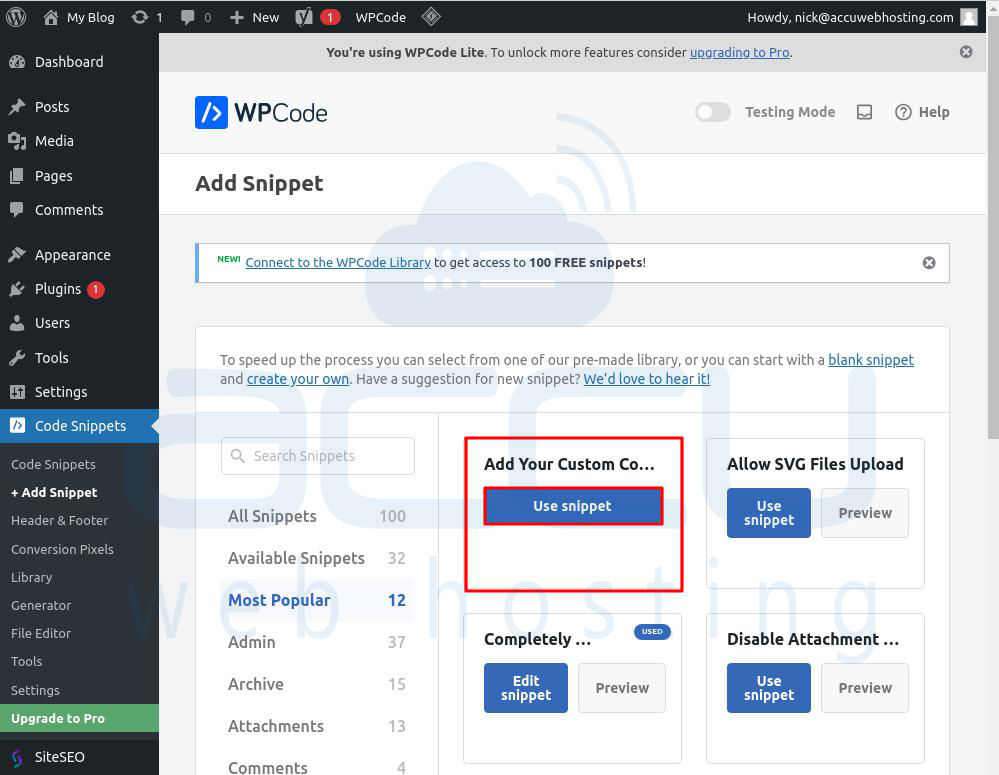
WPCode will then guide you to the ‘Add Snippet’ page, where you can add your custom code or search for existing snippets from the WPCode library.
Since we're adding custom code, hover over the ‘Add Your Custom Code (New Snippet)’ option and click ‘Use snippet.’
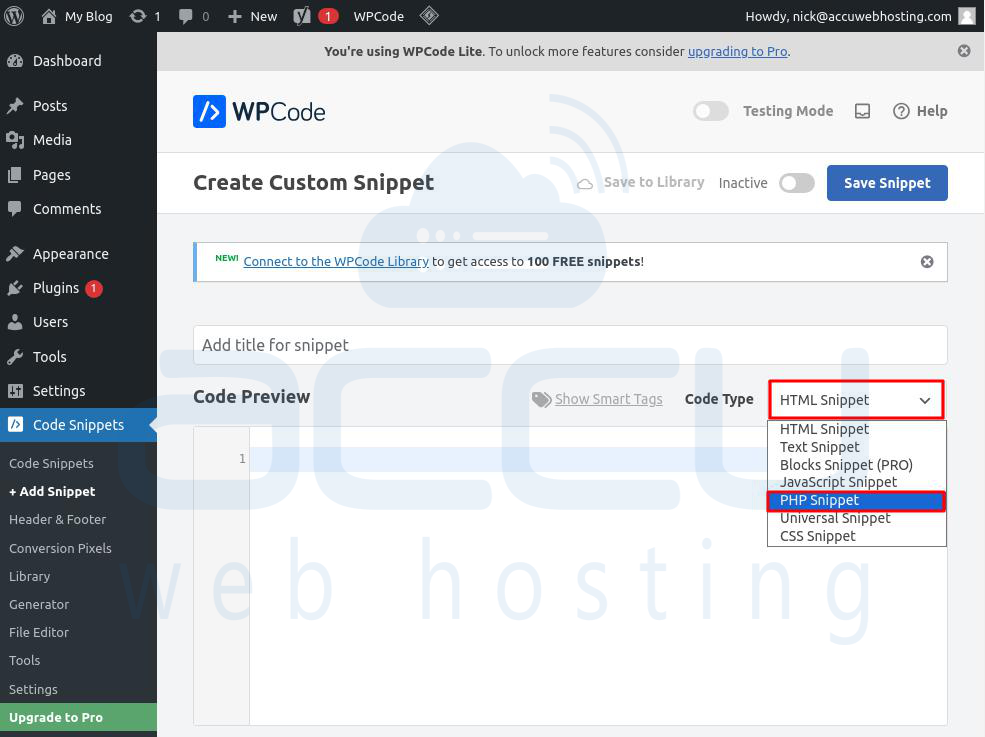
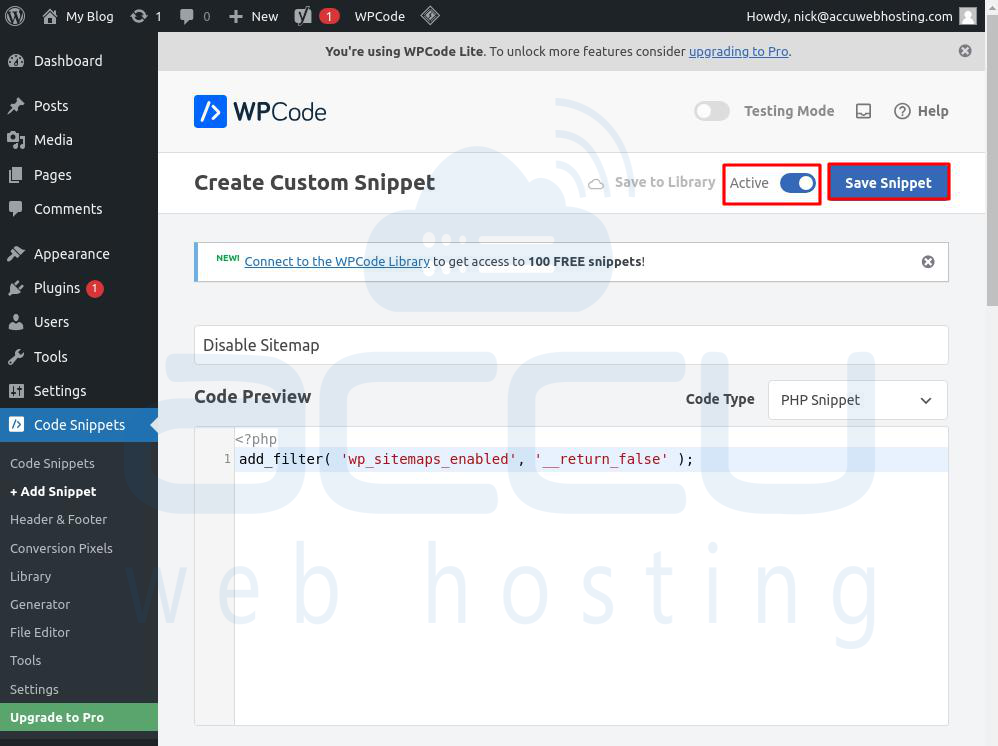
You'll be taken to the ‘Create Custom Snippet’ page. Start by typing a name for your code snippet.
Then, choose ‘PHP Snippet’ from the dropdown menu next to ‘Code Type’, as we'll use PHP code.
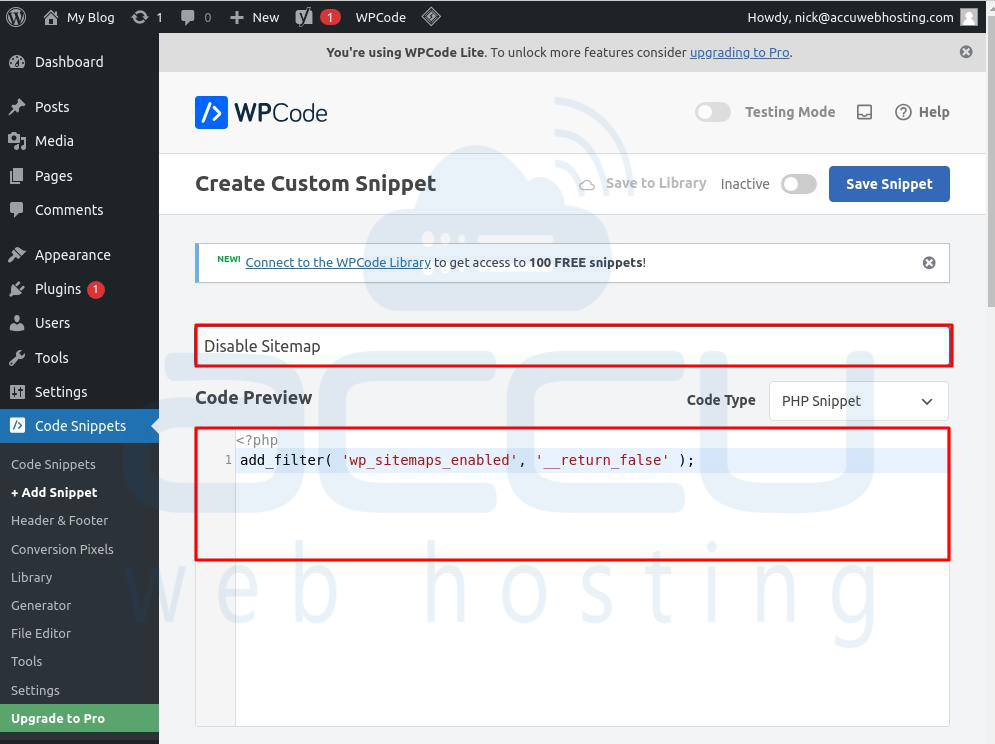
Next, copy and paste the following PHP code snippet into the ‘Code Preview’ box:
add_filter( 'wp_sitemaps_enabled', '__return_false' );
It will look like this once you have pasted it.
Scroll down to the ‘Insertion’ section after pasting the code. You'll find two insertion methods.
Select the ‘Auto Insert’ option since you want it to run sitewide.
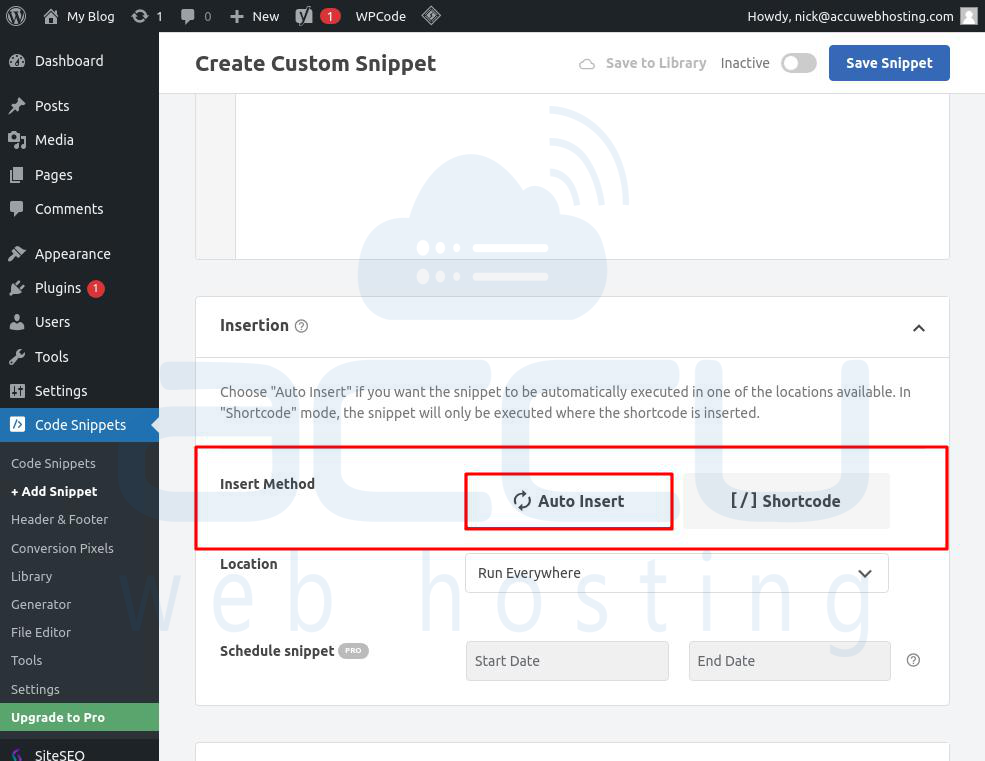
Now, toggle the switch from ‘Inactive’ to ‘Active’ at the top right corner of the page and click the ‘Save Snippet’ button.
Once you've saved and activated the code snippet, it will be active, and the default WordPress sitemap will be disabled.
Remove Yoast Default Sitemap
You can get rid of the automatic sitemap_index.xml created by Yoast SEO. Here are the steps to turn off Yoast XML Sitemaps from the WordPress dashboard.
Step 1: Go to Yoast in your WordPress dashboard.
Step 2: Click "Settings" and "Site features".
Step 3: Scroll to the bottom of the page and turn off "XML sitemaps." Then, click on the Save Changes button to save the changes.

The default sitemap will disappear soon after.
Conclusion:
Turning off the default WordPress sitemap is easy if you follow the right steps. Just make sure you have another sitemap set up so search engines can still easily check your website. By following these steps and doing things the right way, you can ensure your website stays good for SEO.
