How to install a Zabbix agent on CentOS 7?
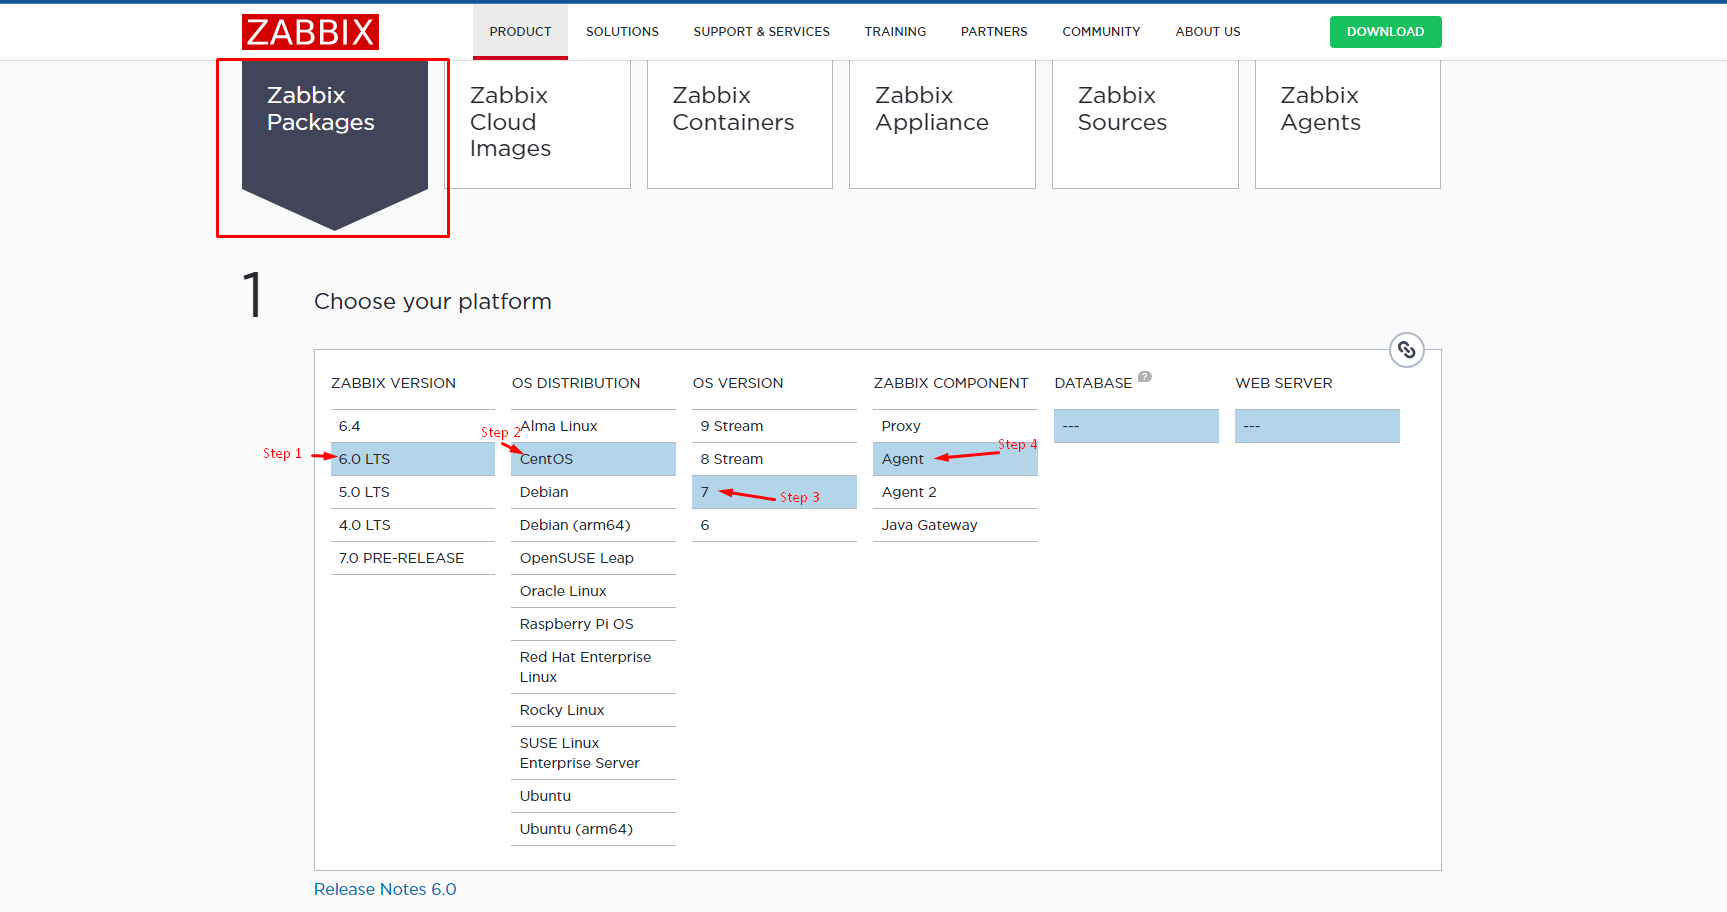
(1) You can download the Zabbix Packages from the download link. Select
- Zabbix version: 6.0 LTS, OS
- OS Distribution: CentOS
- OS Version: 7
- Zabbix Component: Agent
(1) Log in to your Centos 7 server via SSH. After logging run the below commands.
# yum update -y
# rpm -Uvh https://repo.zabbix.com/zabbix/6.0/rhel/7/x86_64/zabbix-release-6.0-4.el7.noarch.rpm
# yum install zabbix-agent -y
(2) Edit zabbix_agentd.conf file located in /etc/Zabbix/ directory. Replace the following values and save the file. You can edit the file using vi or nano editor.
To save the file edited in a vi editor, click the Esc button, then type :wq and press enter.
Let's use vi editor here. Enter the following command and press Enter:
#vi /etc/zabbix/zabbix_agentd.conf
Then click on "below arrow" key from keyboard till you find "Server" and "ServerActive" as seen in the image. To edit the IP address, enter "Shift+i". Replace the IP address. Here we have replaced it with 192.168.2.152
Please note: You need replace this IP with your zabbix server's ip address.
Server=173.248.174.65
Server Active=173.248.174.65 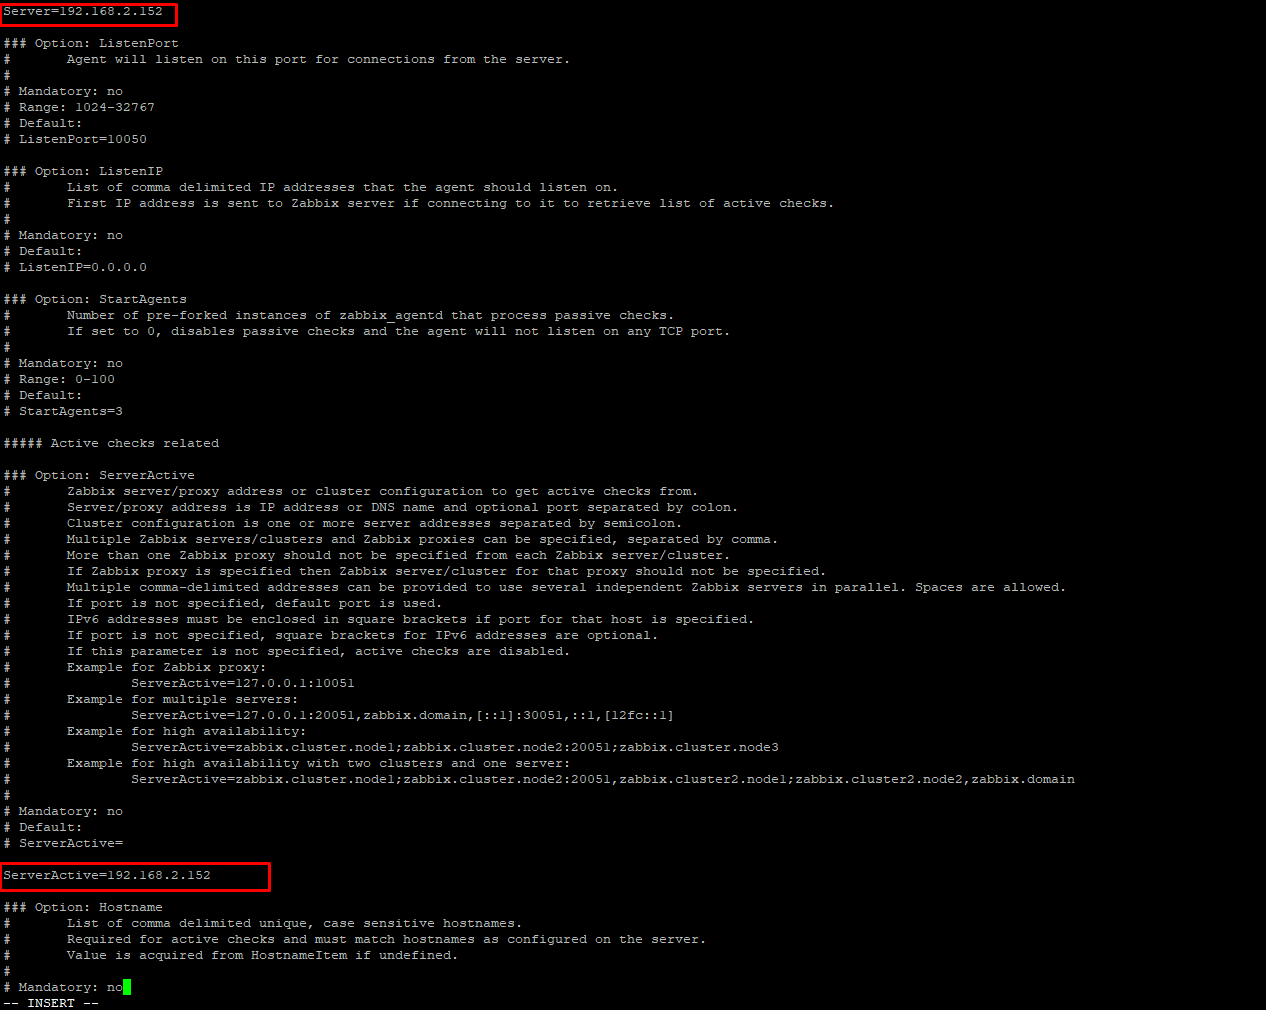
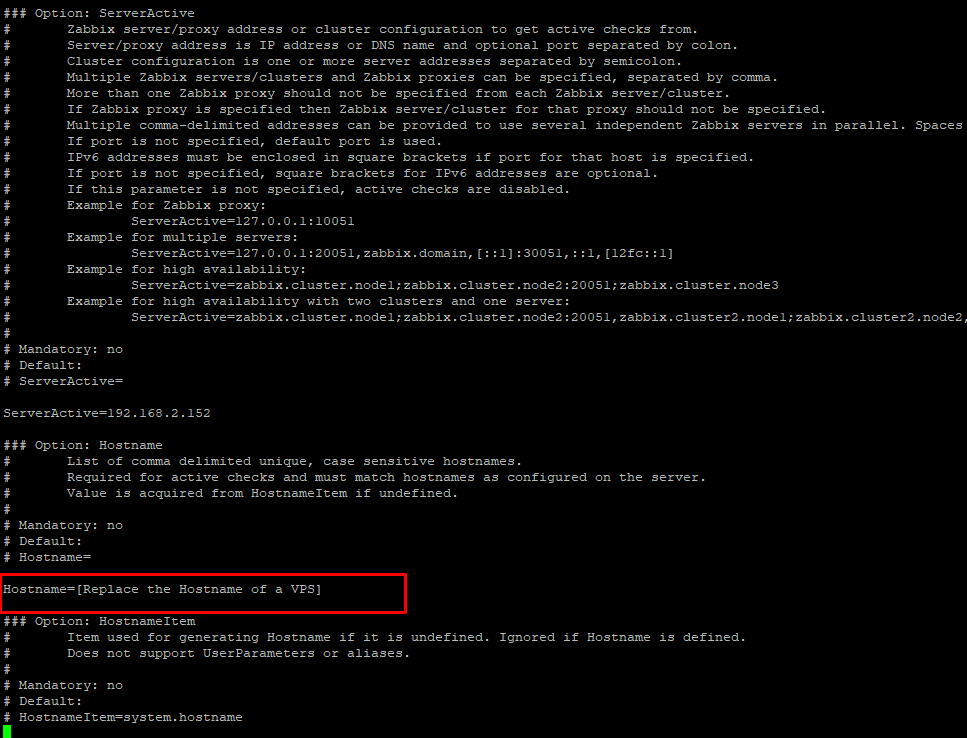
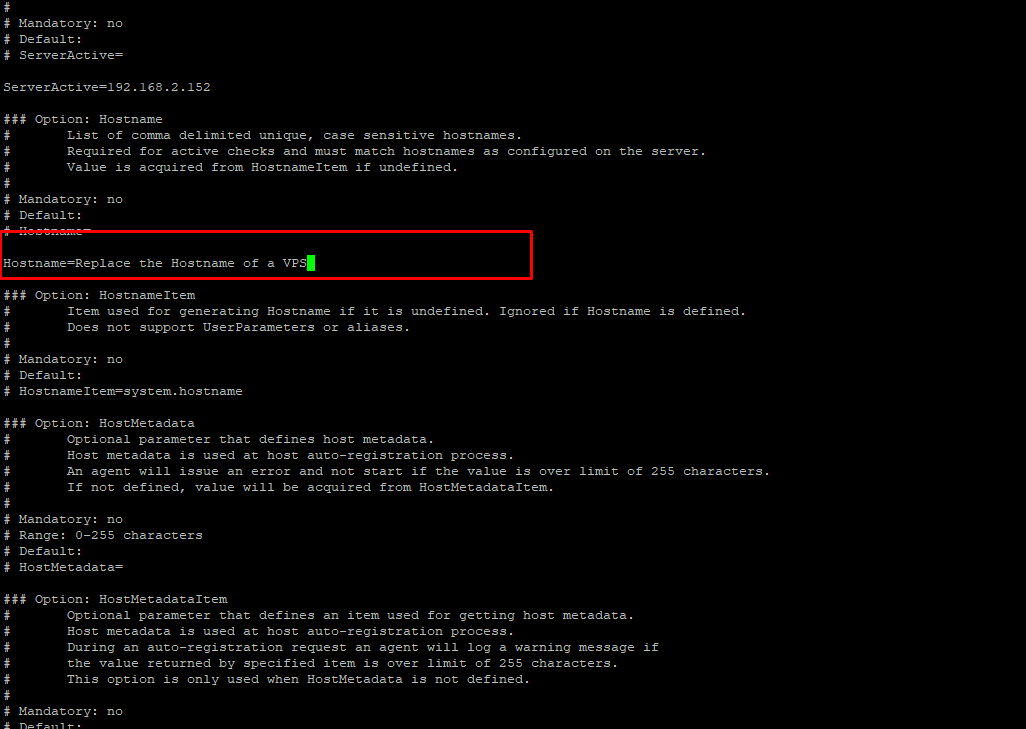
Scroll down with "below arrow" key from the keyboard and you will find "Hostname". You need to replace the Hostname with your VPS's hostname.
Hostname=Replace the Hostname of a VPS
(3) Run the following commands to start the Zabbix service and set it in the boot.
service zabbix-agent start
chkconfig zabbix-agent on
How to install a Zabbix agent on Ubuntu 20.04 and above?
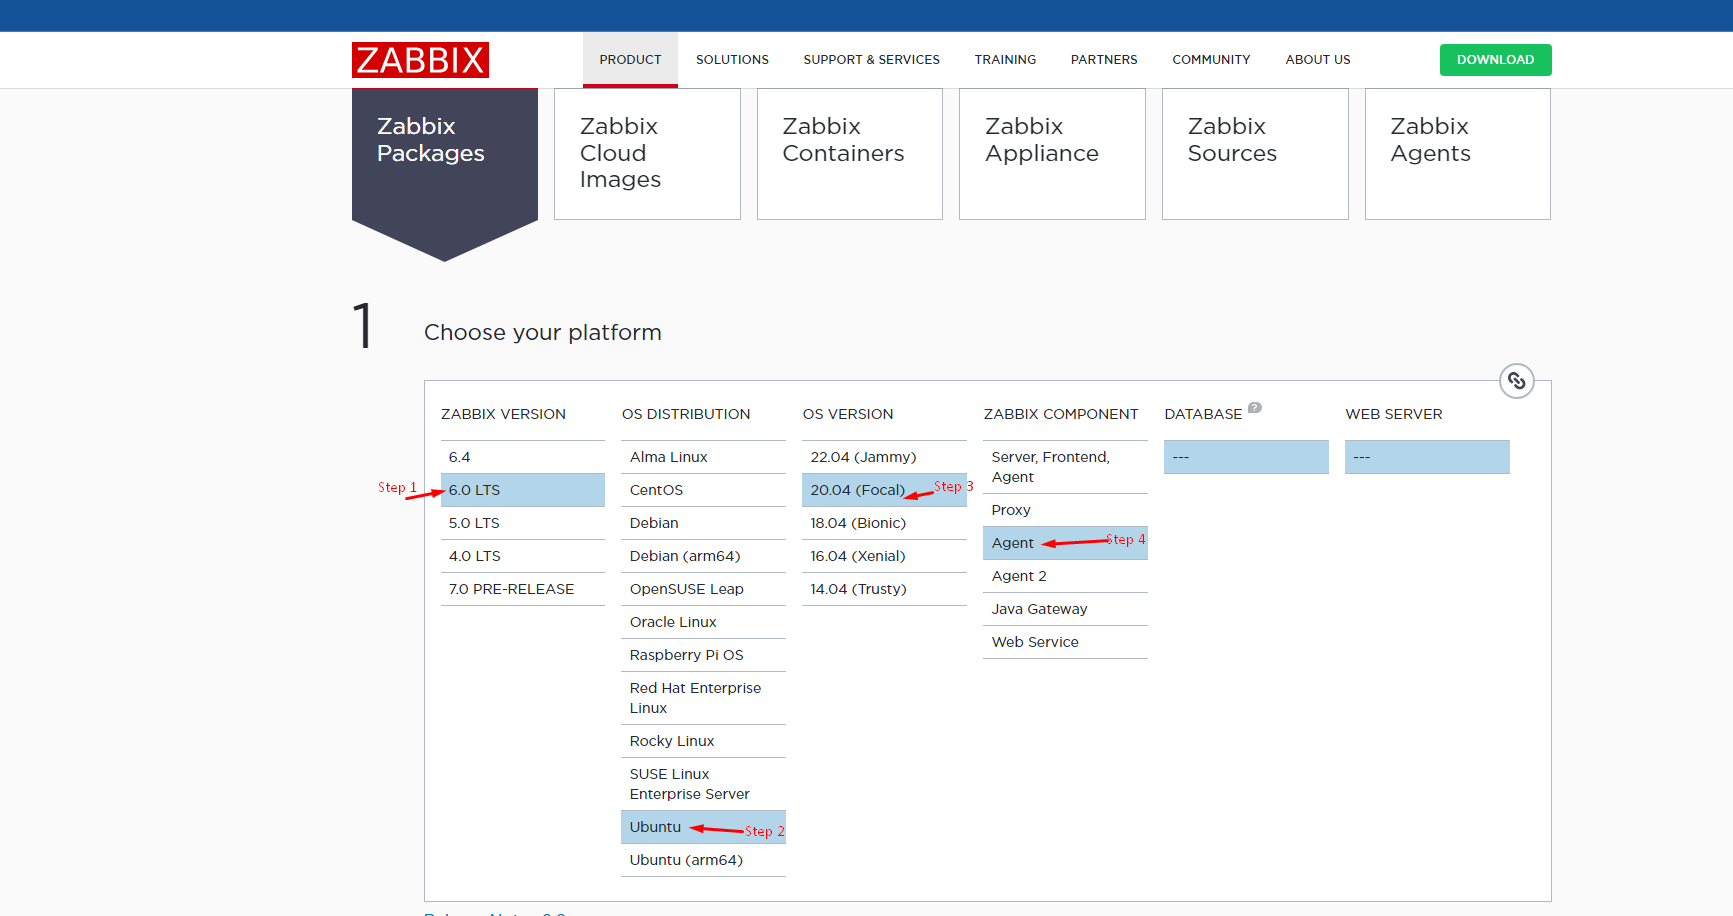
(1) You can download the Zabbix Packages from the download link. Select
- Zabbix version: 6.0 LTS
- OS Distribution: Ubuntu
- OS Version: 20.04(Focal)
- Zabbix Component: Agent
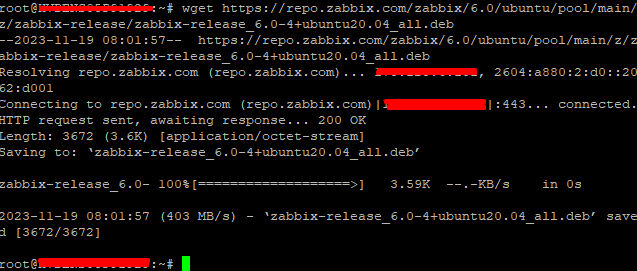
(2) At first Install the repository configuration package for the Zabbix agent on the Ubuntu server.
# wget https://repo.zabbix.com/zabbix/6.0/ubuntu/pool/main/z/zabbix-release/zabbix-release_6.0-4+ubuntu20.04_all.deb
(3) Then enter below command:
dpkg -i zabbix-release_6.0-4+ubuntu20.04_all.deb

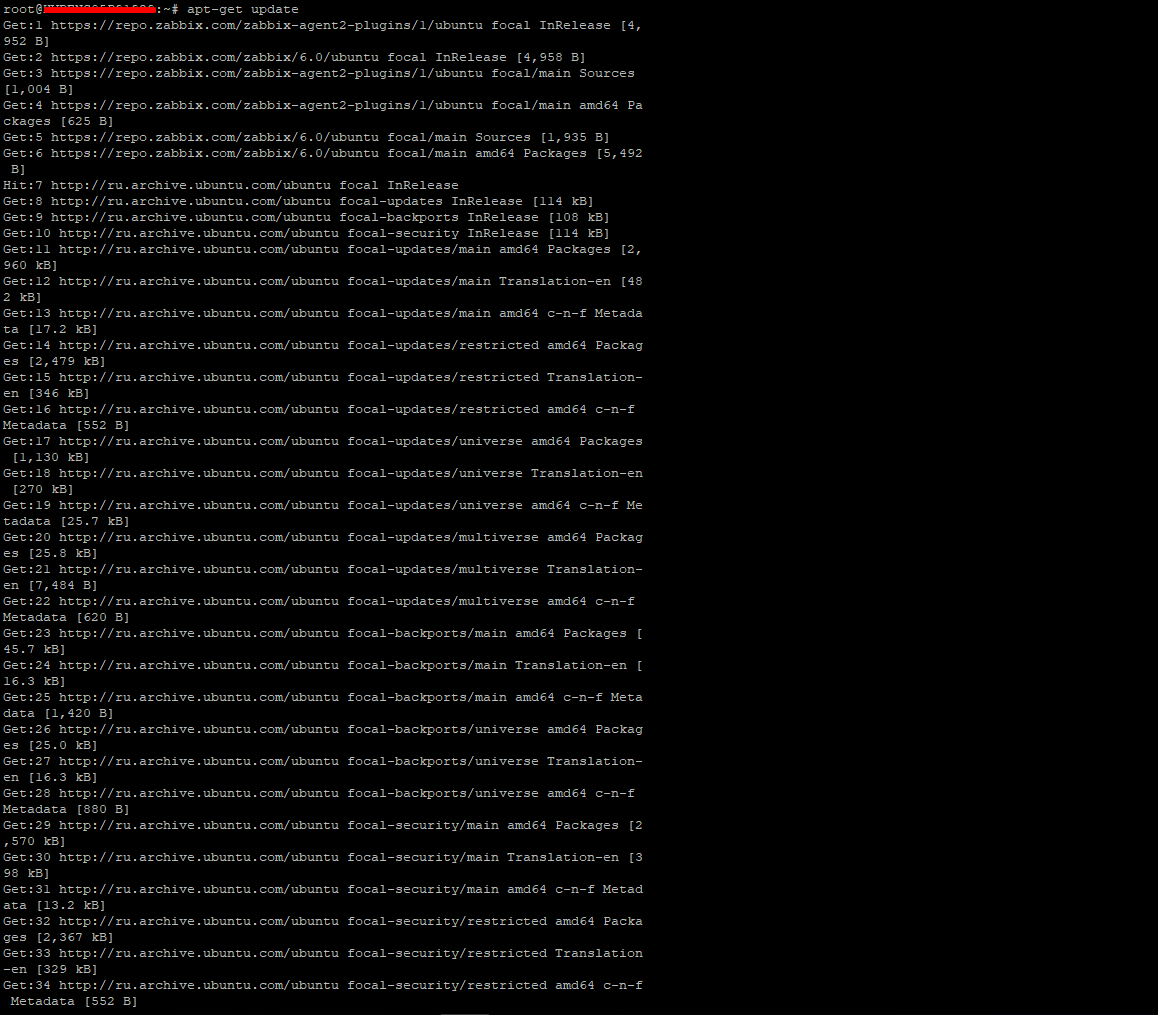
(4) After that enter:
apt-get update
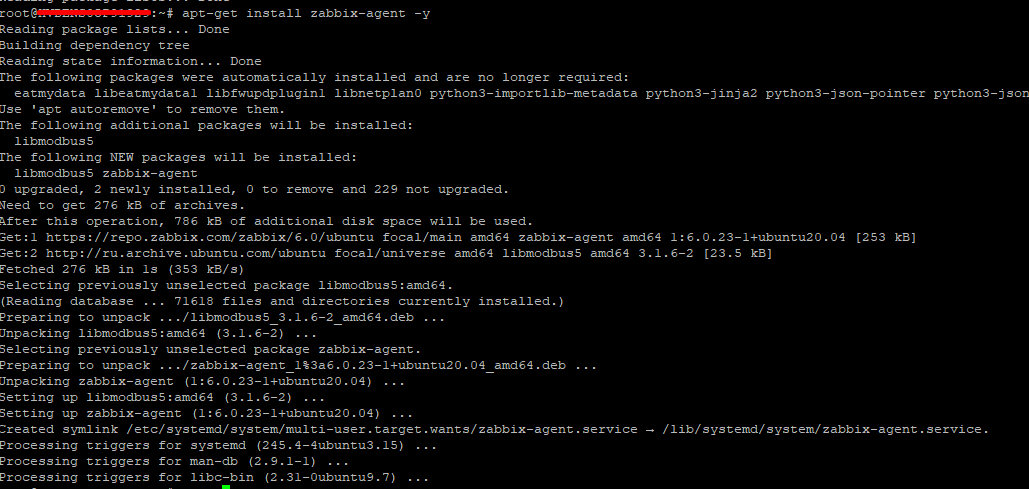
(5)After that install Zabbix agent by entering following command:
apt-get install zabbix-agent -y
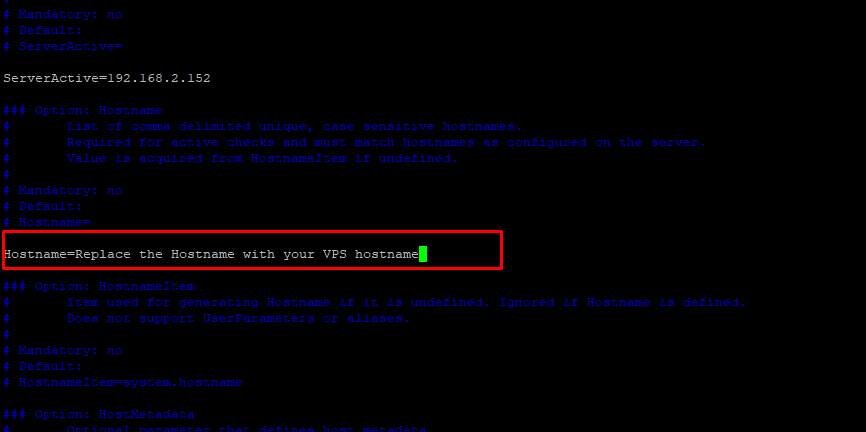
(6) Edit zabbix_agentd.conf file located in /etc/Zabbix/ directory. Replace the following values and save the file. You can edit the file using vi or nano editor.
To save the file edited in a vi editor, click the Esc button, then type :wq and press enter.
#vi /etc/zabbix/zabbix_agentd.conf

Then click on "below arrow" key from keyboard till you find "Server" and "ServerActive" as seen in the image. To edit the IP address, enter "Shift+i". Replace the IP address. Here we have replaced it with 192.168.2.152
Please note: You need replace this IP with your zabbix server's ip address.
Server=173.248.174.65
Server Active=173.248.174.65

Replce the hostname with your VPS's hostname:
Hostname=[Replace the Hostname of a VPS]
(7) Now, restart the Zabbix agent.
service zabbix-agent restart

How to install a Zabbix agent on Windows?
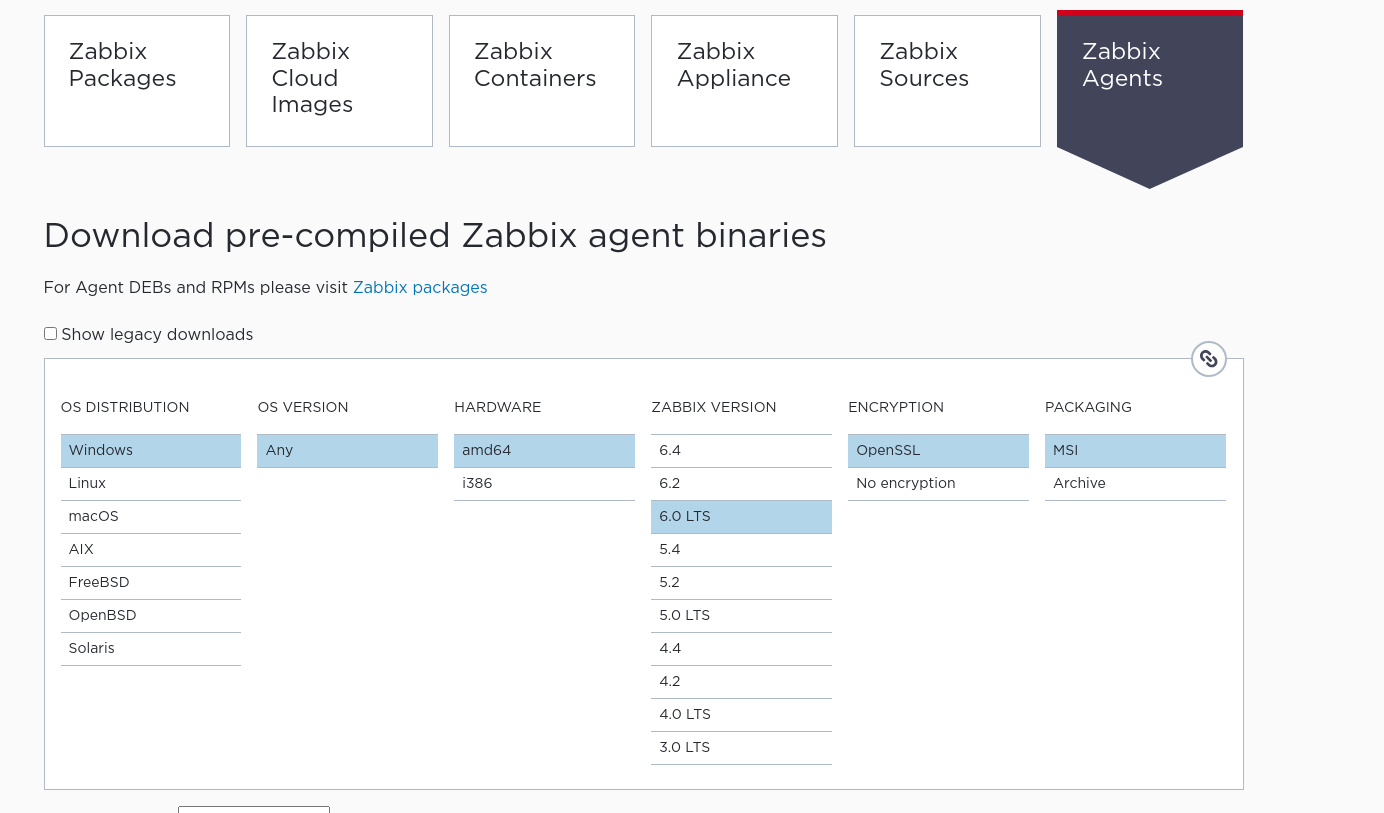
(1) You can download the Zabbix Agents from the download link. Select
- OS Distribution: Windows
- OS Version: Any
- Hardware: i386
- Zabbix Version: 6.0 LTS
- Encryption: No Encryption
- Packaging: MSI
(2) Scroll down and click on Download under "Zabbix agent v6.0.23".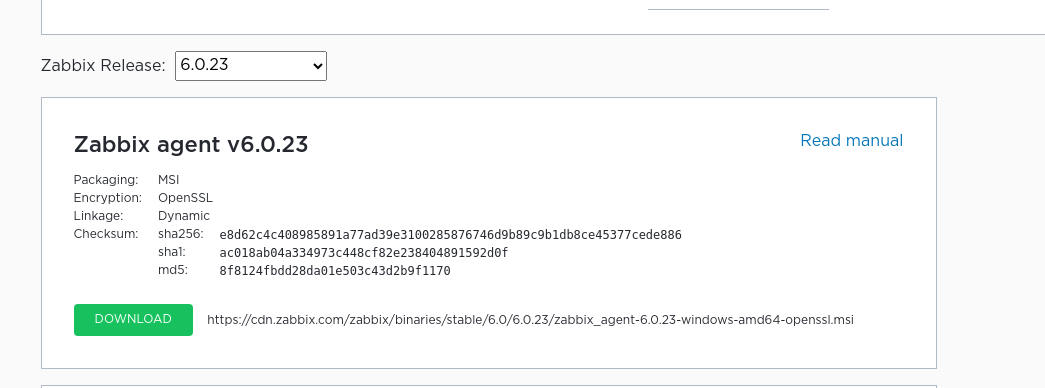
(3) Once the Windows Installer is downloaded, open it and Setup will open as shown in the image below:
(4) Click on "Next" and you will see below screens: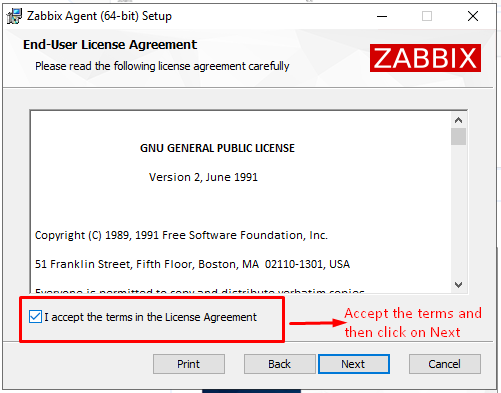
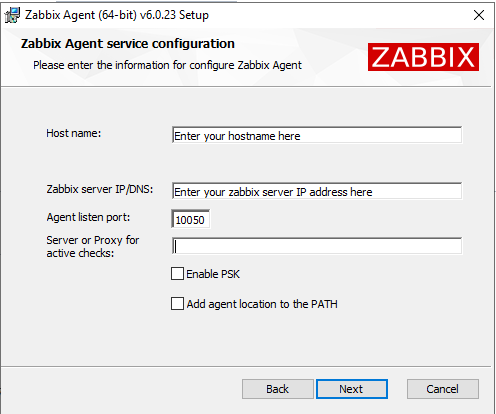
(5) Then in Hostname, enter your VPS's hostname and then in Zabbix Server IP/DNS: Enter your zabbix server IP address here. Here only two fields will be filled and no checkboxes will be selected. Then, click on "Next"
(6) Then click on "Install"

Your Zabbix is installed on Windows.
(7) Once the Zabbix agent is installed open services (Administrative tool -> Services) and locate zabbix-agent and start the service

(8) Set the Zabbix service to restart on failure by referring to the below screen capture.

How to install a Zabbix agent on Almalinux?
(1) You can download the Zabbix Packages from the download link. Select
- Zabbix version: 6.0 LTS
- OS Distribution: Alma Linux
- OS Version: 8
- Zabbix component: Agent

(2) Login into your server. Then enter below command:
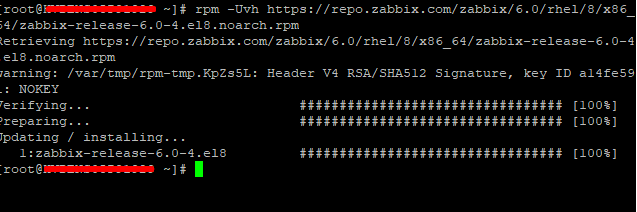
rpm -Uvh https://repo.zabbix.com/zabbix/6.0/rhel/8/x86_64/zabbix-release-6.0-4.el8.noarch.rpm
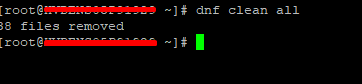
Enter below command:
#dnf clean all
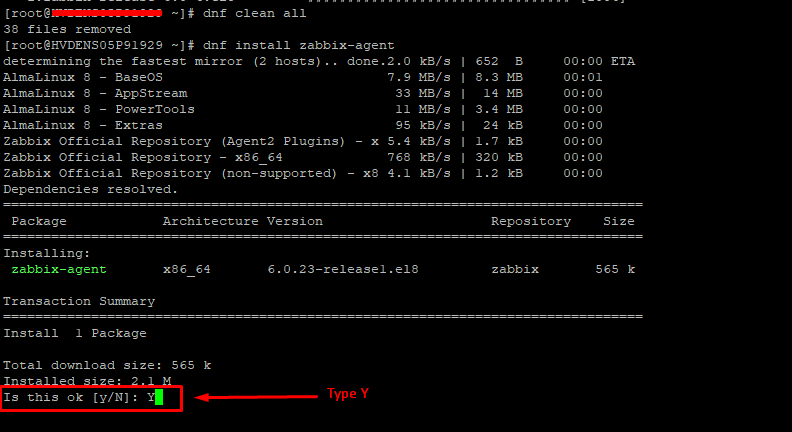
Then install zabbix agent by entering following command:
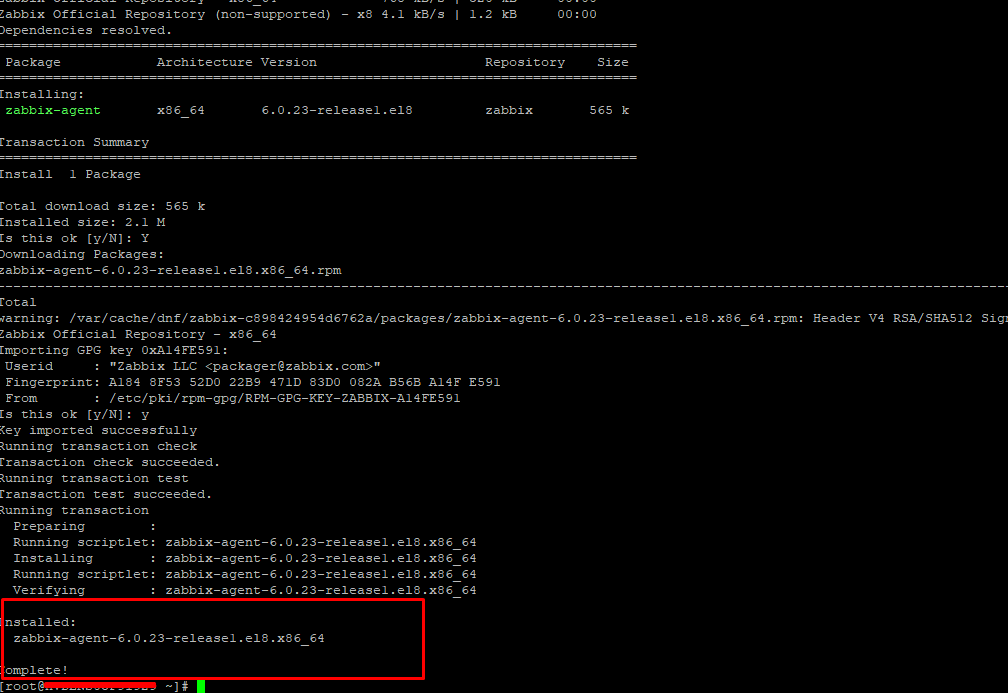
#dnf install zabbix-agent
And then type "Y" as seen in the image below:
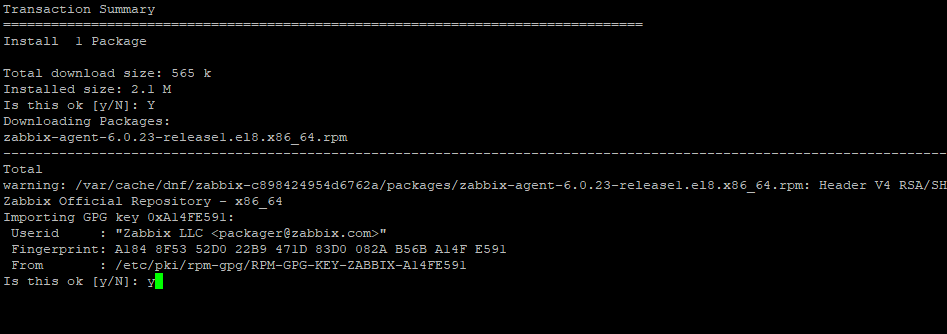
Again type "Y" as seen in the below image to download the packages:
Your zabbix installation is complete:
Edit zabbix_agentd.conf file located in /etc/Zabbix/ directory. Replace the following values and save the file. You can edit the file using vi or nano editor.
To save the file edited in a vi editor, click the Esc button, then type :wq and press enter.
#vi /etc/zabbix/zabbix_agentd.conf

Please note: You need replace this IP with your zabbix server's ip address.
Server=173.248.174.65
Server Active=173.248.174.65

Replce the hostname with your VPS's hostname:
Hostname=[Replace the Hostname of a VPS]
(7) Now, start Zabbix agent process and make it start at system boot.
# systemctl restart zabbix-agent
# systemctl enable zabbix-agent

How to set up the Zabbix agent configuration in the Zabbix server?
Once you complete the Zabbix installations proceed with the below steps.
(1) Log in to the Zabbix dashboard.
(2) Click on Configuration and then Hosts.

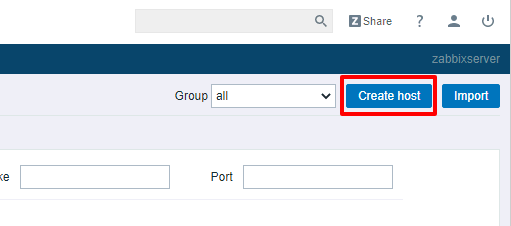
(3) Click on Create Host button located in the upper right-hand corner.
(4) In the next screen, enter your VPS's Hostname, its Visible name. Under Templates, select the template of your VPS from the predefined list. Similarly, under Groups select the appropriate group from the predefined list. Under Interfaces, click on Add, and select Agent from the drop-down.
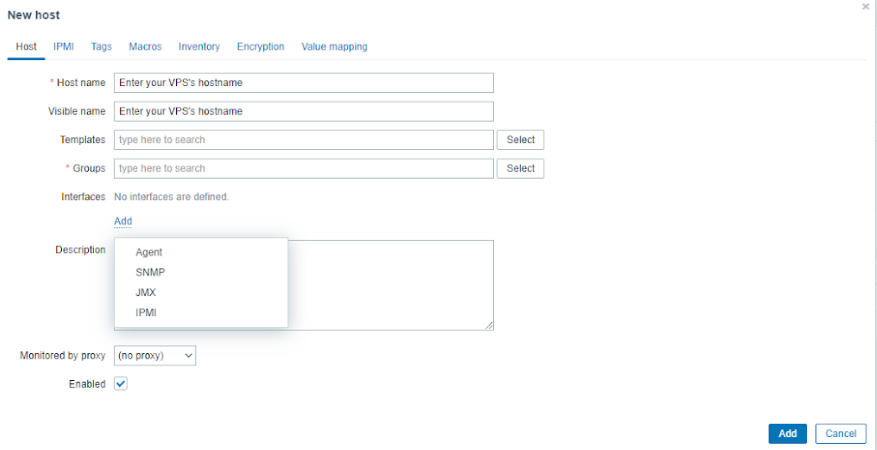
(5) Enter the IP address of your VPS in Agent field. Keep the port according to your requirements and keep the Enabled box checked. You can also add individual alerts for services like SMTP, FTP, MS SQL, MySQL, Host Alive, SSH, etc.. Click on Add button at the bottom of the screen after the necessary alerts are added.
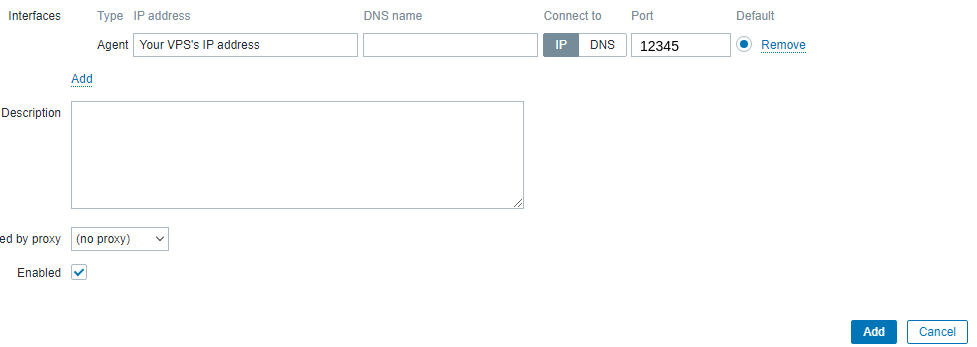
If your VPS Has Multiple IP Addresses and Some Services are Running on Different IP Address, then after performing all above 5 steps, click on Add again under Interfaces and then add the secondary/ second IP and then add the port according to your requirement as seen in image below and then click on Add button at the bottom left corner of the screen.

If you want to setup Service Listening on a Non-Standard Port, then perform all the above steps and then while adding the IP address under Interfaces > Agent > in Port field add the non-standard port
To add the templatein Zabbix, you can refer below link:
https://manage.accuwebhosting.com/knowledgebase/4863/How-to-add-Template-in-Zabbix-.html
