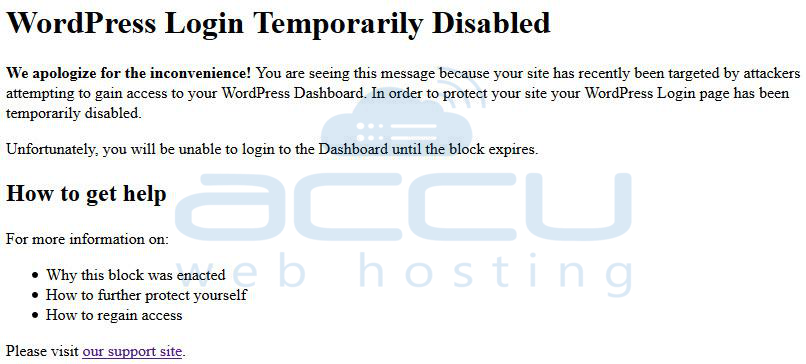
Why has my WordPress Dashboard been blocked?
Due to a potential attack on your website, systems have limited access to your WordPress Dashboard. To stop the hackers from continuing to target your website, we have disabled access.
How long will this block remain in place?
Typically, the block will be in place for 15 to 20 minutes. This means neither you nor the hackers can access your WordPress Dashboard. The login page for your WordPress website will again be accessible when the 15 to 20 minutes have elapsed and the block has been lifted. However, this also implies that hackers could target your website once more, leading to another block and a repeat of the vicious cycle.
How can I fix this issue?
Wait until the restriction on your WordPress login page is removed before fixing the issue. Usually, it lasts between 15 and 20 minutes. Once the block has been removed, proceed with the following steps.
Method - 1: Protect your WordPress login page by hiding the Admin URL
Hackers won't be able to locate your WordPress login page if you hide it. Your website cannot be attacked by brute force if they cannot discover it.
Step 1: Log into your WordPress Dashboard.
Step 2: Scroll down to the Plugins > Add New.
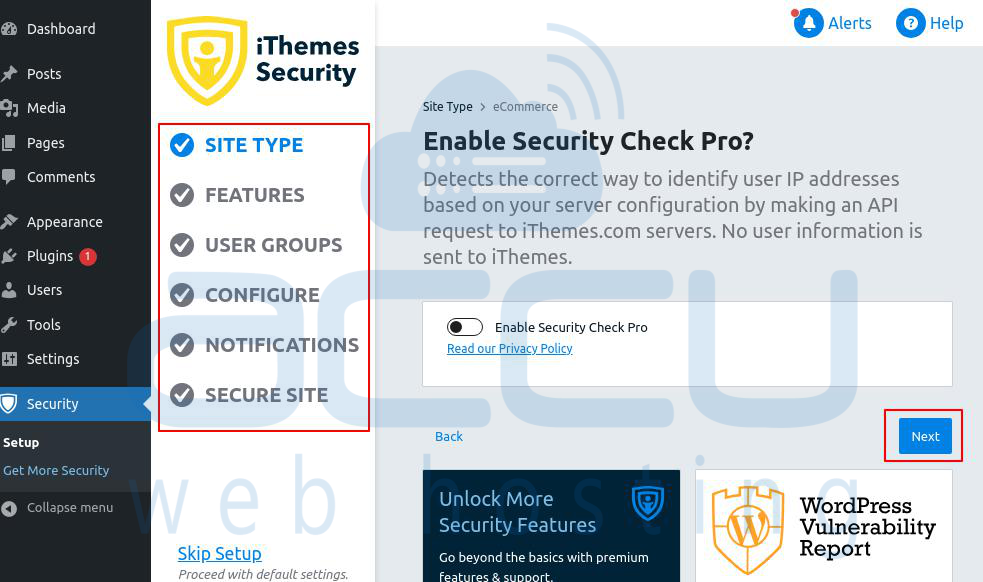
Step 3: Search for the iThemes Security plugin.
Step 4: Click on Install Now and Activate.

Step 5: After installation, on the left side of the page, choose the Security menu, select your website type, and set up all the security options.

Set all the configurations according to your requirements, and click on Next and Finish.
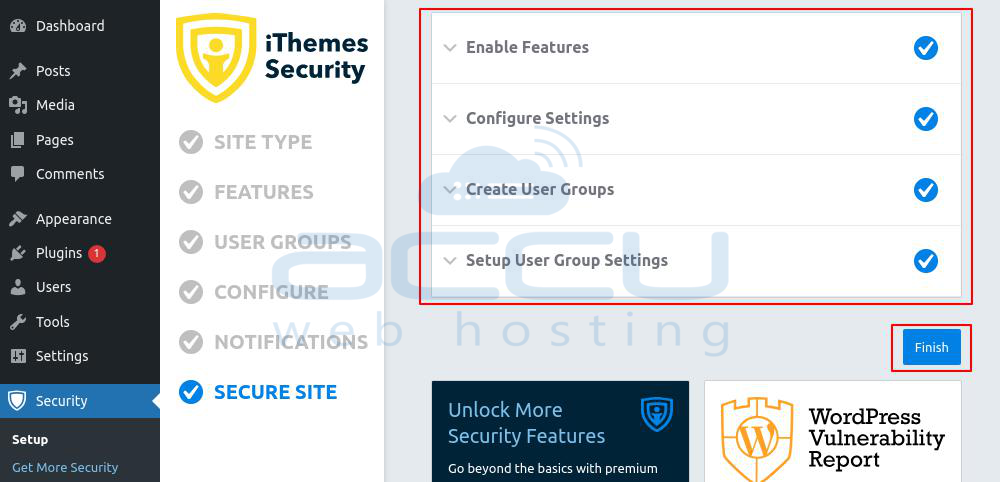
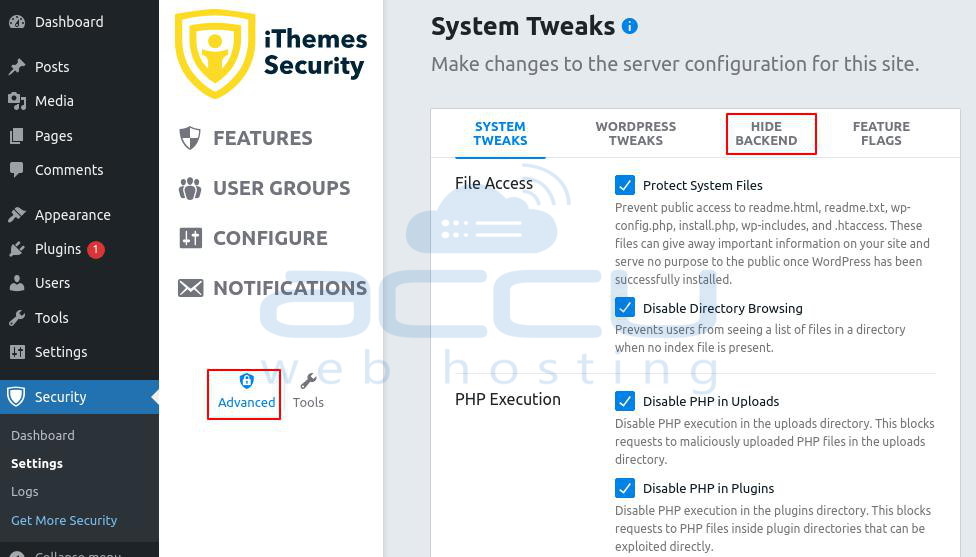
Step 6: Then click on Settings.
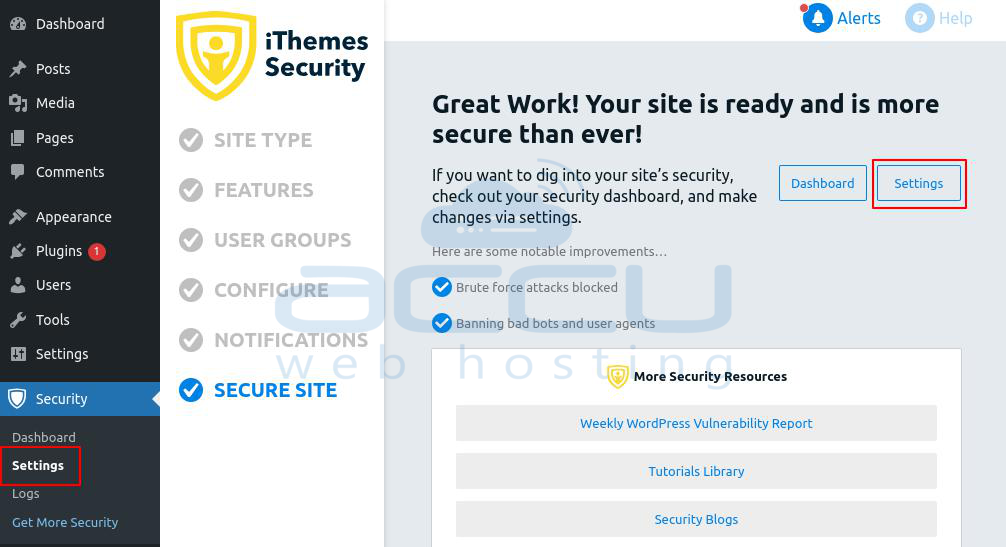
Step 7: Click the Advanced option from the bottom left side of this page.
Step 8: Find the Hide Backend option.
Step 9: Enable the Hide Backend option by selecting the checkbox. This option lets you customize how your login URL is set, and it will start to appear. Enter your new login location in the URLs field.
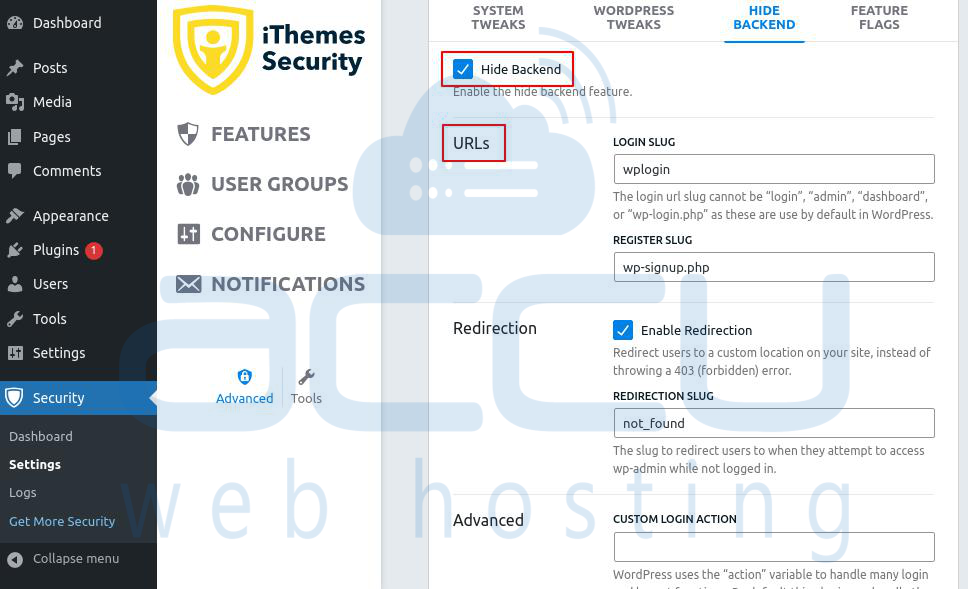
Step 10: Click Save in the bottom right corner.
Method - 2: Block all access except your IP address
The Allow and Deny directives allow you to Allow or Deny access based on the originating visitor server's IP address or hostname.
For example,
Allows IP 122.102.1.2 access to your website.
Allow from 122.102.1.2
Deny IP 101.135.2.1 access to your website.
Deny from 101.135.2.1
Using Order to combine Allow and Deny
Order allows you to combine a Deny and an Allow directive in one place.
Order deny, allow Deny from all Allow from 203.25.45.2
Access control by Hostname
Using the visitor's hostname, you can block them in the.htaccess file. The syntax to prevent host names from visiting your website is as follows.
Deny from unwanted-domain_name.com
Combining Deny with the IP and Host
Deny from 192.197.205 Deny from unwanted-domain_name.com unwanted-domain_name-2.com Deny from domain-part
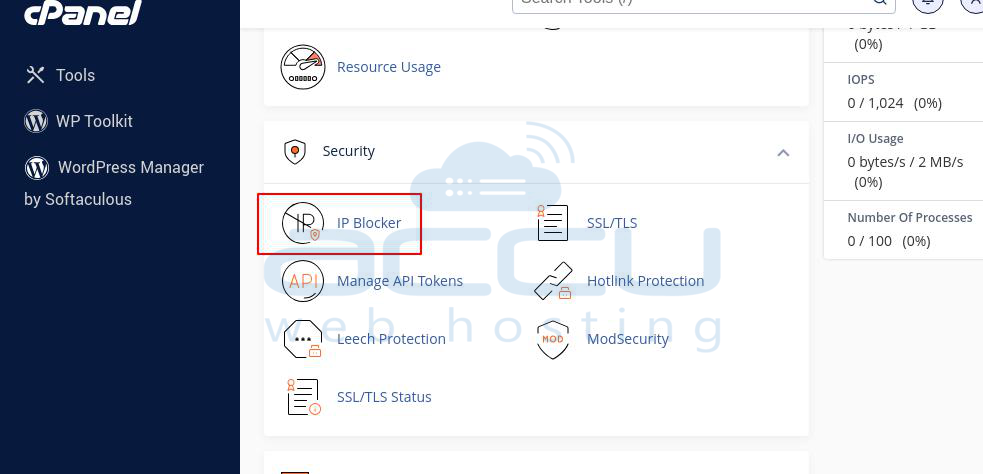
Step 1: Log into your CPanel account.
Step 2: Scroll down to the Security and choose IP Blocker.
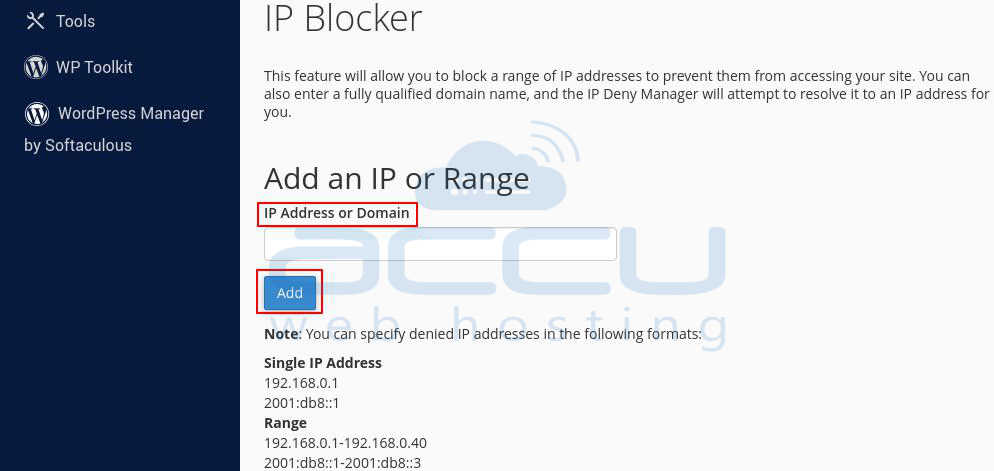
Step 3: Add the IP address you want to block with the text IP Address or Domain.
The following table explains what formats you can use to block IPs.
|
Single IP Address |
16.5.3.133 (Only this IP will be blocked.) |
|
Implied Range |
16.5.3.3-16.5.3.40 (This blocks a range of IPs that fit the parameters between IP 16.5.3.3 and 16.5.3.40) |
|
CIDR Format |
16.5.3.3/32 (This blocks all IPs in the 16.3.3 range from 16.3.3.00 to 16.3.3.32) |
|
Implied IP Address |
16. Implies 16.*.*.* (blocks all IPs starting with 16.) |
Using the .htaccess file
Step 1: Log into your CPanel account.
Step 2: Scroll down to Files and select File Manager.
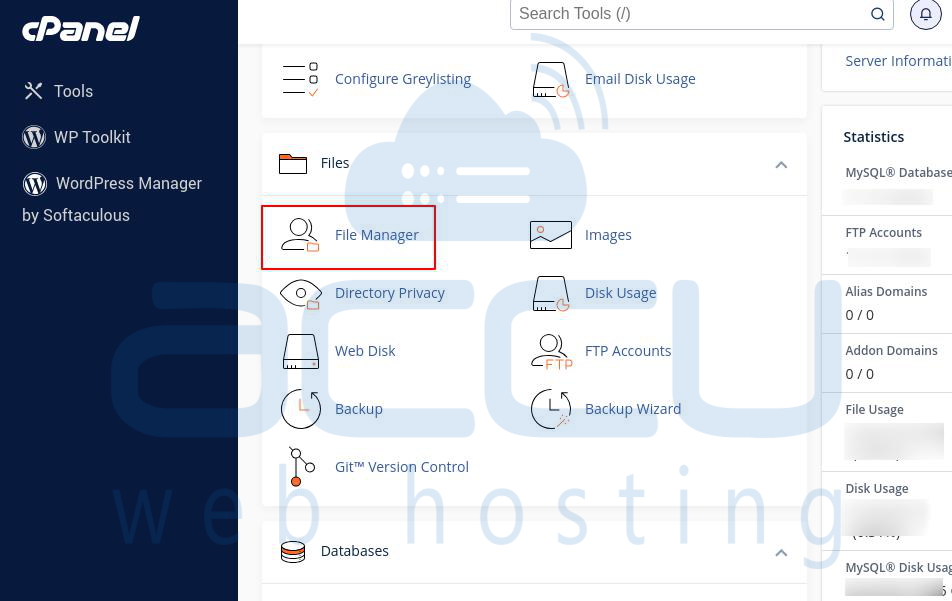
Step 3: Inside the public_html directory, find the .htaccess file.
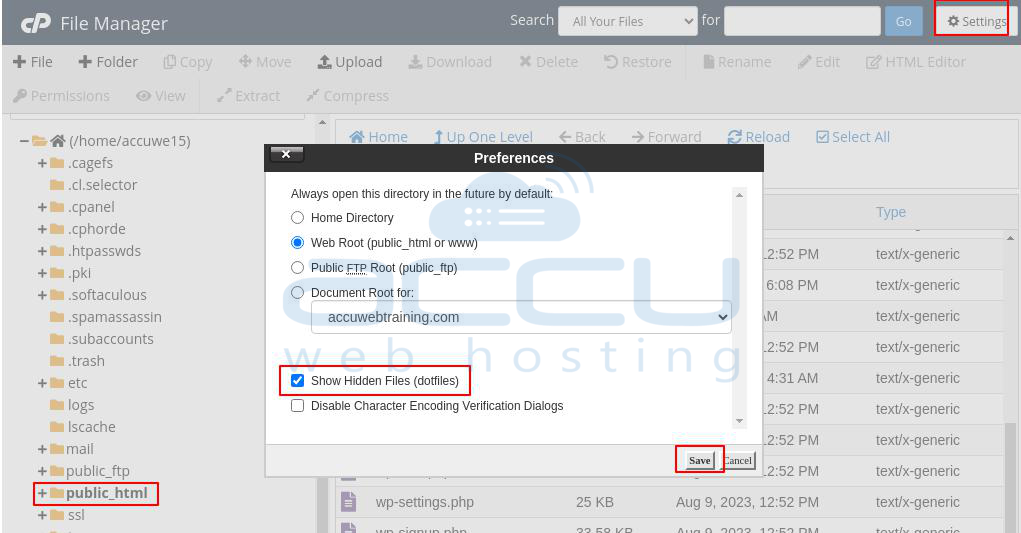
Step 4: If the.htaccess file is not there, click on Settings at the top-right side of the page.
Step 5: Check the checkbox with the text Show Hidden Files and click on Save.
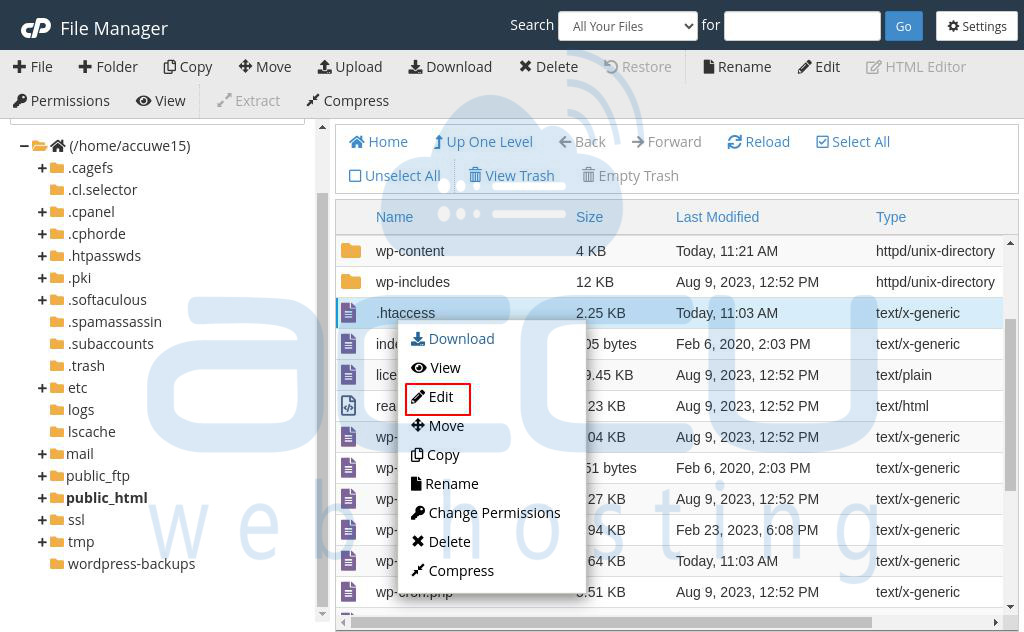
Step 6: Now select the .htaccess file, right-click on it, and choose Edit.
Step 7: There are a few ways to restrict access to your WordPress admin section using this .htaccess file.
Single IP address access
Replace 101.101.101.101 with your IP address to allow access from a single IP address:
<IfModule mod_rewrite.c>
RewriteEngine on
RewriteCond %{REQUEST_URI} ^(.*)?wp-login\.php(.*)$ [OR]
RewriteCond %{REQUEST_URI} ^(.*)?wp-admin$
RewriteCond %{REMOTE_ADDR} !^101\.101\.101\.101$
RewriteRule ^(.*)$ - [R=403,L]
</IfModule>
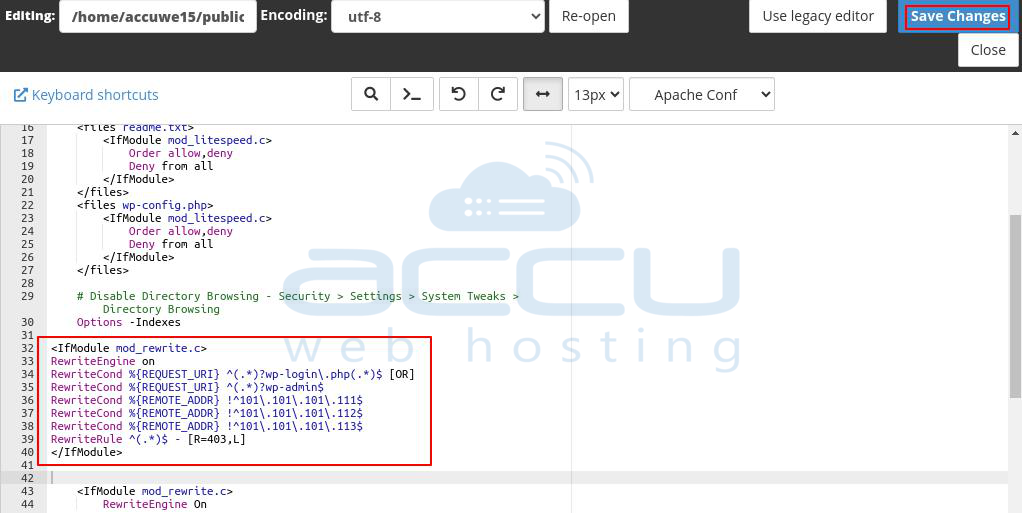
Multiple IP address access
<IfModule mod_rewrite.c>
RewriteEngine on
RewriteCond %{REQUEST_URI} ^(.*)?wp-login\.php(.*)$ [OR]
RewriteCond %{REQUEST_URI} ^(.*)?wp-admin$
RewriteCond %{REMOTE_ADDR} !^101\.101\.101\.111$
RewriteCond %{REMOTE_ADDR} !^101\.101\.101\.112$
RewriteCond %{REMOTE_ADDR} !^101\.101\.101\.113$
RewriteRule ^(.*)$ - [R=403,L]
</IfModule>
Dynamic IP address access, limited by referer
Only permitting login requests from your domain name can safeguard your WordPress site if your IP address changes. Use your domain name, like demo.com.
Most brute force attacks work by directly making POST requests to your wp-login.php script. Requiring a POST request with your domain as the referrer may be helpful to exclude bots.
<IfModule mod_rewrite.c>
RewriteEngine on
RewriteCond %{REQUEST_METHOD} POST
RewriteCond %{HTTP_REFERER} !^http://(.*)?demo\.com [NC]
RewriteCond %{REQUEST_URI} ^(.*)?wp-login\.php(.*)$ [OR]
RewriteCond %{REQUEST_URI} ^(.*)?wp-admin$
RewriteRule ^(.*)$ - [F]
</IfModule>
Method - 3: Disable Wordfence plugin
Step 1: Log into your CPanel account.
Step 2: Scroll down to the Files and choose File Manager.
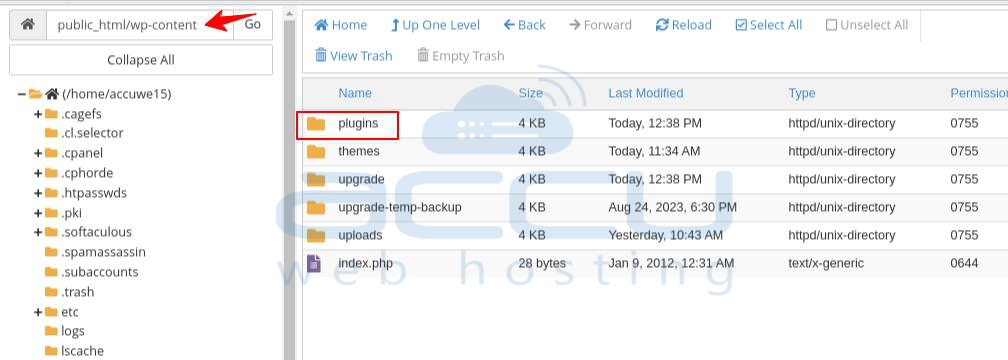
Step 3: Inside the public_html directory, select the wp-content folder.

Step 4: Select the plugins folder.
Step 5: Navigate to the Wordfence folder, right-click on it, and select the Rename option.

Step 6: Now, Rename the wordfence directory to wordfence_backup.

You can rename the folder to wordfence once you've logged into your WordPress admin.
Method - 4: Reset your password.
After changing your password, you can sign in again and access your dashboard.
Try using WordPress's built-in password reset functionality, which sends a message to the email id connected to your account. From the WordPress login page, you may access this tool.
However, this approach might only sometimes be effective. For instance, you can experience issues with WordPress email delivery or lose access to that email account. If so, you'll have to reset your password using PHPMyAdmin manually.
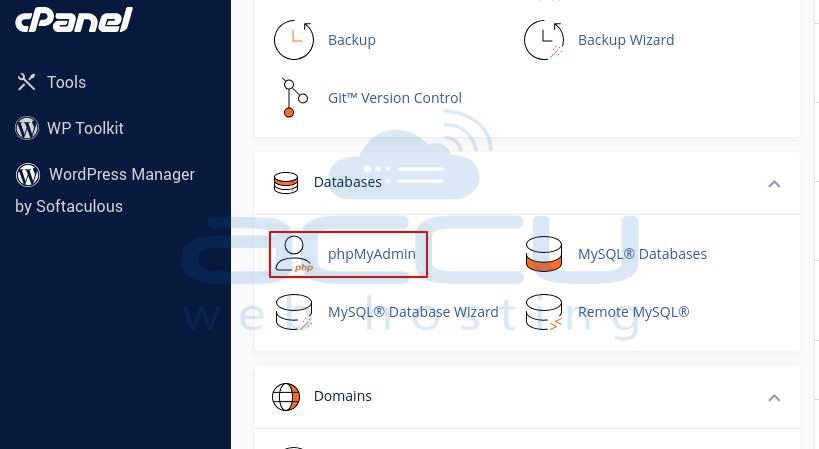
Step 1: Log into your Cpanel account.
Step 2: Navigate to the Databases and select phpMyAdmin.
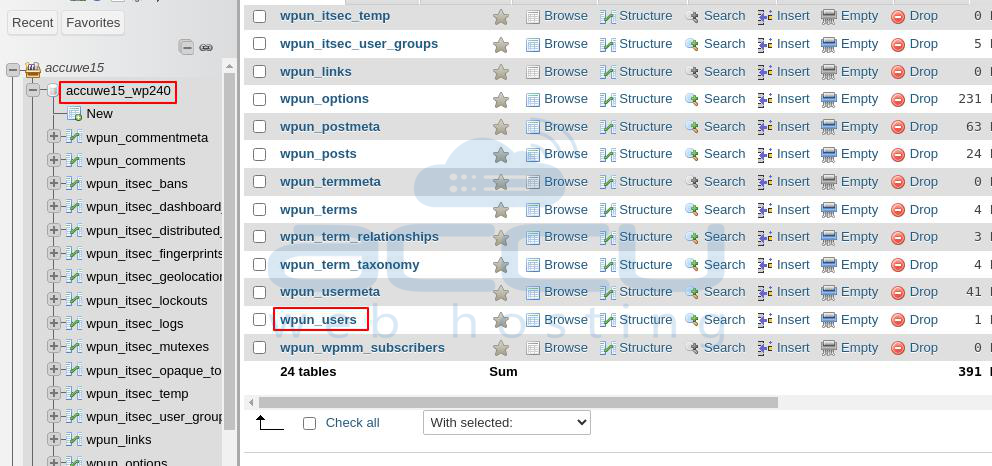
Step 3: Make sure you have selected your WordPress site’s database. Select the wp_users table.
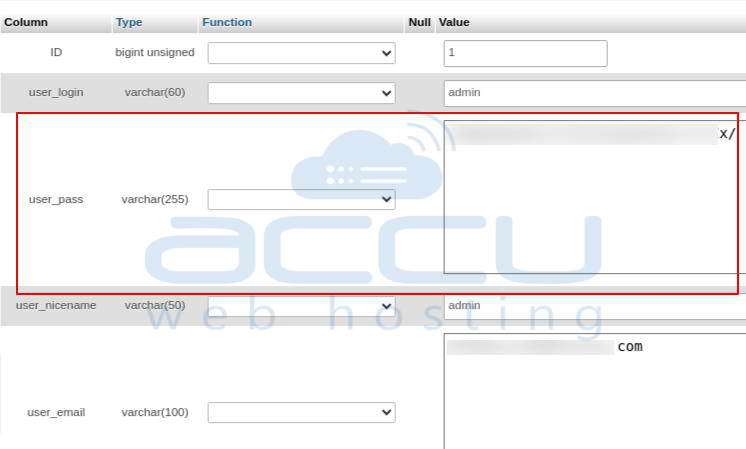
Step 4: Find your username and user_pass fields and choose Edit (pencil icon).
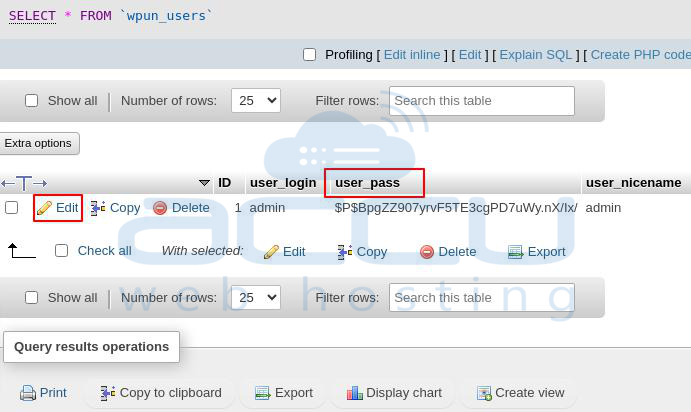
Step 5: Enter your new password in the user_pass value column.
Method - 5: Create a New WordPress Admin User via phpMyAdmin
Step 1: Log into your CPanel account.
Step 2: Navigate to the Databases and choose phpMyAdmin.
Step 3: Select your WordPress site’s database.
Step 4: Select the wp_users table.
Step 5: Select the Insert option from top menu.
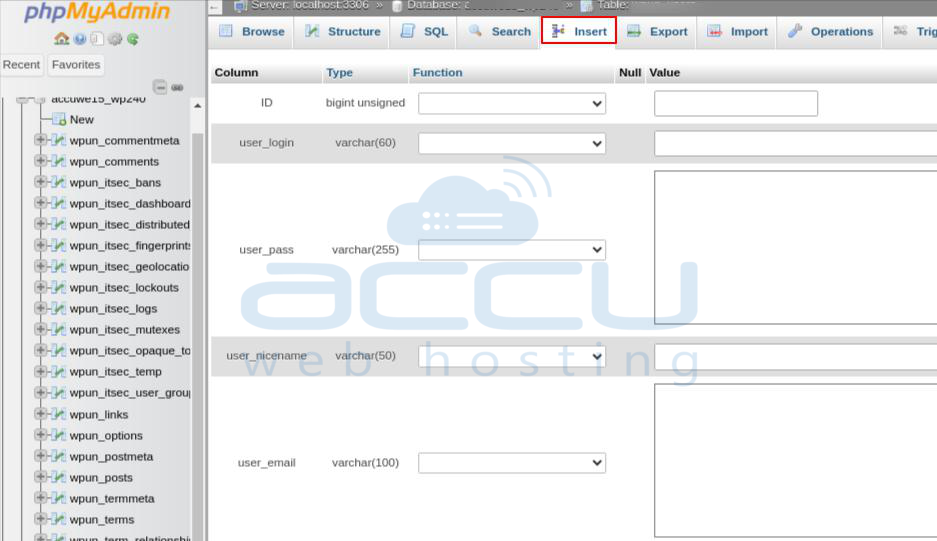
Step 6: Fill out the information and click Go.
Step 7: Now, open the wp_usermeta table. Select the Insert option from the top menu.
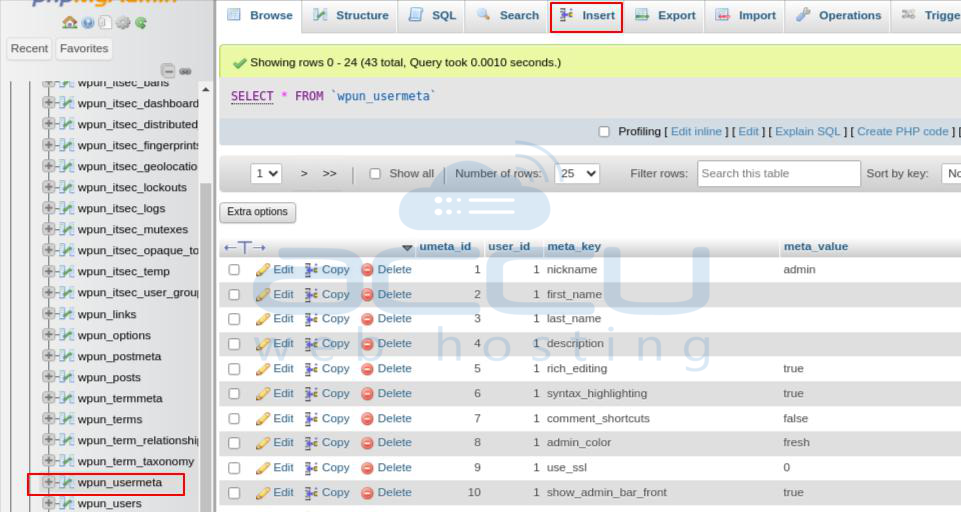
Step 8: Enter the user_id, meta_key, meta_value, and then click Go.
Method - 6: Fix errors that are blocking your site
You must correct the technical problem you are seeing in order to log back into WordPress if it has locked you out.
WordPress White Screen of Death troubleshooting
500 Internal Server Error troubleshooting
403 Forbidden error troubleshooting
ERR_TOO_MANY_REDIRECTS error troubleshooting
Method - 7: Restore a backup
Keep a recent backup of your website at all times. If troubleshooting doesn't work, you can return the website to its original condition of operation.
Conclusion
Resolving the issue of "WordPress Login Temporarily Disabled" requires a systematic approach and careful consideration of various factors. By following the steps outlined in this guide, you should be able to regain access to your WordPress login and resume normal operations on your website. Remember to always keep your website secure by implementing strong passwords hiding login URLs.
