WooCommerce is a free tool that helps you sell things online. It's used by lots of businesses around the world. It works with WordPress, a popular website builder. With WooCommerce, you can create a new online store or add a shopping cart to your existing WordPress site.
WooCommerce is free to use, but you'll need to pay for a domain name and web hosting to have a website. These are the only things that cost money.
Why Choose WooCommerce?
WooCommerce is often considered the top choice among eCommerce plugins for several reasons:
Designed for WordPress: It seamlessly integrates with WordPress, allowing you to tap into its global community and resources.
Scalability: With a vast library of free and paid extensions, WooCommerce enables you to customize and enhance your eCommerce site as it grows, accommodating your evolving needs.
Affordability: No worries about license or subscription fees with WooCommerce. You can freely install and use it without any additional costs.
Security: WooCommerce prioritizes the safety of customer transactions by implementing tokenization. This method ensures that sensitive credit card information is stored securely on the payment processor's servers rather than your site's database.
Extensive Support: From store setup to troubleshooting, WooCommerce provides comprehensive guides to assist you. Additionally, you can reach out to their support team via email for further assistance.
How to Set Up a WooCommerce Store
This section provides a step-by-step guide to help you create a successful online store using WooCommerce, starting from the installation process to managing extensions.
Step 1: Install and Activate WooCommerce
Before installing WooCommerce, you need to purchase a hosting plan and create a website. We recommend using our WooCommerce hosting, which simplifies the installation process with just a few clicks.
Once you've completed the installation, follow these steps to install and activate the plugin:
1. Access the WordPress dashboard and select "Plugins" from the sidebar
2. Click on "Add New" and search for "WooCommerce" in the search bar.
3. Once you find the WooCommerce WordPress plugin, click "Install Now."
4. After the installation is complete, click "Activate."
Step 2: Add WooCommerce Store Details
After installing and activating the plugin, the WooCommerce Setup Wizard will automatically appear.
Follow the tutorial below to complete the setup:
1. Fill in the Store Details, including your country, address, postcode, city, and email address.
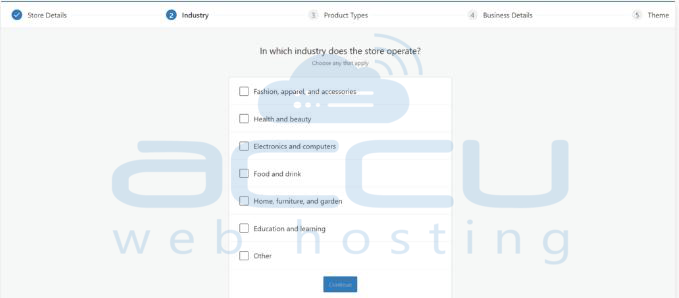
2. Select at least one industry in which your WooCommerce store operates.
3. In the Product Types section, determine the physical and digital products your eCommerce shop offers.
4. Include additional Business Details, such as the number of products and whether you sell on other platforms.
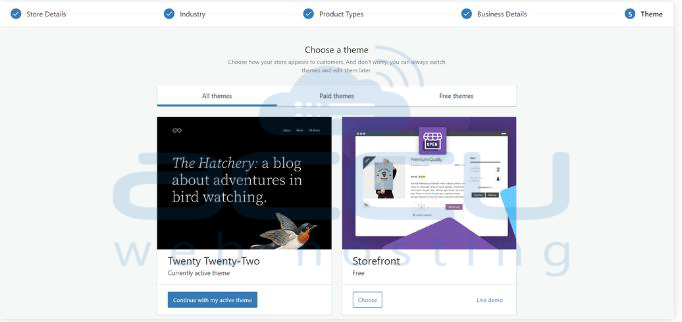
5. For the final step, choose one of the available WooCommerce templates. You can always change the theme later.
After completing the setup process, you will be redirected to the WooCommerce dashboard.
Step 3: Add New Products
Before adding new products to your WooCommerce website, it's important to understand some key terms:
Product categories: Groupings of related products within the same niche, allowing customers to find similar items easily.
Attributes: Filters that help customers select products based on size, color, fabric, and other features.
Product Types: Different types of products, such as simple products, grouped products, virtual products, downloadable products, external products, and variable products.
To add products, follow these steps via the WordPress dashboard:
1. Go to "Products" on the left navigation bar and click "Create Product." You can also import products from a CSV file.
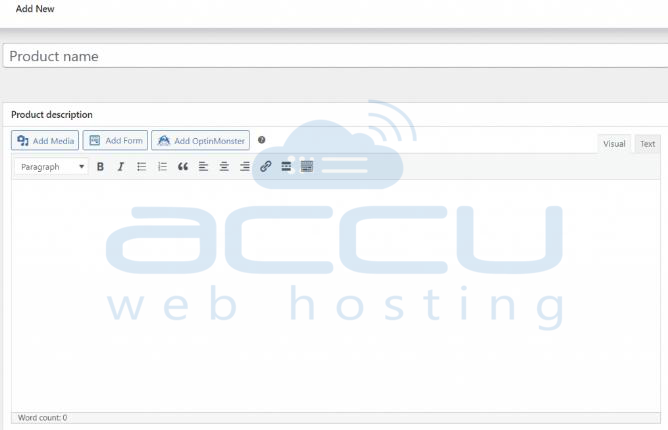
2. Enter the product's name and a detailed description.
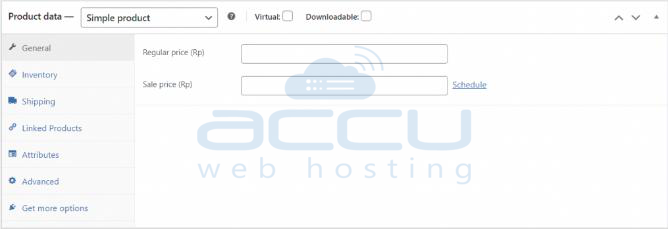
3. Select the product type in the "Product data" section.
4. Specify if the product is virtual or downloadable, and fill in the required information like price, stock status, attributes, and linked products.
5. Choose the product category or create a new one.
6. Add product tags for easier customer searchability.
7. Upload the product's featured image and additional images if needed.
8. Set the product's visibility and catalog visibility options.
9. Save the draft, preview the product, and publish it if satisfied.
Managing Products:
As your store grows, you may need to manage multiple products. WooCommerce's inventory management feature can help with that. Access the "Products" tab on WordPress to easily handle products:
Duplicate a product: Create a copy of an existing product by clicking the "Duplicate" button.
Delete a product: Remove a product by clicking the "Trash" button.
Mark a product as featured: Highlight a product by clicking the "Star" icon to display it prominently on the homepage or in posts using shortcodes.

Step 4: Configure Payment Methods
Follow this step-by-step guide to set up various payment options for customers to choose from when purchasing your products:
1. Go to WooCommerce \u2192 Set up payments.
2. To set up PayPal, click the "Get started" button next to the PayPal Payments option. The WooCommerce PayPal Payments plugin will be automatically installed.
3. Configure your PayPal account and click "Activate PayPal."
4. Enter your login credentials to connect PayPal with your WooCommerce store.
5. Return to Set up payments. Enable Cash on Delivery and Direct Bank Transfer. For Direct Bank Transfer, provide your bank details, including account name, account number, bank name, and sort code.
If you want to add more payment options, visit the WooCommerce Extensions Store, where you can find over 80 payment gateways and tools like Stripe, Amazon Pay, and Square.
Step 5: Set Up Taxes
Tax calculations can be complex, especially for business owners without accounting expertise. Fortunately, WooCommerce allows you to include taxes automatically during checkout. Follow these steps:
1. Go to WooCommerce \u2192 Settings \u2192 General.
2. Check the "Enable tax rates and calculations" box.
3. Click "Save changes."
4. Once enabled, the Tax tab will appear. Configure your tax settings:
Prices entered with tax: Decide whether product prices include or exclude tax.
Calculate tax based on: Choose the address (customer shipping, billing address, or your shop location) for tax calculations.
Display prices in the shop: Determine how prices are displayed to visitors while browsing the store. Ensure consistency with the first option to avoid errors.
Insert tax rates: Enter standard, reduced, and zero tax rates for specific regions.

Step 6: Set Up Shipping Details
If you sell physical items, the next step is to configure shipping zones, allowing you to charge shipping costs based on specific geographical areas. Here's how:
1. Go to WooCommerce \u2192 Settings \u2192 Shipping.
2. Select "Add shipping zone."
3. Enter the zone name, choose the regions, and add shipping methods.
For example:
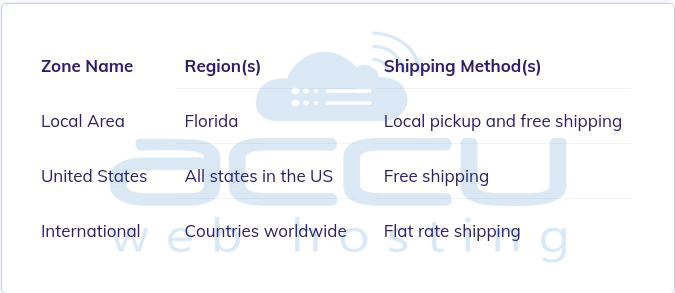
Next, customize the Shipping options. You can display the shipping calculator on the cart page, hide shipping rates until customers enter their address, and choose the default shipping address.
Additionally, WooCommerce offers the option to group similar products using Shipping classes.
Step 7: Customize Your Store
Enhance the visual appeal of your store and customize it further by installing a theme that aligns with your brand identity and utilizing WooCommerce extensions.
The good news is that many WooCommerce themes and extensions are available for free. You can find them either through the WordPress dashboard or the WooCommerce Extensions Store.
Here are some noteworthy options:
Themes:
Selecting an appealing theme is vital to elevate the appearance of your WooCommerce store. Follow these steps to install a WordPress theme: Go to the WordPress admin area, navigate to Appearance -> Themes, and click the Add New button.
Plugins and Extensions:
WordPress and WooCommerce provide a wide range of plugins and extensions to enhance your eCommerce website. They offer improved user experiences, additional language and currency options, and dedicated analytics.
To install WordPress plugins, go to Plugins -> Add New. To install extensions, visit the WooCommerce store and purchase the desired ones.
Step 8: Manage Your WooCommerce Store
Now that your WooCommerce store is up and running, it's important to understand how to manage various aspects, including orders, coupons, customers, analytics, system status, and extensions.
Orders:
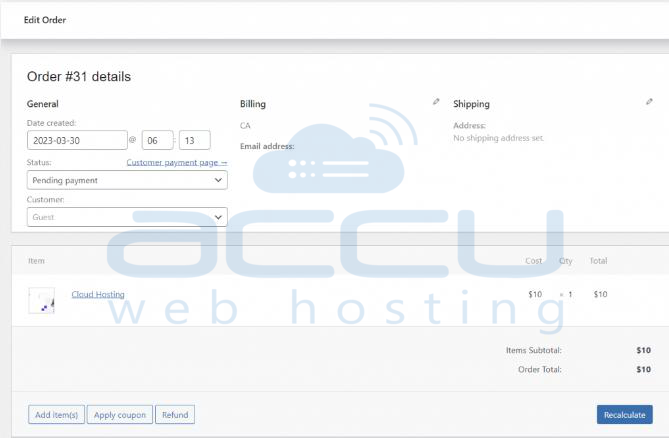
WooCommerce automatically generates new orders whenever a purchase is made. To access and manage orders, go to WooCommerce -> Orders. Each order has a unique ID, payment date, order status, and total price.
Clicking on the order name allows you to update the order status, apply coupons, issue refunds, and modify order details such as billing and shipping information.
Coupons:
Coupons are a great way to offer discounts and rewards to enhance customer loyalty. Follow these steps to create a new coupon:
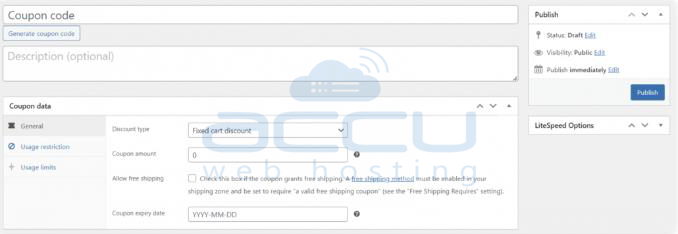
1. Go to WooCommerce -> Coupons and click on "Add coupon."
2. Generate a coupon code, and provide a brief description.
3. Choose the discount type (fixed cart, fixed product, or percentage discount).
4. Set the coupon amount, and specify the coupon expiry date.
5. You can also enable free shipping with the coupon.
To edit a coupon, click on its name and make the necessary changes.
Customers:
WooCommerce allows you to view and manage customer information, including name, username, last active date, registration date, email address, total orders, total spend, average order value (AOV), and country/region. You can download this customer data as a PDF file.
Store Analytics:
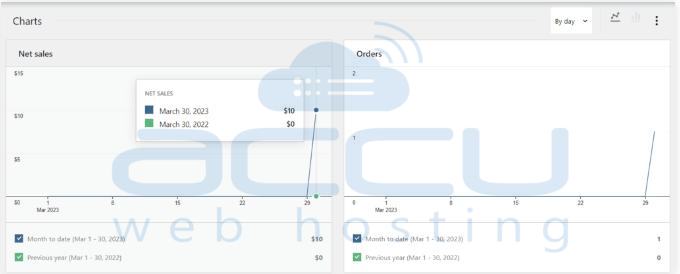
To gain insights into your top-selling products and categories, visit the Analytics section. It provides charts to monitor net sales and orders based on various time periods, such as today, week to date, month to date, quarter to date, year to date, and custom duration.
Settings:
Customize your online store's options by going to WooCommerce -> Settings. Here, you can configure various settings such as the default shipping destination, currency, and third-party integrations. Each setting option is accompanied by a short description when you hover over the question mark.
System Status:
The System Status page allows you to check the overall health of your WooCommerce store. It displays information about the WooCommerce software version, web server type, PHP limits, and more.
Clicking the "Get System Report" button generates a detailed report of your WordPress site and server environment. The page also includes tabs for tools, logs, and scheduled actions to manage specific options and actions.
Extensions:
WooCommerce extensions expand the functionality of your online store. You can add more payment gateways, shipping options, tracking solutions, and integrate with third-party services.
Visit the Extensions tab to browse WooCommerce plugins in different categories such as store content and customizations, marketing, payments, merchandising, shipping, delivery, and fulfillment, and store management.
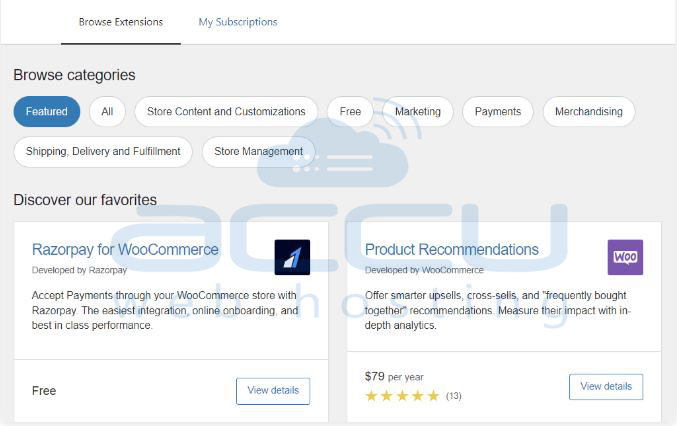
Clicking on an entry will take you to the WooCommerce store, where you can create an account and make a purchase to install the extension on your site.
Conclusion
In conclusion, WooCommerce is an excellent tool for building a comprehensive eCommerce store using WordPress, even without extensive programming knowledge. We hope this WooCommerce tutorial has helped you set up and manage your online store. If you have any questions, feel free to ask in the comments section.
