WordPress plugins are important for adding features to websites. However, sometimes they can cause issues that affect your site. To fix this, you may need to disable the plugin. Usually, you can do this through the admin dashboard, but if you can't access it, we will show you how to disable plugins using the file manager in your web hosting control panel.
How to disable WordPress plugins from File Manager
Note: Before making any changes, be sure to create a full backup of your website.
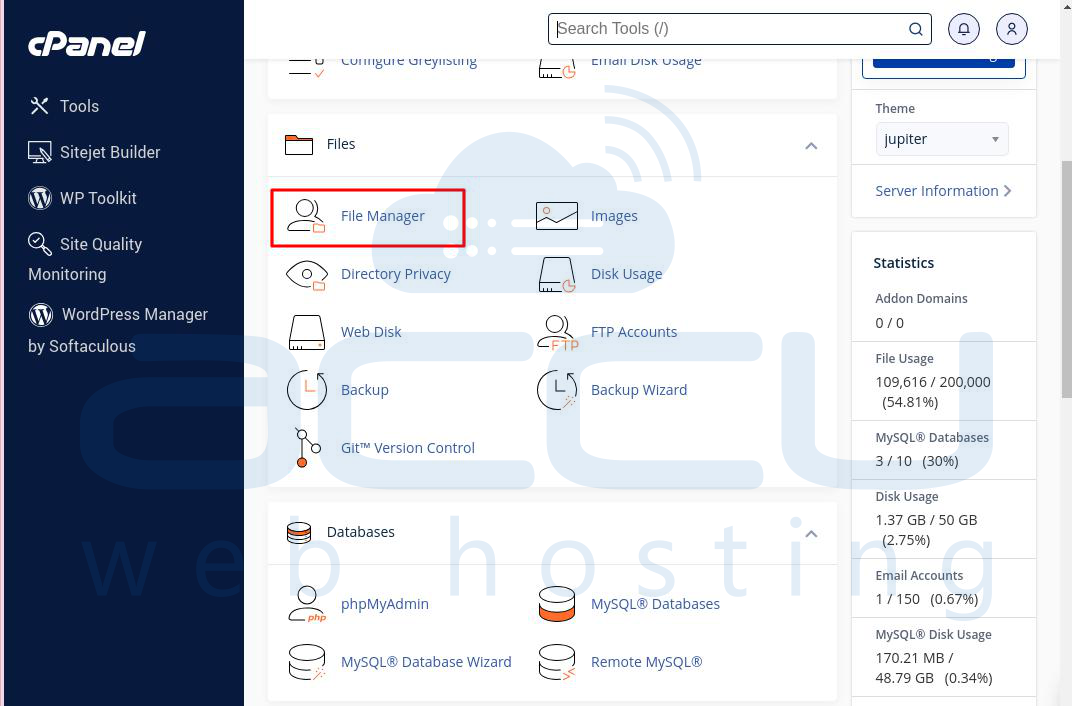
Step 1: Log into your cPanel account.
Step 2: Go to the File section and click on File Manager.
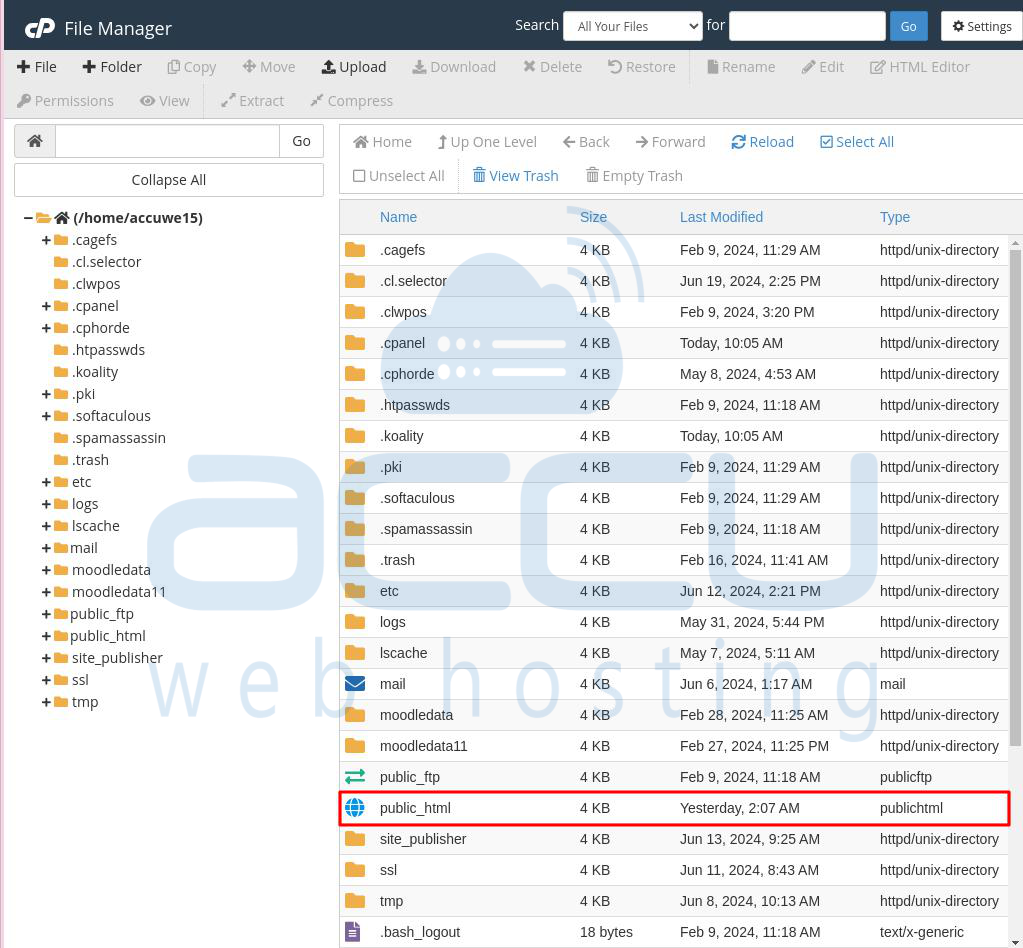
Step 3: In File Manager, find and double-click on the public_html folder to open it.
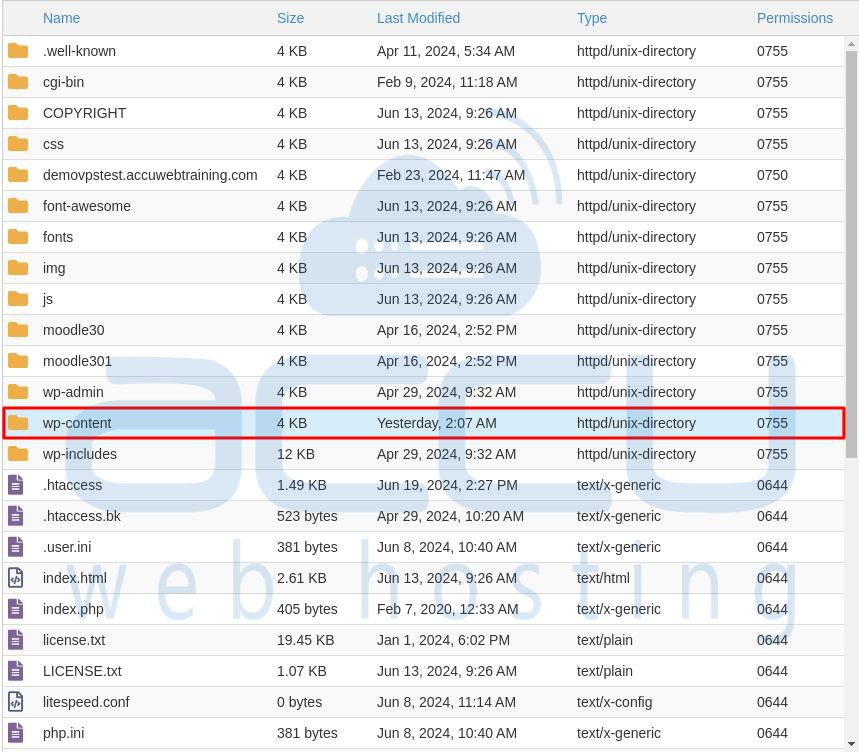
Step 4: Find and open the "wp-content" folder in your WordPress installation directory.
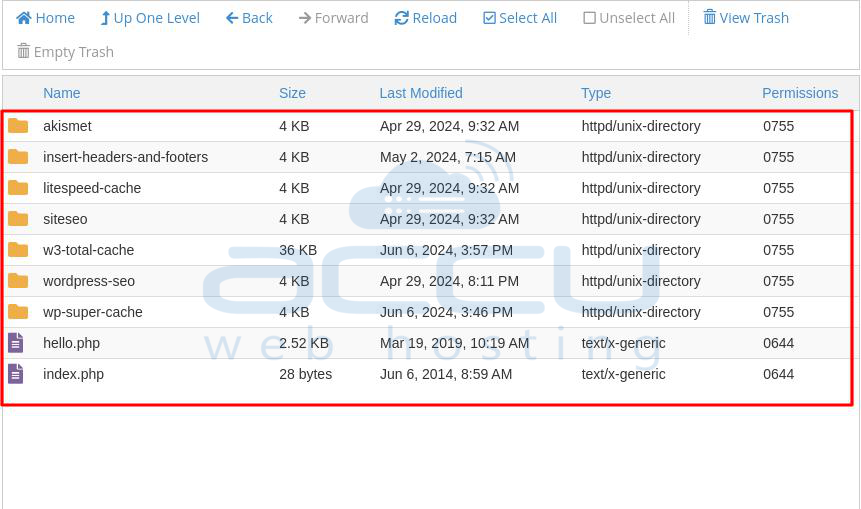
Step 5: Inside the "wp-content" folder, find and open the "plugins" folder, where all your plugins are stored.

Step 6: Find the folder with the same name as the plugin you want to disable. Each plugin has its own folder here.
Step 7: There are two ways to deactivate the plugin:
Option 1: Rename the plugin's folder. Right-click the folder, select Rename, and add "disabled_" or "old_" to the beginning of the folder name. For example, rename "w3-total-cache" to "disabled_w3-total-cache".

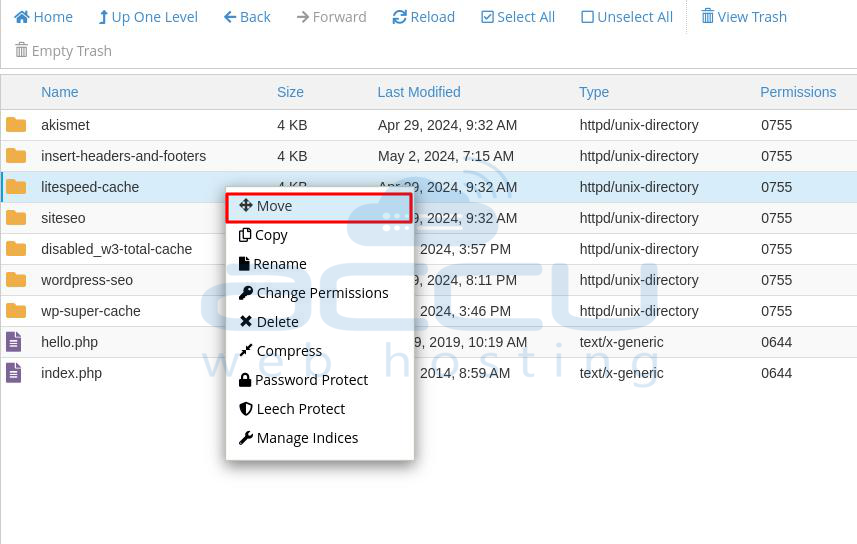
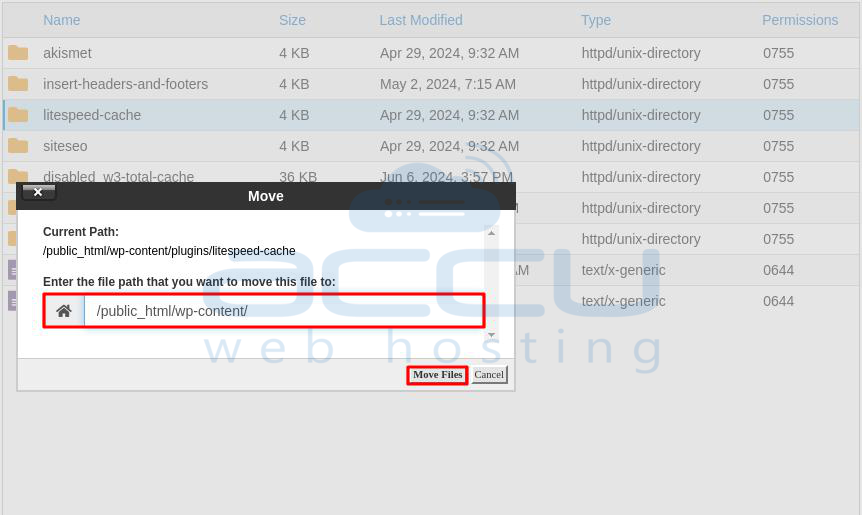
Option 2: Move the plugin's folder outside the "plugins" directory. Right-click the folder and select the Move option.
Enter the new path in the field, and click "Move File".
You've successfully disabled the plugin by renaming or moving the folder. Please check your website to confirm that the plugin is disabled.
Note: Some plugins, e.g., caching ones, are hard-coded, and the folder renaming will not disable them. In such cases, you will need to disable the plugin in the database.
Alternative Option to Disable the Plugins:
There are two common ways to disable WordPress plugins from FileManager: Softaculous WordPress Manager and database. In this guide, we will cover each option:
>>Disable plugins through File Manager
>>Disable plugins through the database
1) Disable plugins through Softaculous WordPress Manager
WordPress Manager enables you to install, enable, disable, and delete plugins for your WordPress sites. To do this, follow these steps.
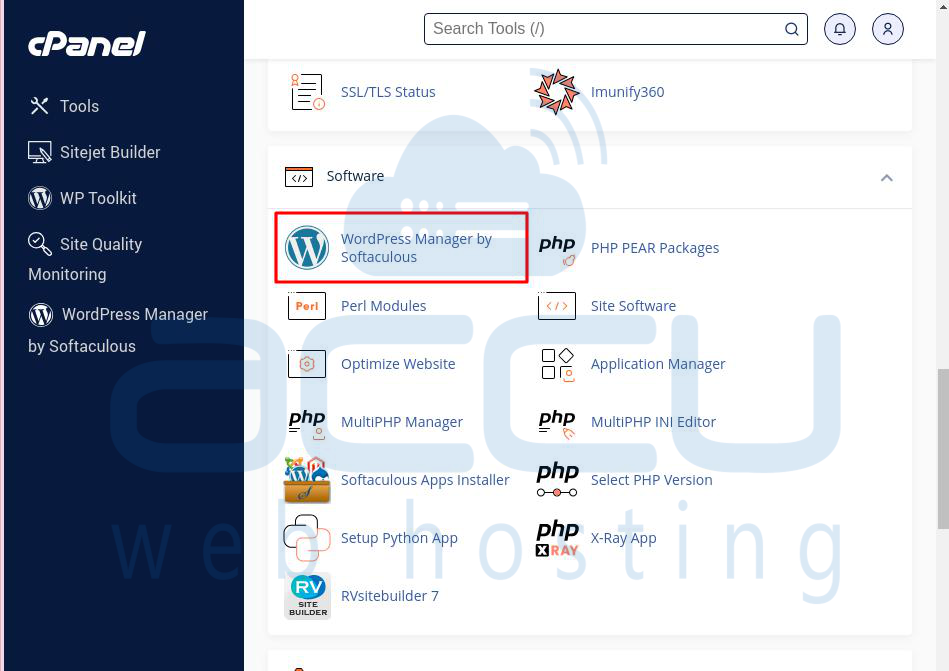
Step 1: Access your cPanel account, navigate to the Software section, and click WordPress Manager by Softaculous.
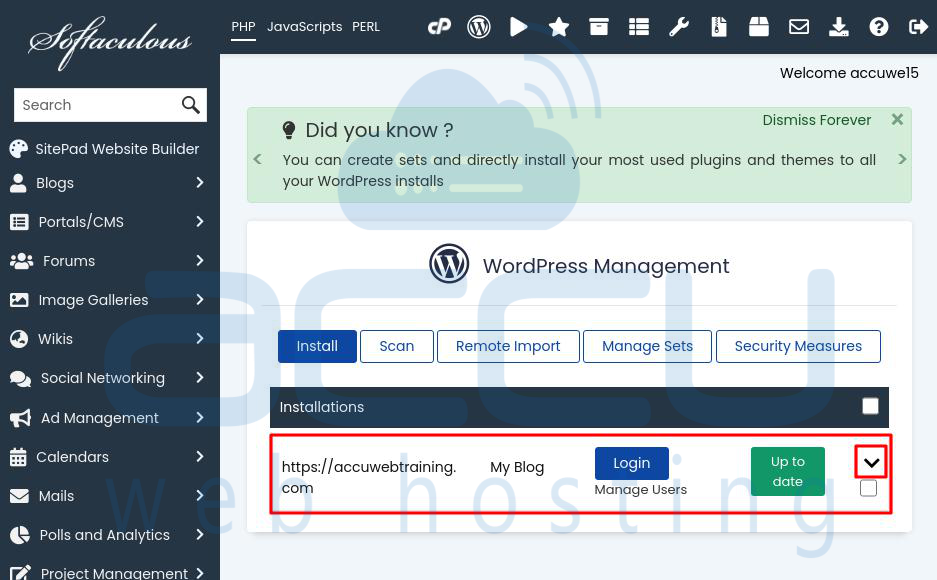
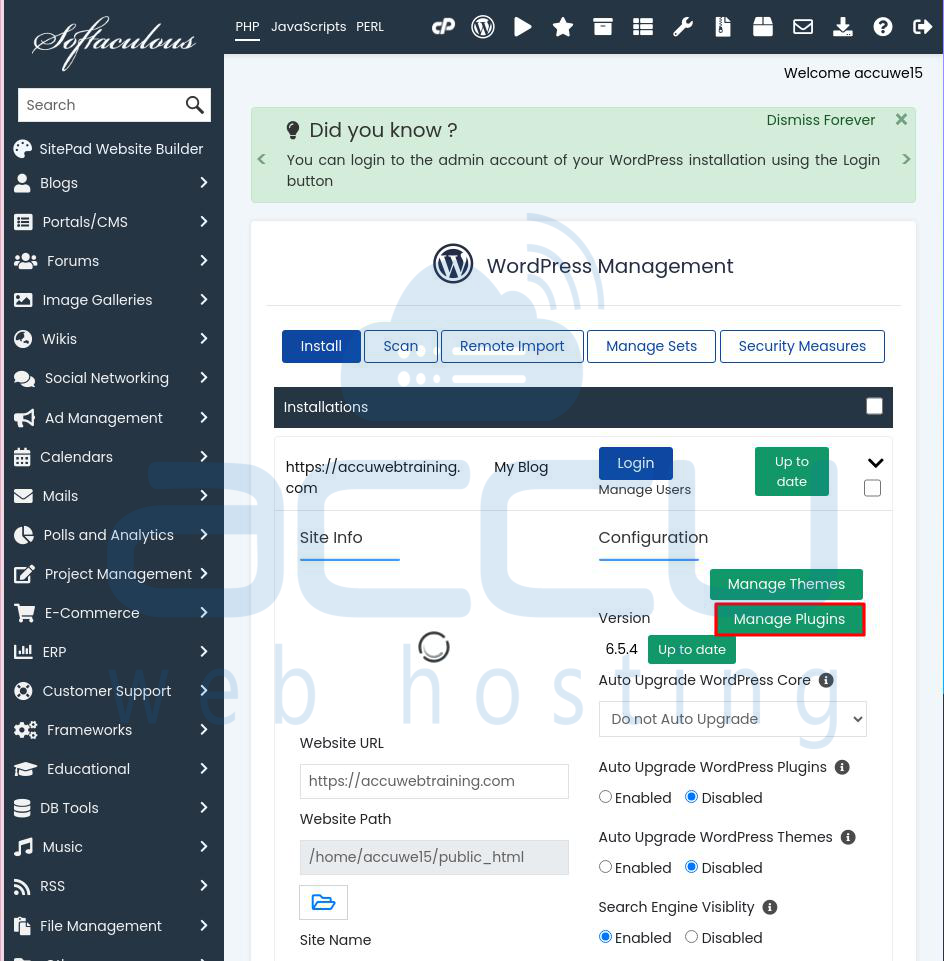
Step 2: In Softaculous WordPress Manager, locate the site you want to configure, and then click the down arrow icon.
Step 3: Click Manage Plugins.
Step 4: On the Installed tab, a list of installed plugins appears:
- If an update for a plugin is available, a circular arrow icon appears in the Version column. Click it to update the plugin.
- To enable or disable a plugin, click the slider in the Status column.
- To uninstall a plugin, click the red trash can icon in the Delete column.
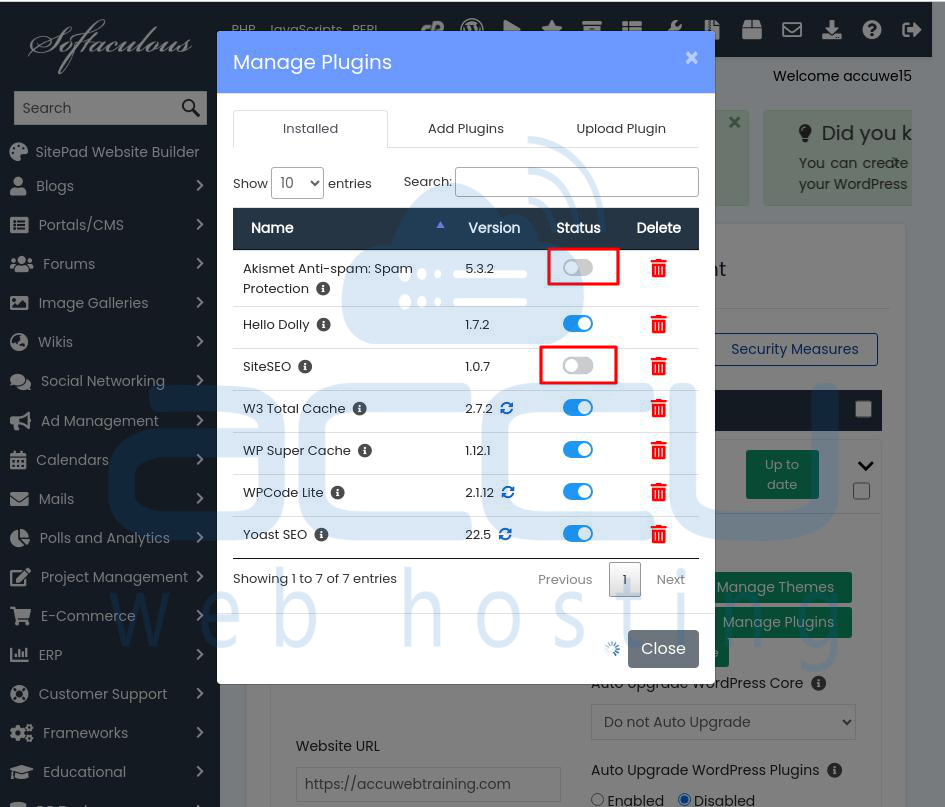
Once done, you'll see the message Plugin deactivated successfully.
2) Disable plugins via database
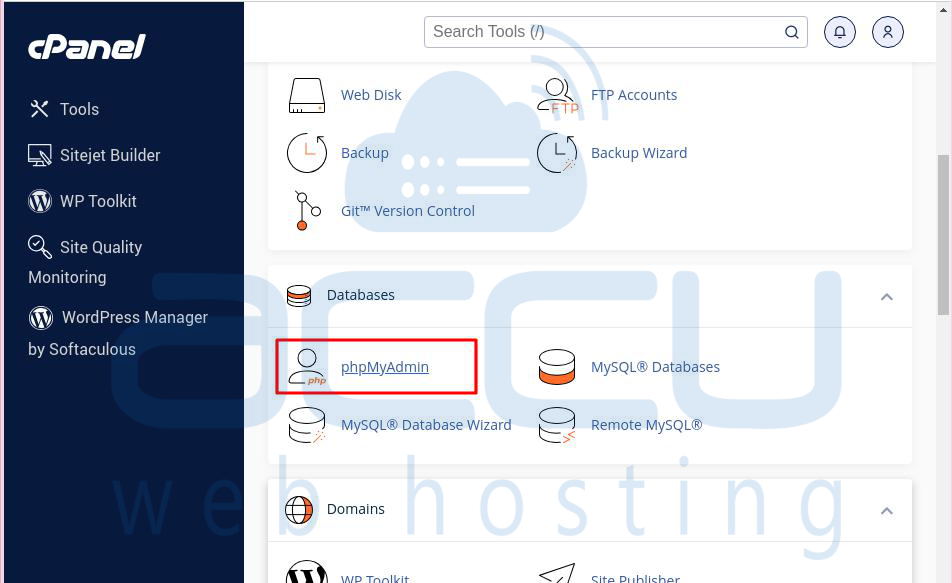
Step 1: Log into your cPanel, go to the Databases section, and click on phpMyAdmin.
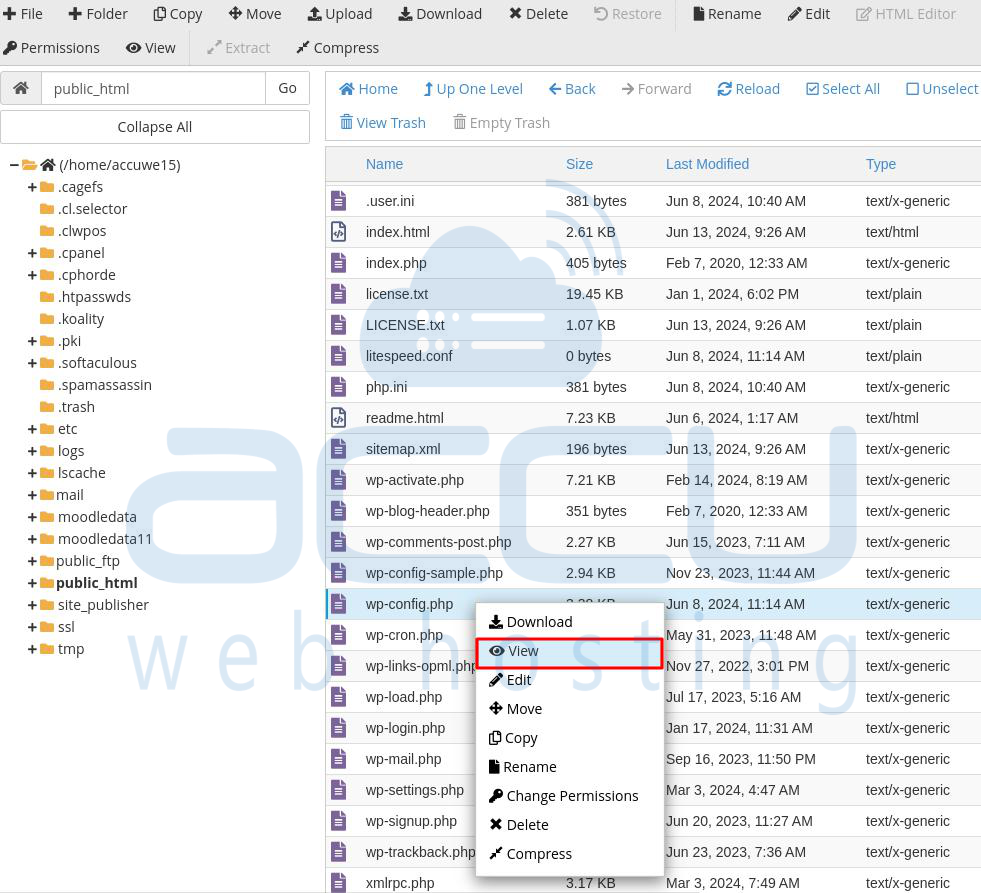
Step 2: To find the database used by your WordPress site, check the wp-config.php file in the website root.
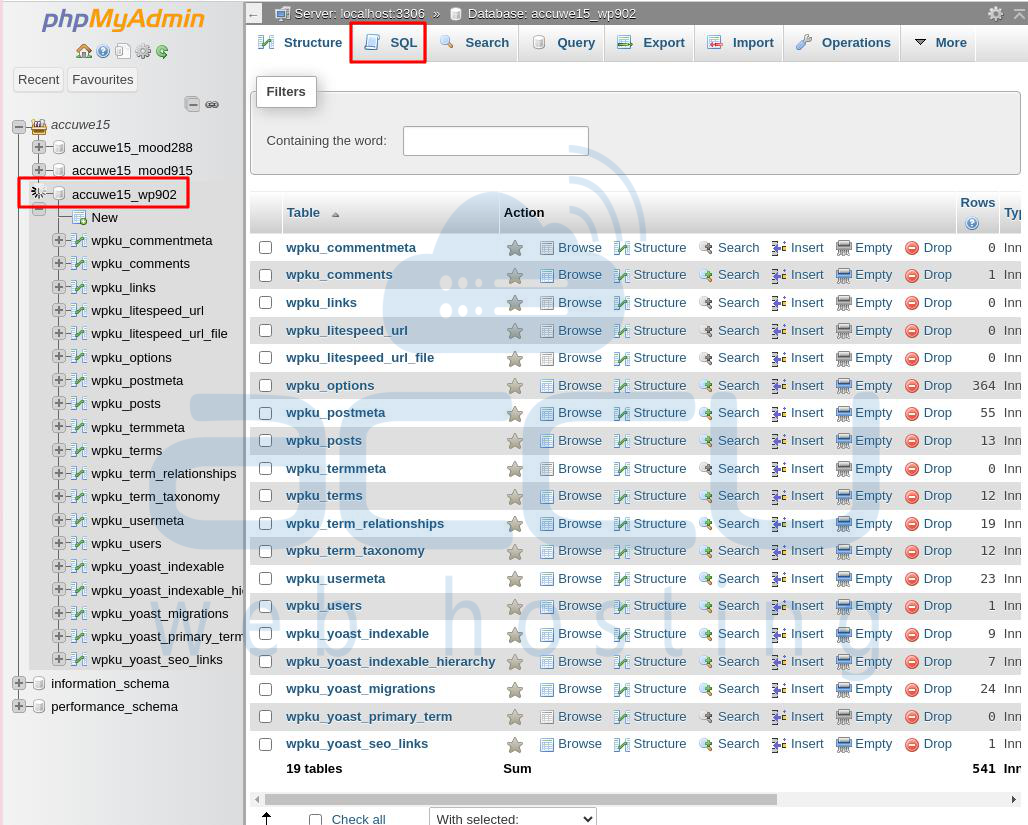
Step 3: In phpMyAdmin, expand the list of databases and click on the one used by your WordPress site. Then, click on SQL in the top menu.
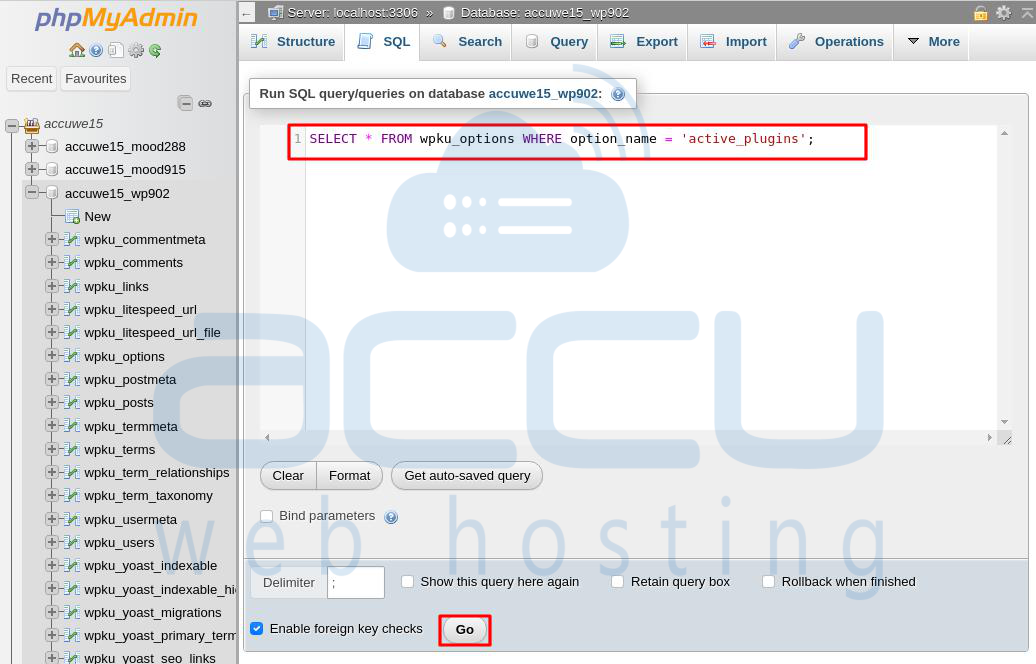
Step 4: Enter this query and click Go:
SELECT * FROM wp_options WHERE option_name = 'active_plugins';
Note: This query assumes the default WordPress 'wp' database prefix. If your prefix is different, you may need to adjust the query accordingly.
Step 5: After running the query, click on the Edit option.
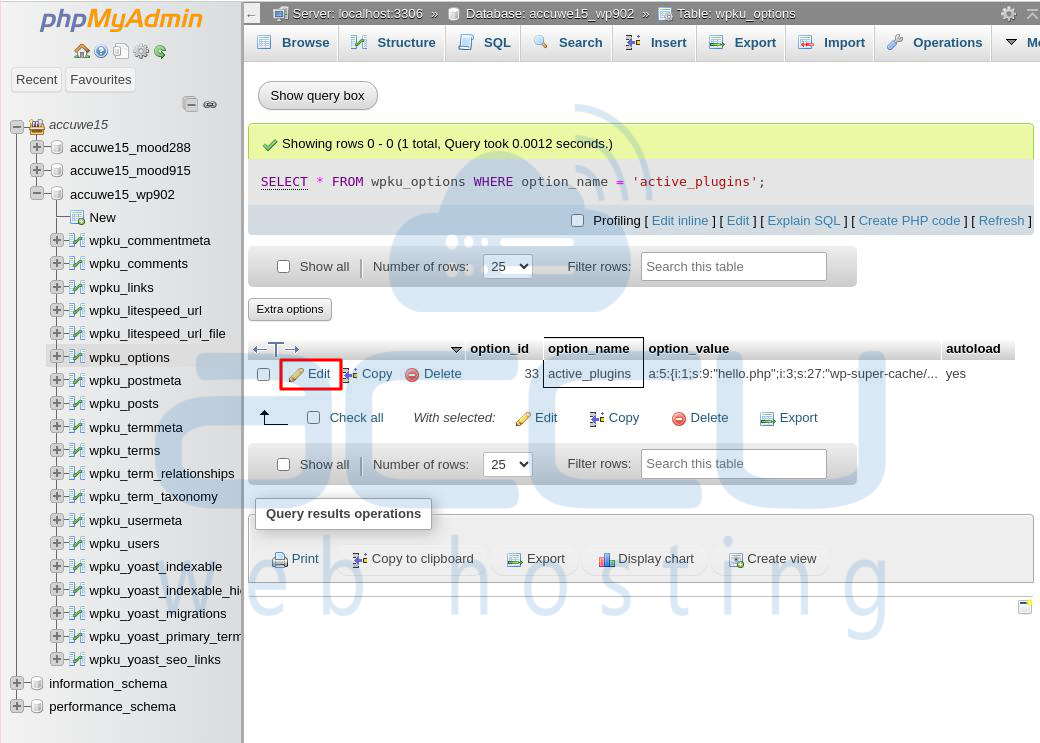
You'll see output like this:
a:5:{
i:1;s:9:"hello.php";
i:3;s:27:"wp-super-cache/wp-cache.php";
i:4;s:35:"insert-headers-and-footers/ihaf.php";
i:5;s:24:"wordpress-seo/wp-seo.php";
i:6;s:42:"disabled_w3-total-cache/w3-total-cache.php";}
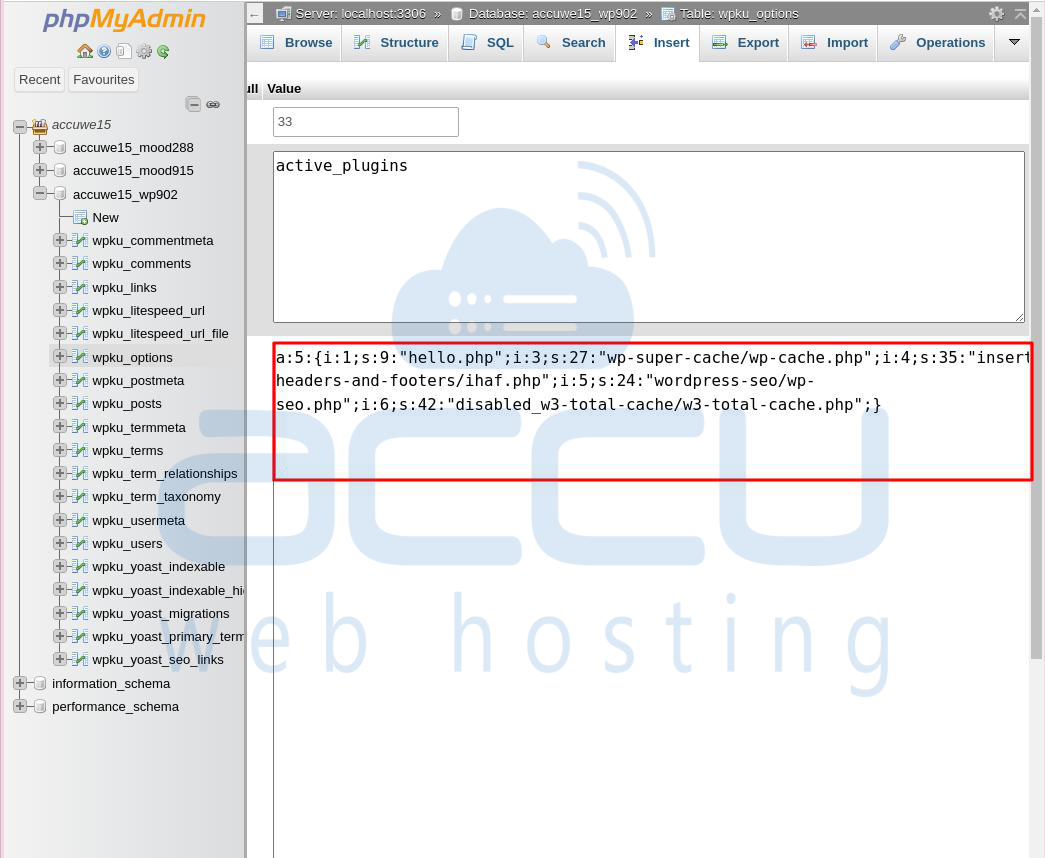
The number 5 indicates the total number of active plugins. They are numbered from i:0 to i:5.
To deactivate a plugin, remove its line and adjust the numbering. For example, to turn off hello, the output should be:
a:4:{
i:1;s:27:"wp-super-cache/wp-cache.php";
i:2;s:35:"insert-headers-and-footers/ihaf.php";
i:3;s:24:"wordpress-seo/wp-seo.php";
i:4;s:42:"disabled_w3-total-cache/w3-total-cache.php";}
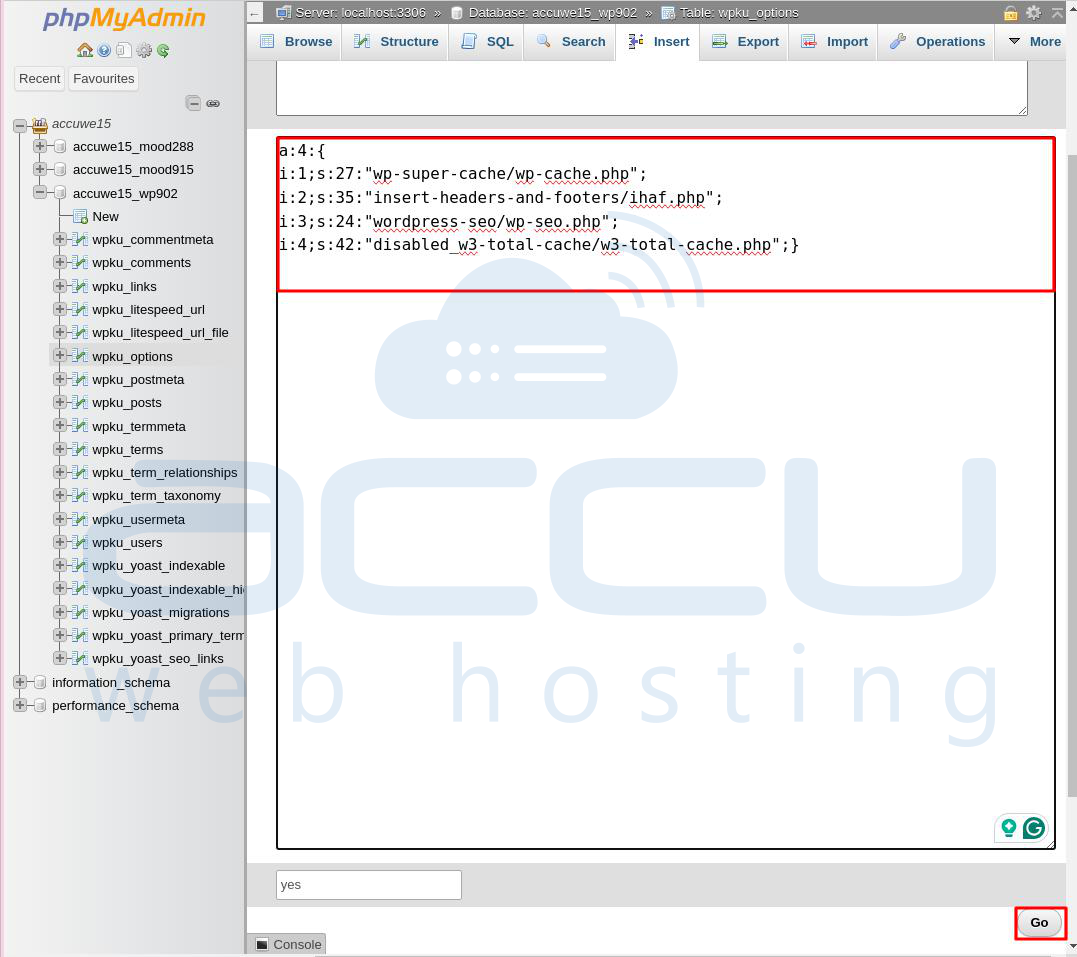
Note: To deactivate all plugins, delete all the code in the box.
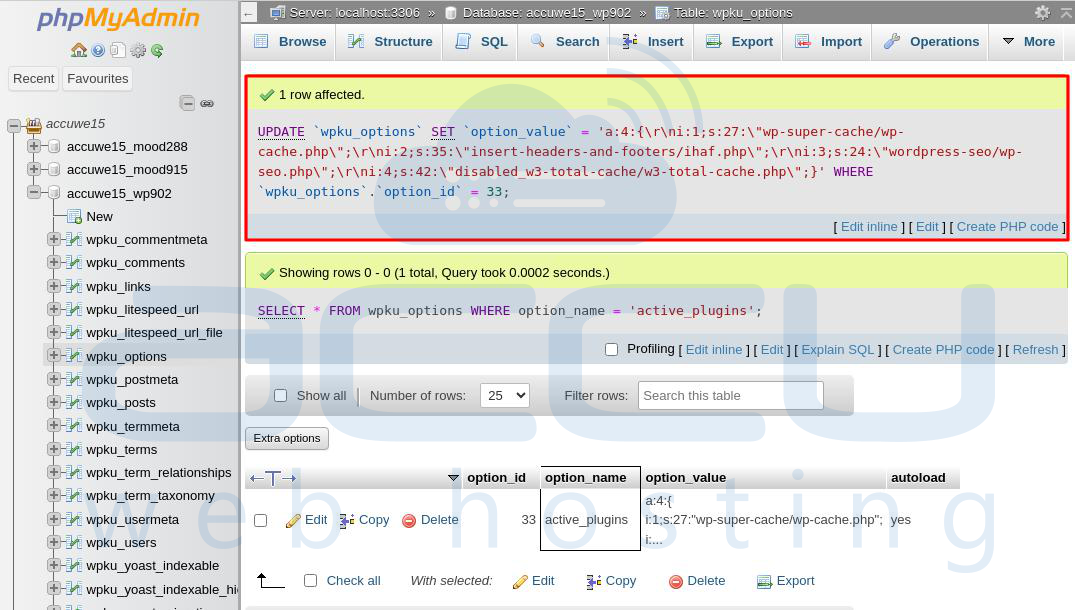
Step 6: Click the Go button to run the query. When it successfully finishes, you'll see a message on the screen saying "1 row affected." This means the plugin has been disabled.
Conclusion:
Disabling WordPress plugins using File Manager is an easy way to fix problems when you can't use the admin dashboard. By renaming or moving the plugin folder, you turn off the plugin, which helps your website work properly again. This method is a dependable option for handling plugins directly from your web hosting control panel.
