Have you seen the "Request Entity Too Large" or 413 error? It is a standard WordPress error that occurs when you try to upload a file larger than the allowed limit.
Most web hosts allow large files like images. However, if you're uploading a custom theme or plugin, those files can be much bigger than images, which often causes the 413 error.
Luckily, fixing this is simple. Today, I'll show you how to solve the 413 error in WordPress.
What Causes the "Request Entity Too Large" Error?
The "Request Entity Too Large" or 413 error in WordPress happens when the file you're trying to upload is more significant than the maximum size allowed. This limit is usually set by your web host and should be big enough for most files like images.
The error often occurs when you try to upload a large plugin or theme file, but it can also occur when you upload a very large image or video.
To avoid this, knowing your site's upload limit is essential. If you need to upload larger files, you can increase the limit in WordPress. I'll show you how to do that.
When raising the upload limit, make sure to increase it only as much as needed. Setting it too high can lead to issues like users uploading very large files, which might slow down your site. These limits exist to keep your website and others on the same server running smoothly.
How to Fix the "Request Entity Too Large" Error
The cause of the 413 error is simple, and it’s easy to prevent and fix.
Before you start, you’ll need access to your website's cPanel. The AccuWeb Hosting team gives you the login details when you create an account. Also, make sure to back up your website.
This way, if something goes wrong, you can restore your site to its previous working version.
Method 1: Modify Your Theme’s Functions.php File
This method works well, but it requires changes to WordPress theme files. When you change these files, using a child theme is a good idea. That way, your changes won’t be lost when the theme updates.
If you can’t use a child theme, you can try the next method, which involves editing the .htaccess file to increase the upload limit.
To start, log in to your cPanel and click on File Manager. File Manager lets you access your website’s files.

Find your theme’s functions.php file by clicking on the public_html folder, then wp-content. Go to the themes folder and open the folder for your active theme. Right-click the functions.php file and select Edit.

A pop-up will appear, warning you to back up your files before editing. If something goes wrong, you can restore your site to its previous state.
Click “Edit,” and a new tab will open showing the file’s code.

We need to increase the upload limit to fix the "413 Request Entity Too Large" error. This limit is in place to protect your site, as a larger limit could allow hackers to upload harmful files.
You can increase the upload limit by adding three lines of code to your theme's functions.php file:
@ini_set( 'upload_max_size' , '64M' );
@ini_set( 'post_max_size', '64M');
@ini_set( 'max_execution_time', '300' );

This will increase the upload limit to 64MB and allow 5 minutes for file uploads. You can adjust the execution time or upload limit if needed. You may also need to ask your web host about the maximum upload limit.
After adding the code, click "Save Changes."
The 413 error should now be fixed because the file size is within the new limit.
Remember, you’re editing a theme file, so using a child theme is safer. Also, you might not have permission to edit the functions.php file.
Method 2. Edit the .htaccess file
The second method is to edit the .htaccess file in your WordPress setup. This file controls some settings for your website and is found in the main folder of your WordPress installation.
To edit the .htaccess file, you need to access your website cPanel account. Log in to your cPanel account. Go to "File Manager" under the "Files" section.

Find the folder where the .htaccess file is located. If you don’t see it, turn on "Show Hidden Files" in the top-right corner.

Right-click on the .htaccess file and choose "Edit."

If a pop-up appears, click the "Edit" button. Add this code to the .htaccess file. After that, click "Save Changes" to save your edits.
php_value upload_max_filesize 64M
php_value post_max_size 64M
php_value max_execution_time 300
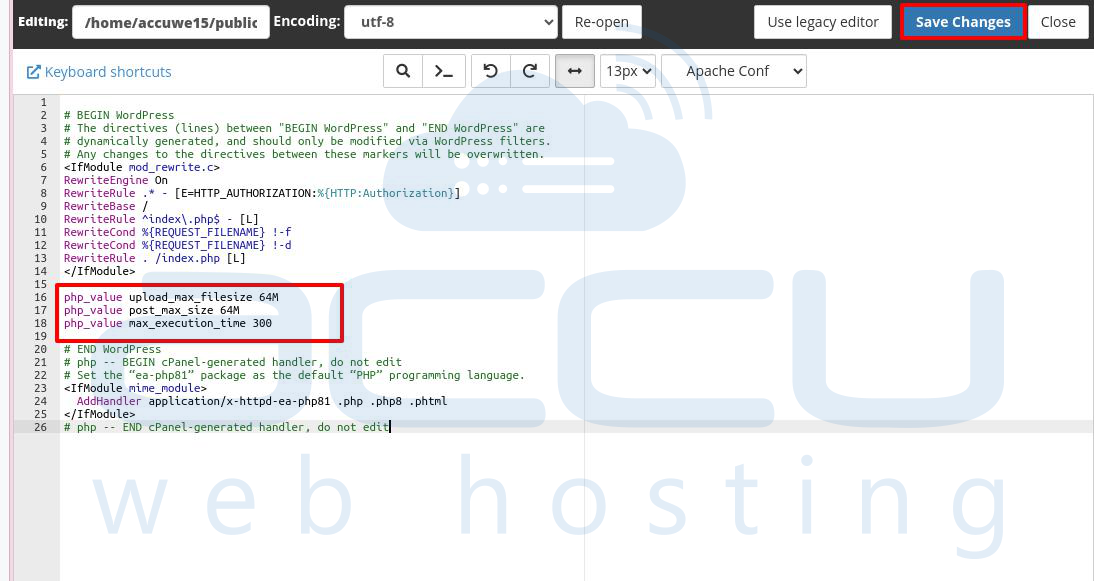
This code sets the maximum file upload size to 64MB and the execution time to 300 seconds. You can change these values to suit your needs.
Method 3. Edit the php.ini file
If the previous step doesn’t work, you will need to edit the php.ini file. This file controls PHP settings on your server. To edit it, you need to access your cPanel account.
Log in to your cPanel account. Go to the Software section and click on MultiPHP INI Editor.

There are two ways to edit the php.ini file:
Basic Mode (lets you change settings through a form)
Editor Mode (lets you edit the file directly in a text editor)
In Basic Mode, select your domain from the dropdown menu. The settings will appear in a table.
The "PHP Directive" column lists the settings.
The "Settings" column has input fields where you can enter values.
The "Information" column provides descriptions for each setting.

Change the values of these settings:
max_execution_time (maximum time for uploads, in seconds)
upload_max_filesize (maximum upload size, in megabytes)
post_max_size (maximum post size, in megabytes)
Click “Apply” to save your changes.

In Editor Mode, select your domain from the dropdown and add the following lines:
upload_max_filesize = 64M
post_max_size = 64M
max_execution_time = 300
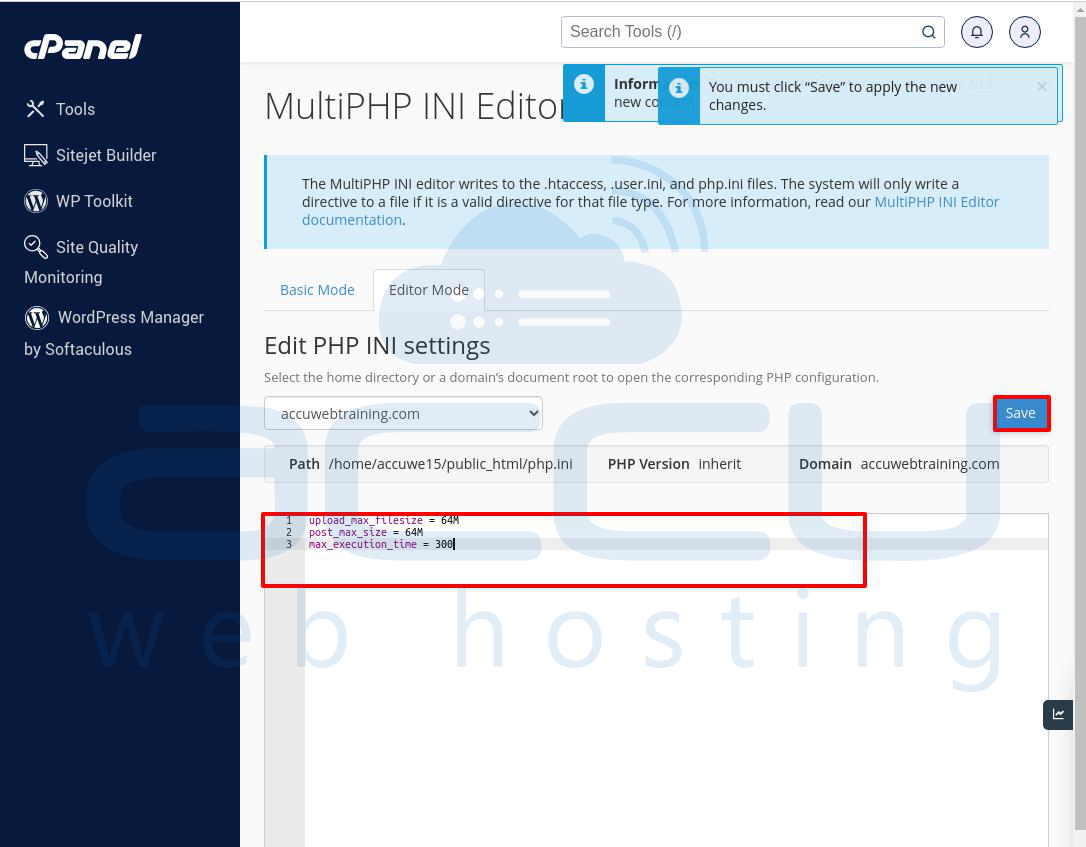
Click “Save” at the top-right when done.
Conclusion:
To fix the "413 Request Entity Too Large" error in WordPress, you can increase the upload limit by editing files like .htaccess, php.ini, or functions.php. This involves raising the maximum file upload size and the time allowed for uploads. You can make these changes using your hosting panel (cPanel) or an FTP client.
We hope this article will help you fix the 413 error and stop it from happening again. If you have any questions, check the FAQ section or leave a comment below.
