Google reCAPTCHA is a free service provided by Google which helps to protect websites from spam and abuse. It is an effective security option that helps protect the WordPress website as it equips the web host to distinguish between bots and humans and restricts the bots' access.
Google reCAPTCHA can be used for website login, registration, comments, password recovery, contact forms, etc. However, it asks the users to decipher difficult-to-read text or match the images that are easy for humans but complicated for the bots, restricting their access.
You can follow these steps to add the Google reCAPTCHA on your WordPress website -
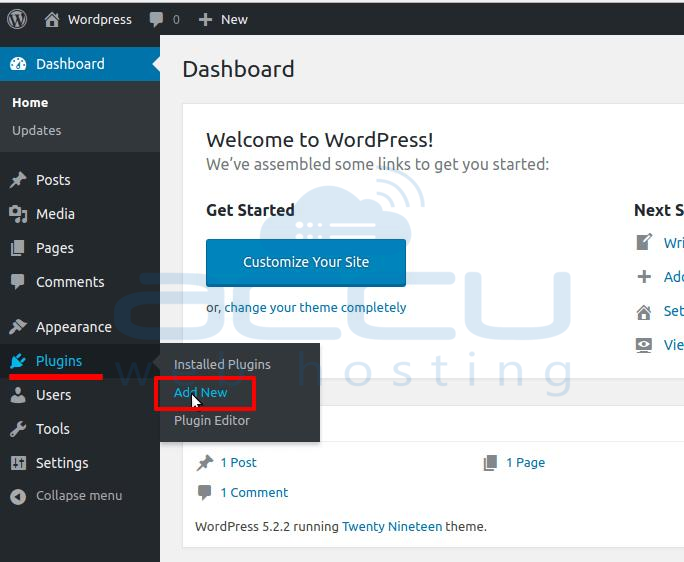
1. Log in to the WordPress Admin Panel.
2. Go to Plugin and click on Add New.
3. In Search Plugin, search for Google Captcha.

4. Go to the same Plugin and click on Install Now button.
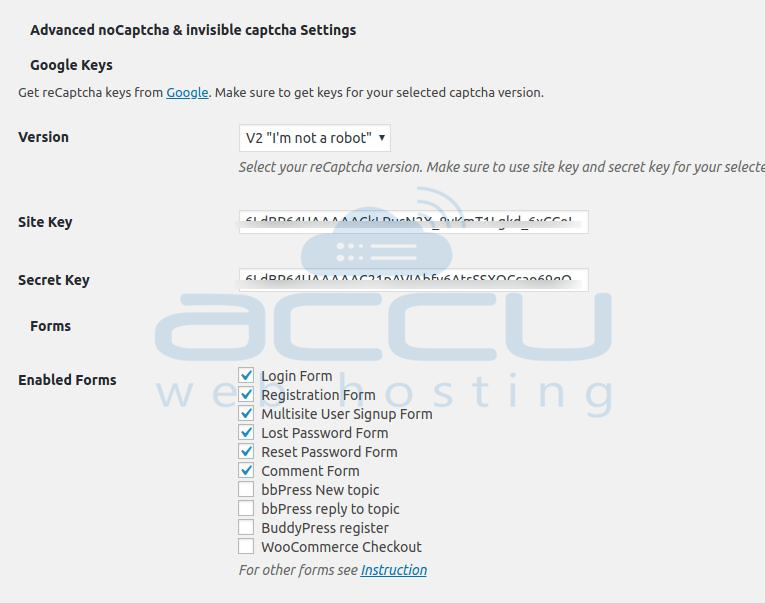
We will install Advanced noCaptcha & invisible Captcha (v2 & v3).
5. Activate the plugin.

6. Once you install and activate the same plugin, it will show you inside all the plugins list.
7. Now, click on the Settings button.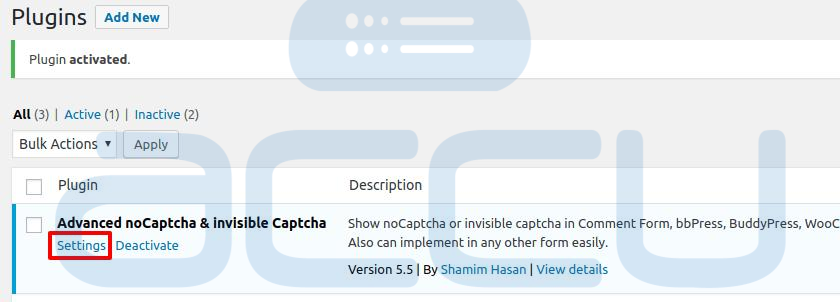
8. We will gather the Google reCAPTCHA Keys.
9. Click the Google link to redirect to the Google reCAPTCHA page.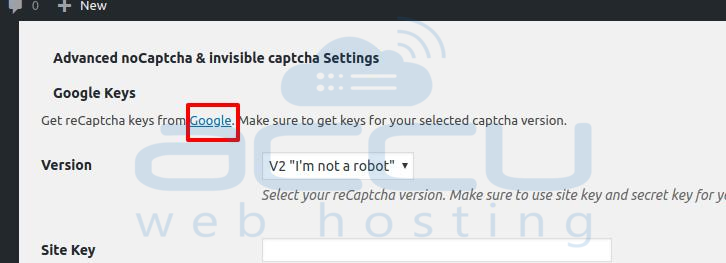
10. Submit the required details such as Domain Name, reCAPTCHA v2 type, and accept the terms and service.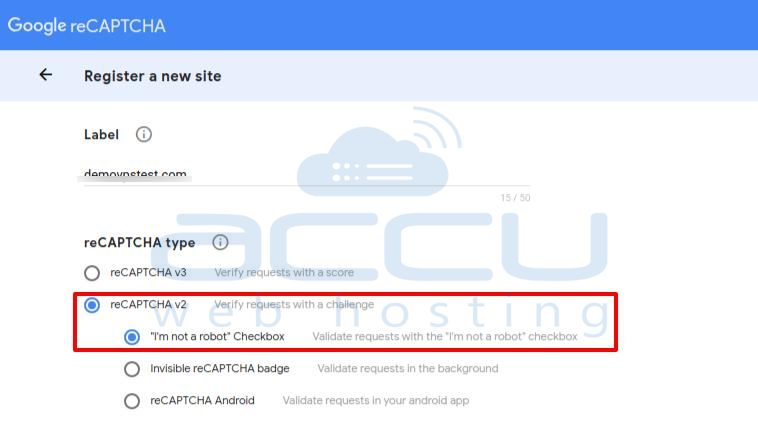
11. It will give you the Site Key and Secret Key.
Copy the same keys and keep the information safe.
12. Go back to the WordPress Google reCAPTCHA Settings page and enter the Site Key and Secret Key generated in the previous step.
13. In the Enabled Form option, tick the required forms where you need to enable the Google reCAPTCHA.
14. Click on the Save Changes button.
15. Google reCAPTCHA will be activated on your WordPress website.
After successfully activating the Google reCAPTCHA, visitors will see it where you have selected in the form.
