If you have checked your WordPress website in performance tools like Google PageSpeed Insights, you may have seen the warning: Leverage Browser Caching
This warning appears when static resources (images, CSS, JavaScript, etc.) do not have proper caching rules defined. Browser caching helps store these resources locally, so when a visitor returns to your site, the browser can load them from cache instead of downloading them again, resulting in faster page load times.
The easiest way to fix this issue is by installing caching plugins such as W3 Total Cache, WP Super Cache, or WP Fastest Cache. However, you can also resolve it by manually adding Expires headers to your .htaccess file.
Follow the steps below to add caching rules manually:
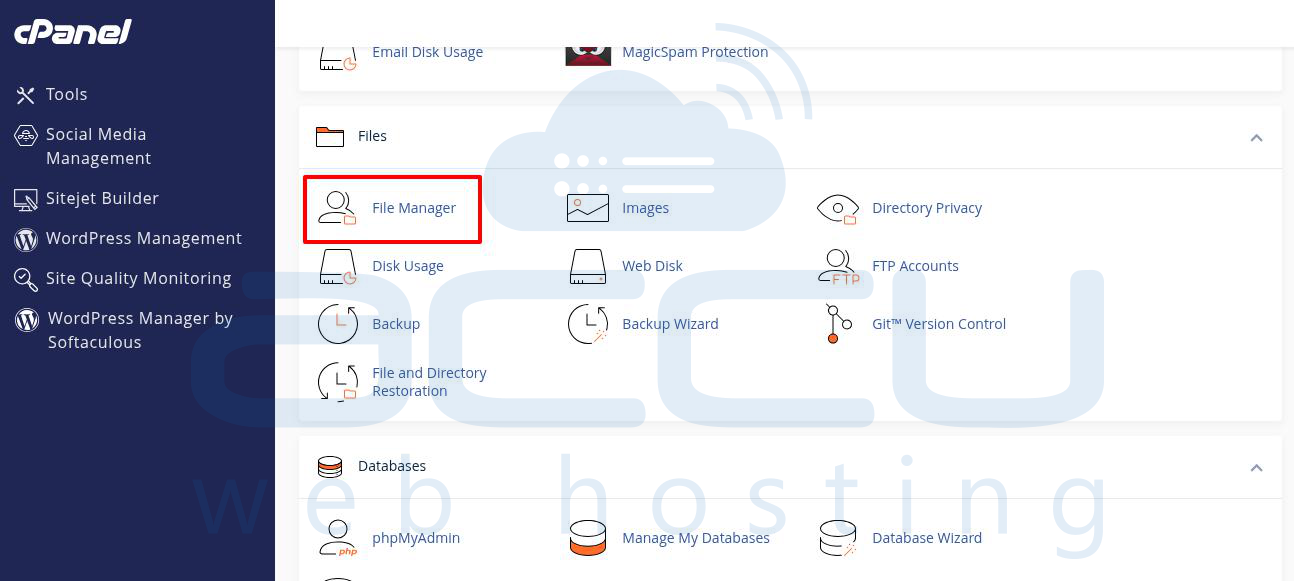
Step 1: Log in to your cPanel.
Step 2: Under the Files section, open File Manager.
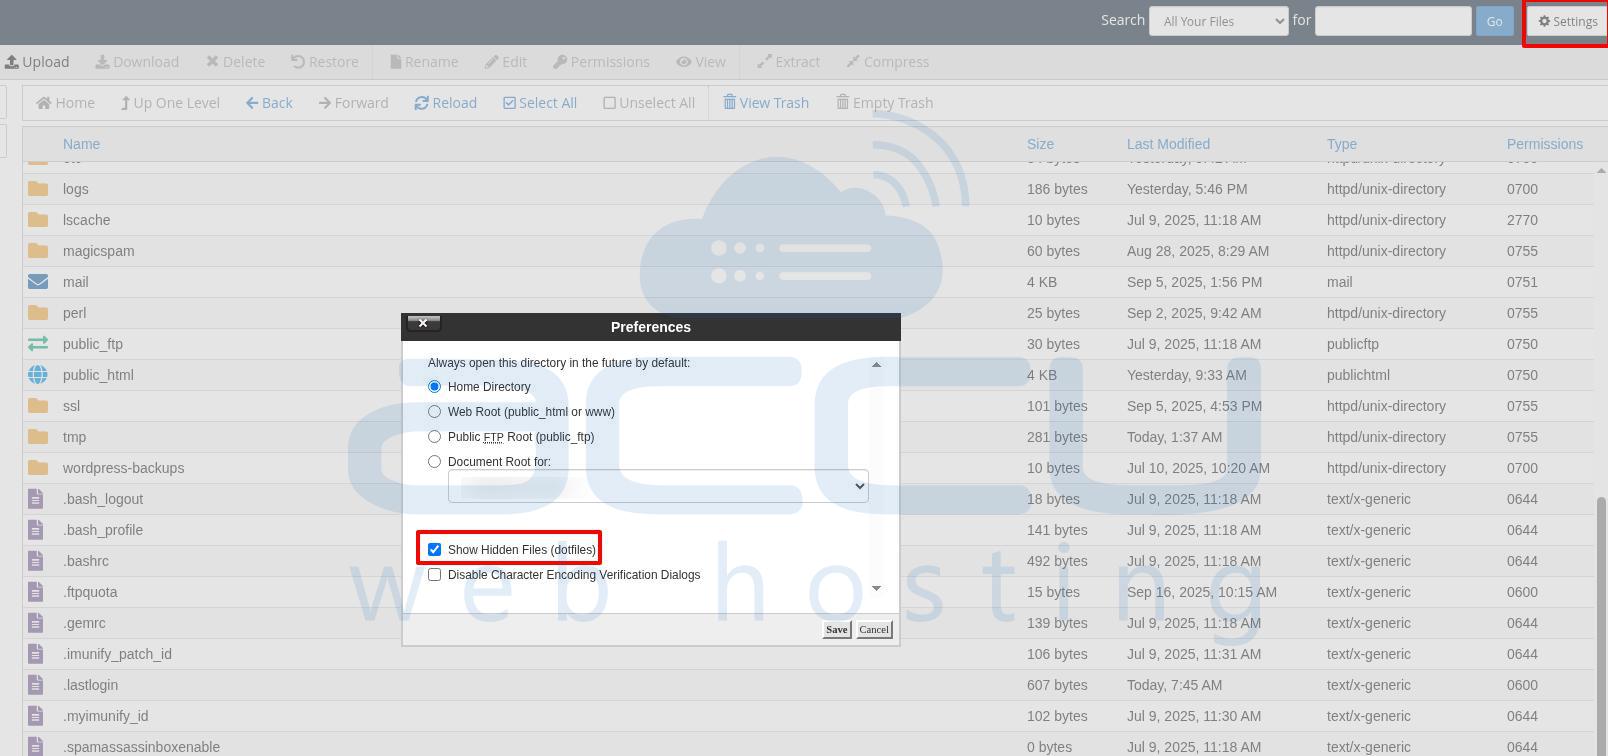
Step 3: Enable the option Show Hidden Files from settings and click Go.
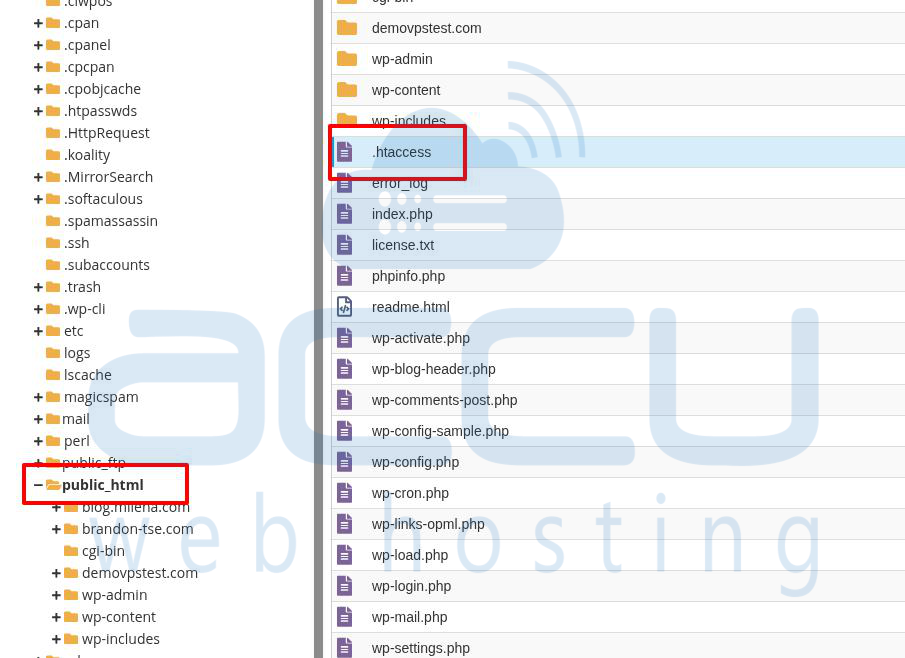
Step 4: Navigate to the public_html folder and locate the file named .htaccess.
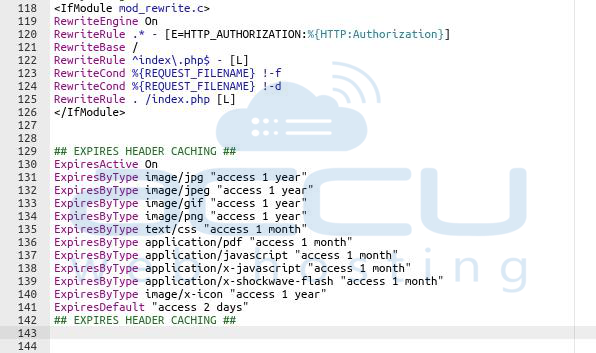
Step 5: Edit the .htaccess file and paste the following code at the bottom:
## EXPIRES HEADER CACHING ##
ExpiresActive On
ExpiresByType image/jpg "access 1 year"
ExpiresByType image/jpeg "access 1 year"
ExpiresByType image/gif "access 1 year"
ExpiresByType image/png "access 1 year"
ExpiresByType text/css "access 1 month"
ExpiresByType application/pdf "access 1 month"
ExpiresByType application/javascript "access 1 month"
ExpiresByType application/x-javascript "access 1 month"
ExpiresByType application/x-shockwave-flash "access 1 month"
ExpiresByType image/x-icon "access 1 year"
ExpiresDefault "access 2 days"
## EXPIRES HEADER CACHING ##
Save the changes.
Conclusion
By adding Expires headers in your .htaccess file, you can resolve the "Leverage Browser Caching" warning and significantly improve your website’s loading speed. This ensures static resources are cached in the visitor’s browser, reducing server load and improving performance scores on tools like Google PageSpeed Insights.
