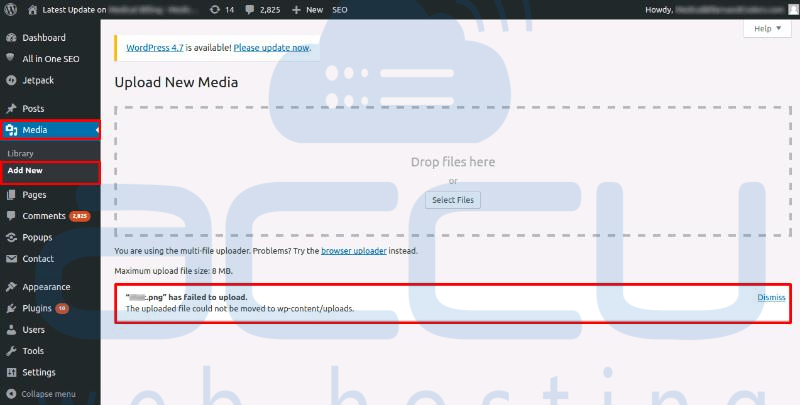
Sometimes while trying to upload new media/ images to your WordPress website, you can face the following error -
The uploaded file could not be moved to wp-content/uploads"
Note
This error occurs only if you are using the default application pool in Windows VPS.
To resolve it, you need to follow the step listed below -
1. Log in to your Windows VPS via RDP (Remote Desktop Access).
This tutorial will guide you to connect to the Windows VPS Server using the RDP from different operating systems.
2. Click on Start and go to the wp-content folder of your WordPress installation.
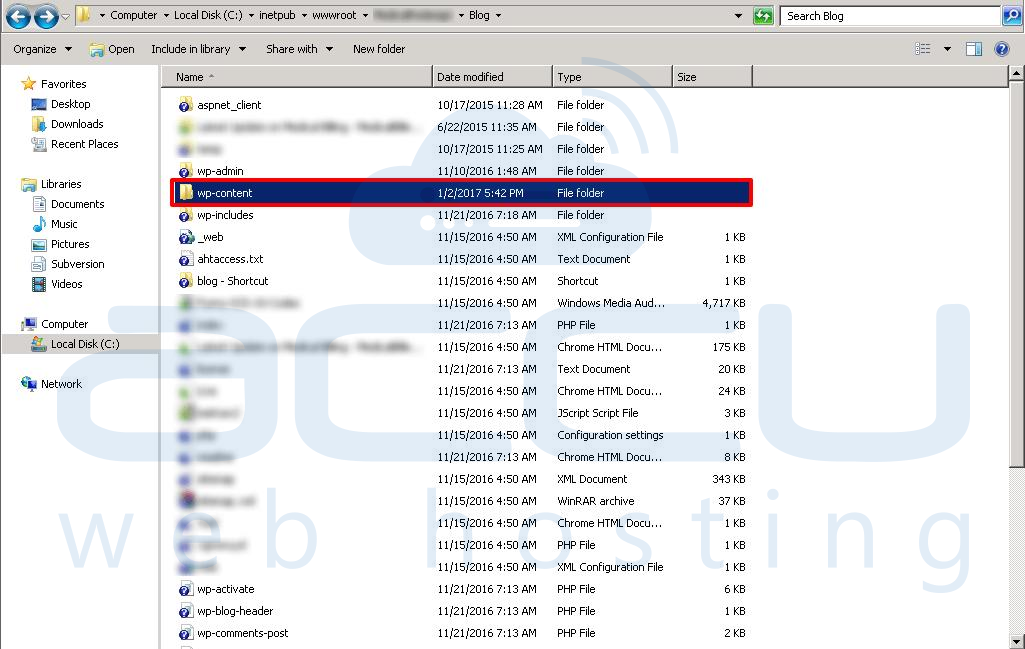
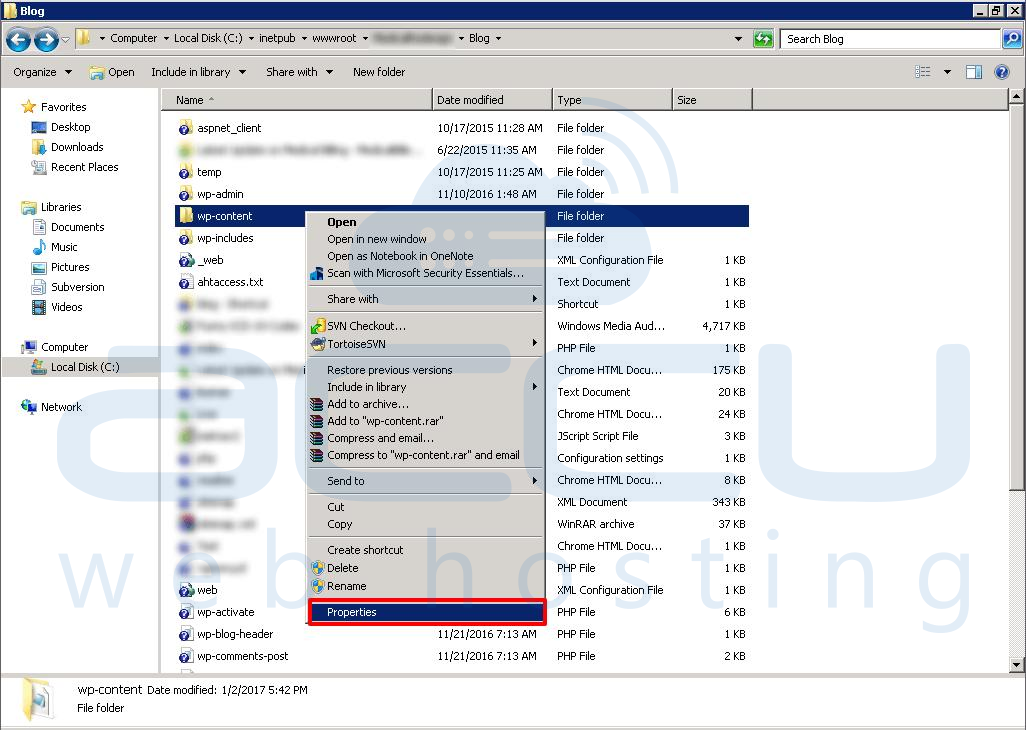
3. Right-click on the WP-Content folder and select Properties.
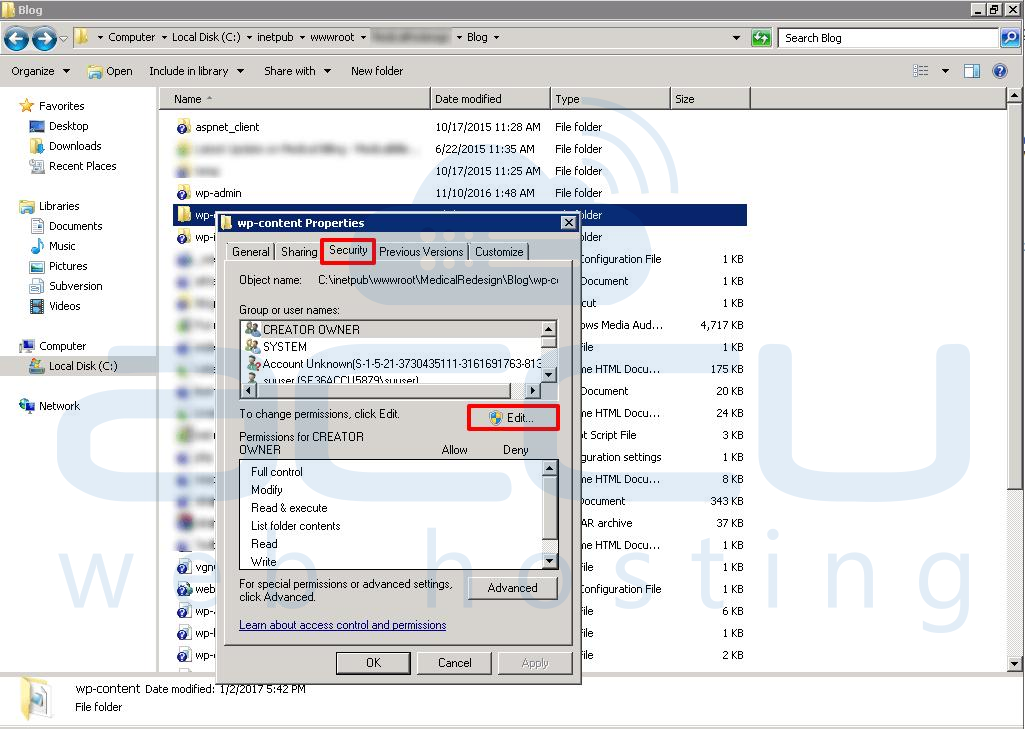
4. In the Properties tab, select the Security option and click on Edit.
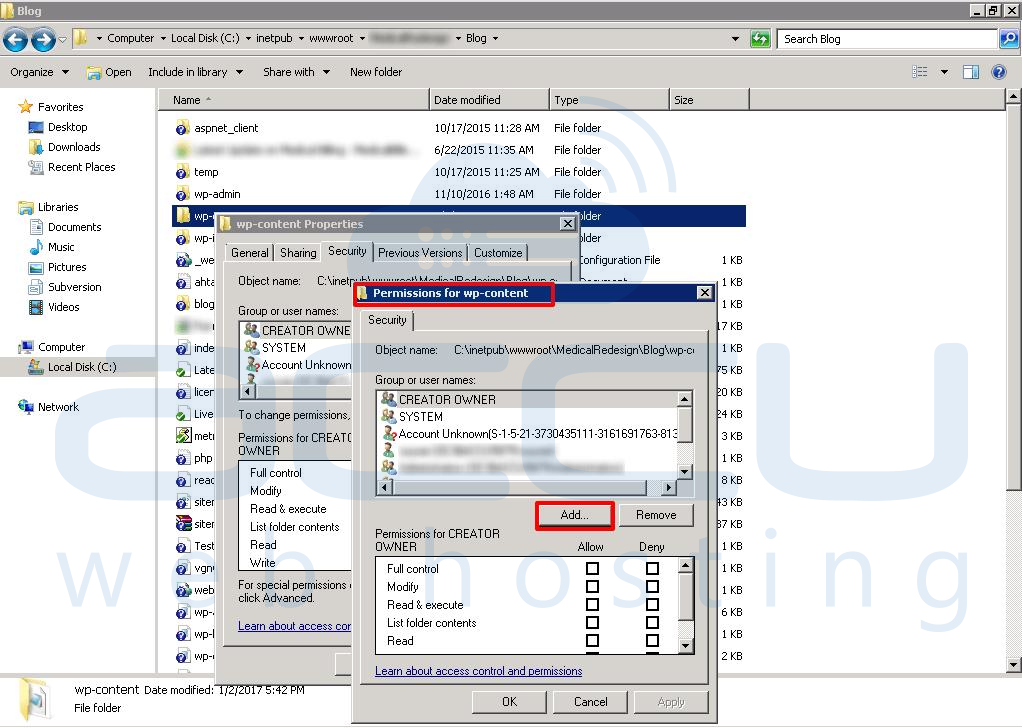
5. In the Permission for WP-Content tab, click on Add.
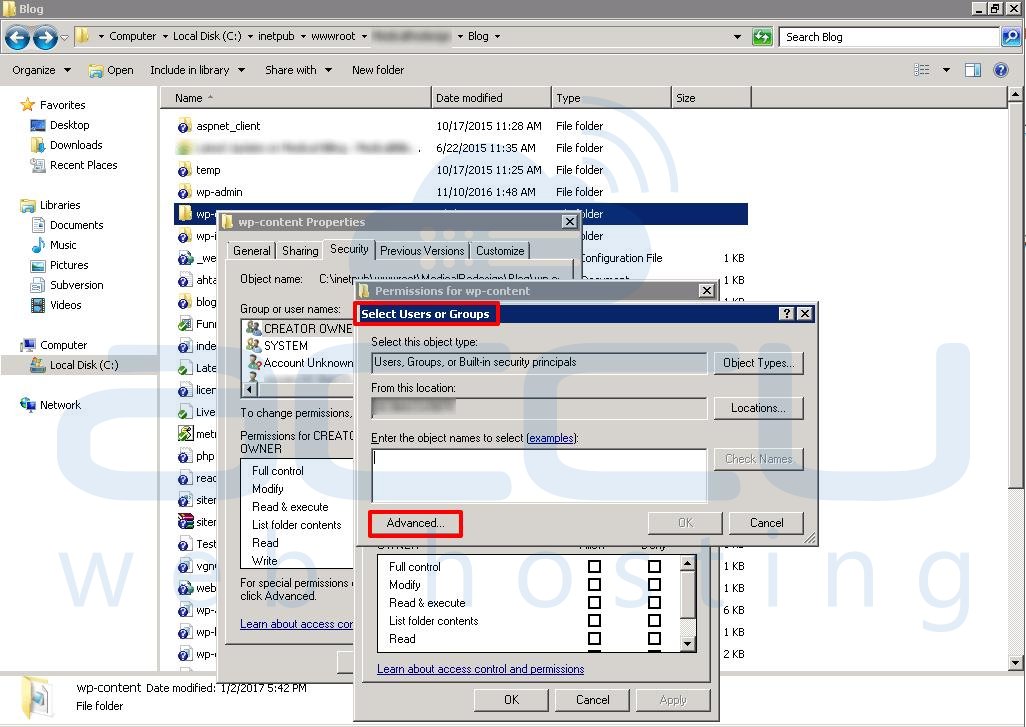
6. In the Select Users & Groups tab, click on Advanced.
This will open a new tab.
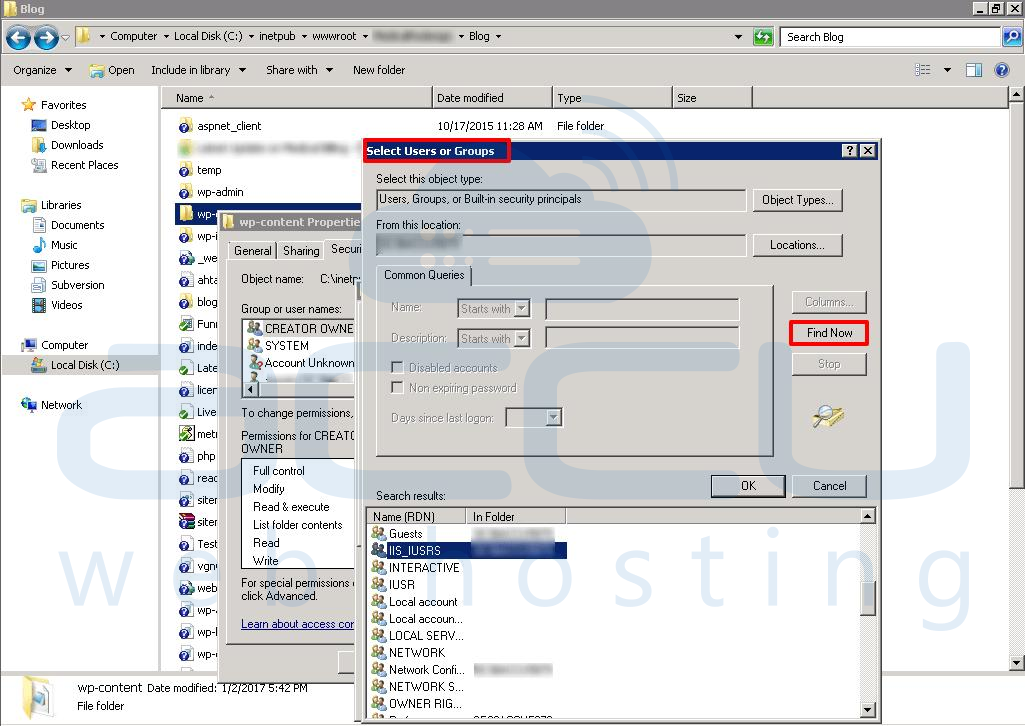
7. In the new Select Users or Groups tab, click on Find Now.
It will display the list of users and groups.
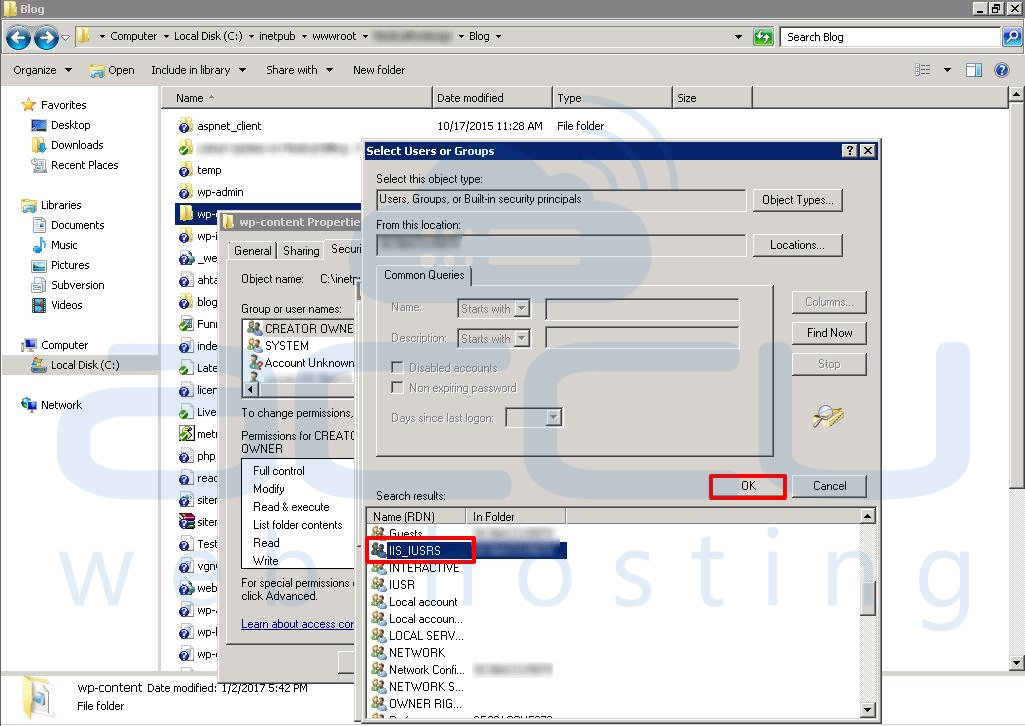
8. In the search result field, select IIS_IUSRS and click OK.
It will display the selected user in Select Users and Groups tab.
9. Click on OK and then Apply in the permission tab.
This will apply all the permissions for the user.
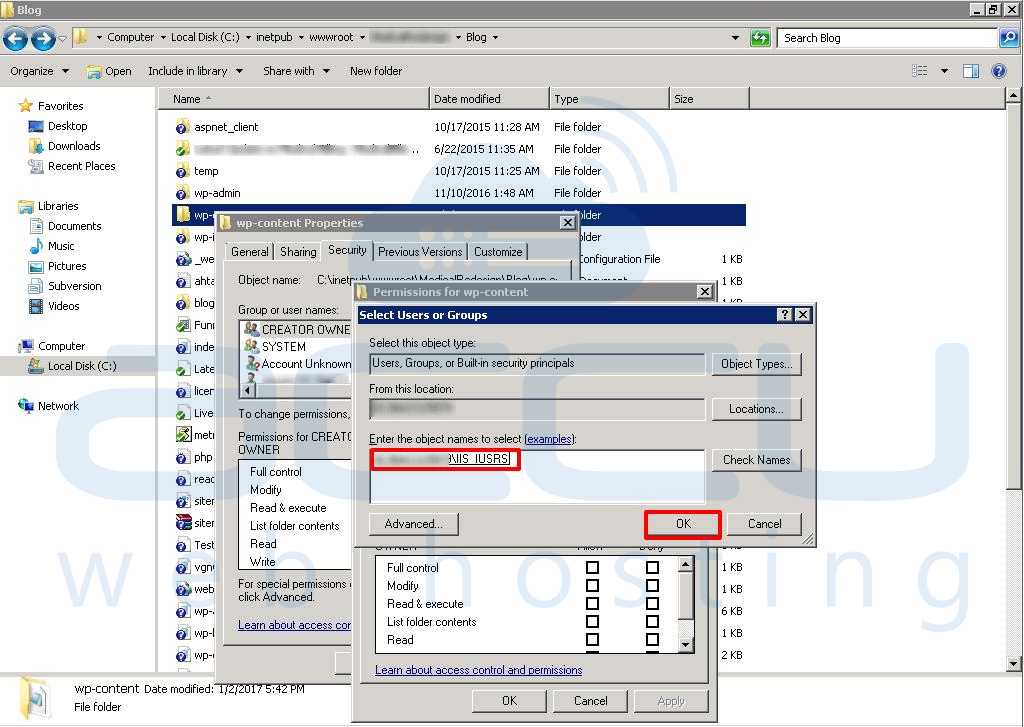
10. Click OK to close all the opened tabs.
That's it…!
By implementing these steps, you should be able to upload images to your WordPress site.


