Upgrading is highly recommended whenever you receive a notification regarding a new WordPress version in the dashboard. Many people overlook this notification because a WordPress upgrade may cause plugin breaks, or the entire website might not function properly after an upgrade. When you do not update the WordPress website, you risk several vulnerabilities that can only be patched by installing a new WordPress version. Therefore, it is good to have a patched website.
Before you begin the WordPress upgrade exercise, it is a good idea to back up your WordPress website because if you face any issues while upgrading WordPress, you can easily restore your website from the backup. You can get complete instructions to create a WordPress website backup here.
After WordPress 3.7+, you do not have to update minor and security updates manually. WordPress is capable of updating itself to a new minor release without any user input.
(For major updates, you still need to click Update Now).
There are mainly two methods for updating WordPress, and we will discuss both of them here.
- One-Click Update
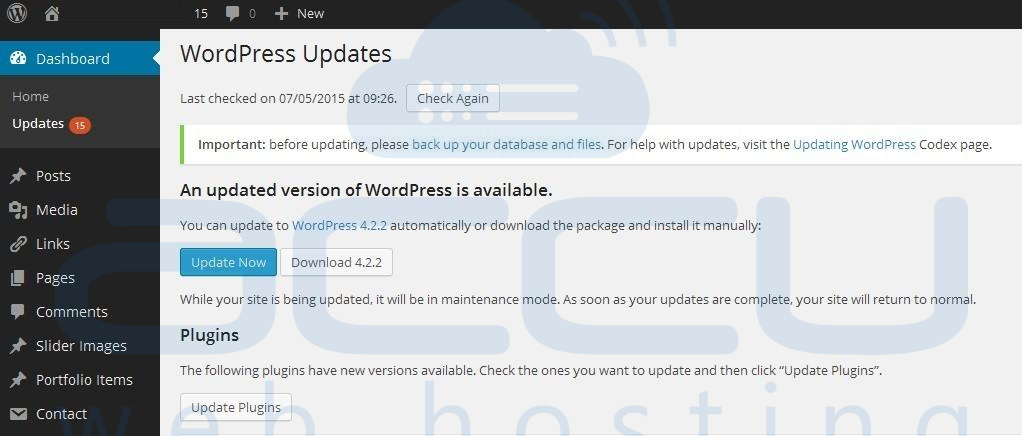
The one-click update is the easiest method to upgrade WordPress and is preferred by most people. When a WordPress update is available, you will receive an update message on the WordPress dashboard. You can launch the update by clicking the link in the new version banner. On the Update WordPress page, you'll have to click the Update Now button to start the process.

Once the WordPress upgrade is launched, you do not need to do anything else, and once the upgrade is finished, your WordPress website will be up-to-date.
In case the WordPress website update fails or you receive failed update message, you will have to follow the steps mentioned below –
- Access your WordPress directory through cPanel or FTP.
- Locate and delete the .maintenance file from your WordPress directory.
This should remove the failed update message.
If the one-click upgrade doesn't work for you, try the manual update method instead.
- Manual Upgrade through FTP
The manual backup method is an advanced option to upgrade the WordPress website; however, it demands more technical skills. If you prefer to be more hands-on or you have made several failed one-click upgrade attempts previously, you can follow the manual update process by implementing these steps –
- Replace WordPress files through FTP
- Go to the current WordPress website dashboard and deactivate all the plugins.
- Go to the existing WordPress directory and delete the wp-includes and wp-admin directories through FTP.
- Now, download the latest WordPress zip (or tar.gz) file.
- Unpack the zip file that you downloaded.
- Locate wp-includes and wp-admin directories and upload them to your web host in place of the previously deleted directories.
- Locate the wp-content directory.
Upload the individual files from the new wp-content folder to your existing wp-content folder, overwriting existing files. - Do not delete your existing wp-content folder.
Do not delete any files or folders in your existing wp-content directory (except for the one overwritten by new files). - Upload all new loose files from the root directory of the new version to your existing WordPress root directory.
- Try to log in to the WordPress dashboard.
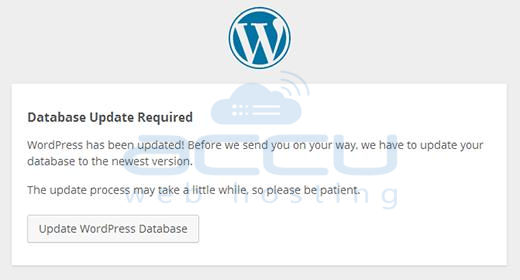
If a database upgrade is necessary at this point, WordPress will detect it and give you a link to a URL - http://website.com/wp-admin/upgrade.php. - Browse that link and follow the instructions; this will update your database to be compatible with the latest code.

Notes
- You should replace all the old WordPress files with the new ones in root directories (such as index.php, wp-login.php, and so on).
- Make sure that you only copy the files from the wp-content directory rather than replacing your entire wp-content directory.
wp-content contains your themes and plugins, so you will want to keep them. - Do not overwrite those files if you have made custom changes in default or classic themes without renaming them. Otherwise, you will lose your changes.
- Check the wp-config-sample.php file if any new settings have been introduced that you might want to add to your wp-config.php.
Removing the .maintenance file and flushing the cache plugins
- If you have attempted the one-click upgrade previously and received failed auto-upgrade error, you will have to delete the .maintenance file from your WordPress directory using FTP.
- If you have caching enabled, clear the cache so the changes will go live immediately.
- Now, your WordPress update is complete, so you can go in and enable your plugins again.
- If you have issues with logging in, try clearing cookies in your browser.
If anything goes wrong, refer to all the steps in the extended upgrade instructions.


