Here we have provided you a video tutorial as well as an article that will guide you on installing the Let's Encrypt SSL Certificate in the Windows VPS without a control panel.
Also, below is the article that will guide you on how to install the Let's Encrypt SSL certificate in the Windows vps without a control panel.
Many people hesitate to switch their websites from HTTP to HTTPS because dealing with certificates can be a challenge. However, Let's Encrypt has addressed this problem.
Let's Encrypt is a free and user-friendly Certificate Authority. Their aim is to ensure that everyone can easily use HTTPS for their websites. Read on to discover how to obtain free SSL/TLS certificates that browsers trust.
Requirements:
-> You must have administrative user access via Remote Desktop Protocol.
-> IIS should already be installed on the server with an active website.
-> Your website should be directed to your server.
What Is Let's Encrypt SSL?
Let's Encrypt provides free SSL certificates for websites. These certificates are trustworthy and come from Let's Encrypt. You can find more information about Let's Encrypt on their official website.
To use an SSL certificate, you need a valid domain or subdomain name. Additionally, the domain must be connected to the web server through the DNS server. Let's Encrypt uses the ACME protocol to confirm your control over the domain name.
Type Of ACME Clients
There are different tools, called ACME clients, that you can use to get Let's Encrypt SSL certificates for your website. Here, we'll talk about two ways to get SSL/TLS certificates. You can pick either of these:
1. Use the certbot ACME client to get an SSL certificate.
2. Use the win-acme client.
1. How do you install the Let's Encrypt SSL Certificate using Certbot ACME on the Windows Server?
1.1 Installing Certbot ACME Client on Windows
In this part, we'll install the Certbot ACME client. Follow these steps:
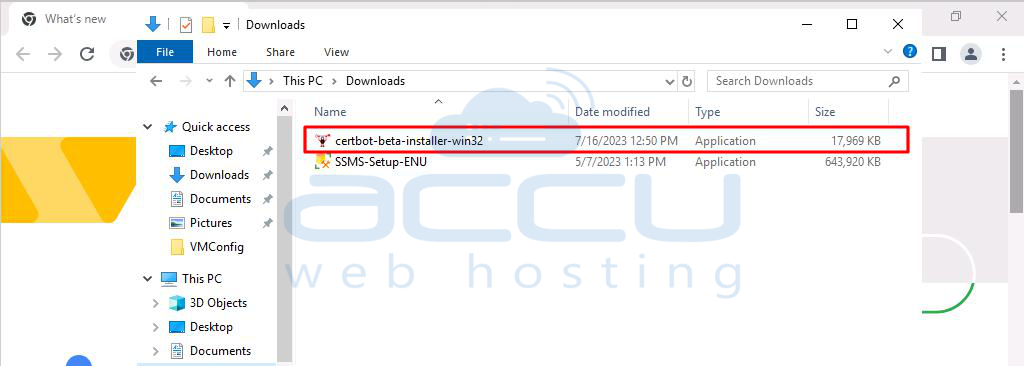
Step 1: Download the Certbot ACME exe file by visiting this URL in your web browser.
Step 2: Once the download is done, run the installer by double-clicking on the install file.
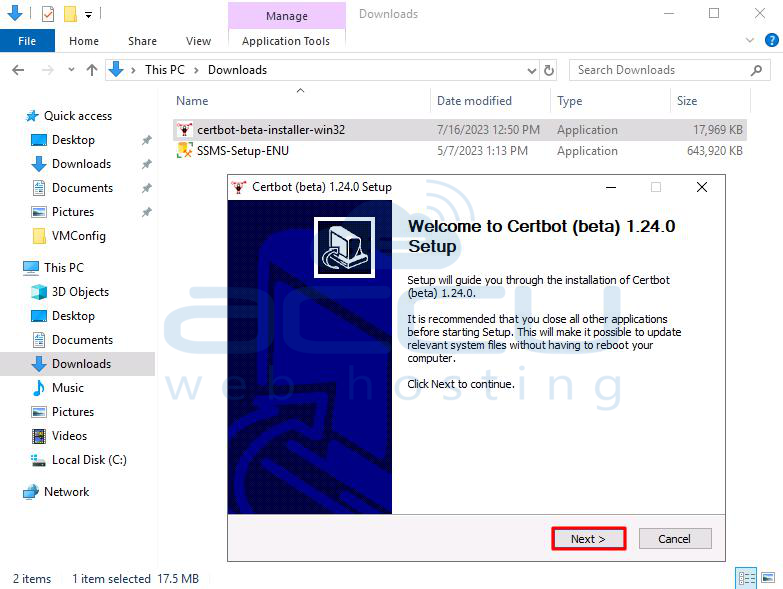
Step 3: The installer wizard will open; click Next.
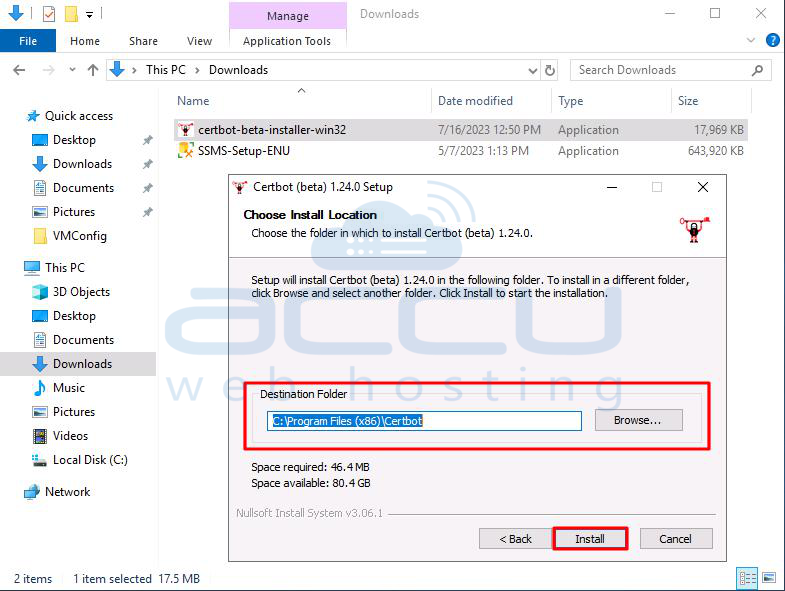
Step 4: The installer will suggest a default installation directory (e.g., C:\Program Files(x86)\Certbot). Leave it as it is and click Install.
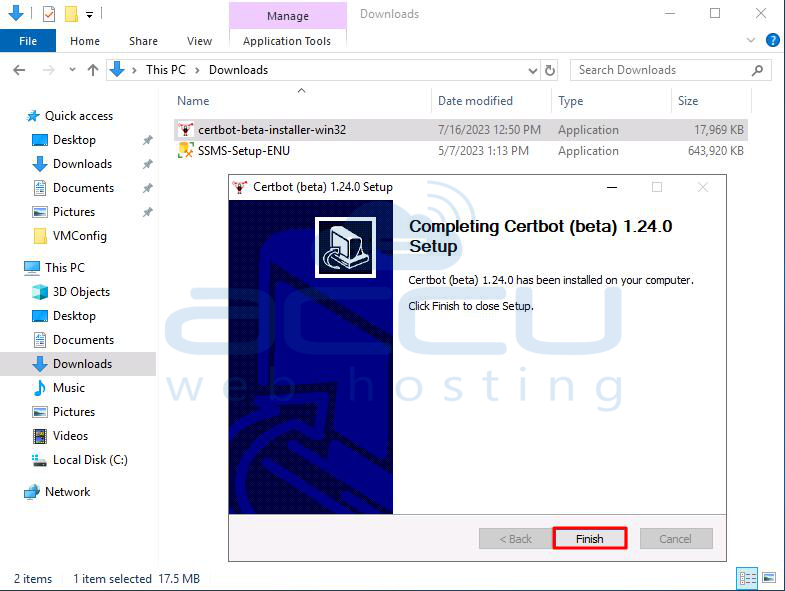
Step 5: After the installation is complete, click Finish.
This finishes the installation of the Certbot ACME package. Now, let's test it. Open the Windows command prompt (cmd) and type the following command:
certbot --help

If Certbot ACME client is installed successfully, you'll see the corresponding output. Now, let's move to the next section.
1.2 Issuing SSL Certificate Using Certbot
In this section, we'll issue an SSL certificate for our website. Follow these steps:
Step 1: Stop the IIS service from the IIS manager or through the Windows Services section.
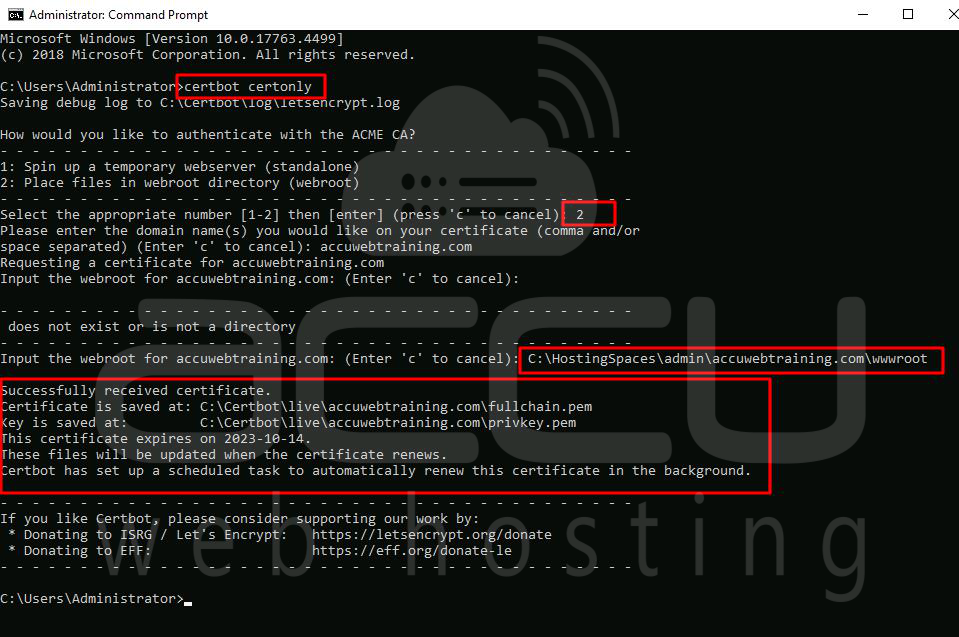
Step 2: In the Windows command prompt (cmd), enter the following command:
certbot certonly
Step 3: Select the authentication method. Here, we have chosen 2: Place files in webroot directory (webroot) as an example.
Step 4: Enter the path of the webroot directory in the "input the webroot for website" field. Here, we have used C:\HostingSpaces\admin\accuwebtraining.com\wwwroot as an example.
Certbot will issue the SSL/TLS certificate successfully, along with the private key and intermediate certificate. The issued certificates will be automatically saved to the location C:\Certbot\live\accuwebtraining.com\ folder.
This completes the issuance of the SSL/TLS certificate for your website.
Step 5: Start the IIS service again, and let's move to the next section.
1.3. Importing and Installing SSL Using IIS Manager
Currently, Certbot for Windows can't automatically add SSL certificates to IIS. So, we have to do it manually through the IIS manager. Here's what you need to do:
Step 1: Change the SSL certificate file from Certbot into a PFX file, which IIS supports. You can use online tools or OpenSSL commands for this.
Example OpenSSL command:
openssl pkcs12 -export -out cert.p12 -in C:\Certbot\live\accuwebtraining.com\cert.pem -inkey C:\Certbot\live\accuwebtraining.com\privkey.pem -passout pass: -nokeys

Step 2: Assume you have the PFX version of the SSL certificate (e.g., cert.pfx) ready.
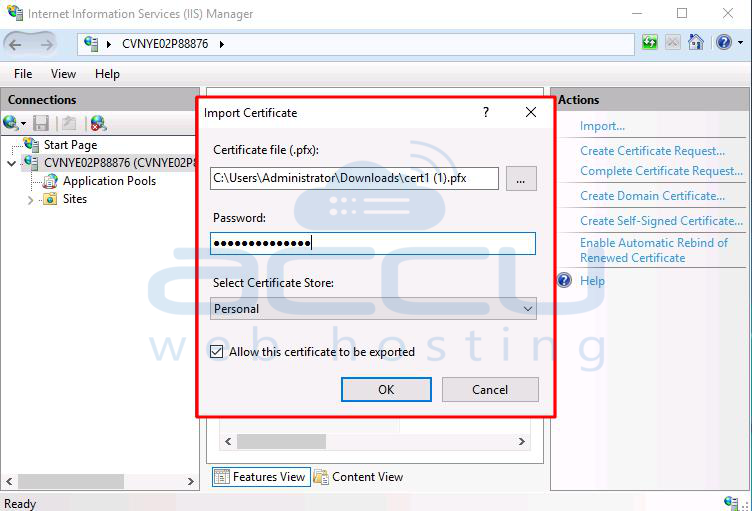
Step 3: Open the IIS manager, click "Server Certificates" under the server section, then click "Import."
Step 4: In the import window, provide the location of your cert.pfx file.
Step 5: Leave the password field blank.
Step 6: Choose the certificate store as "Personal."
Step 7: Leave other settings as they are and click OK.
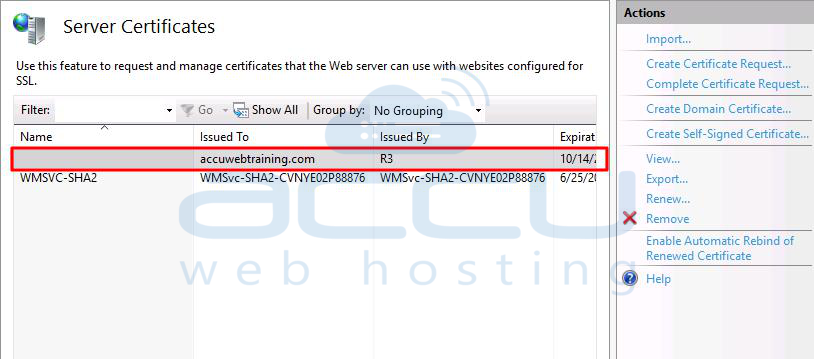
Step 8: Now, you can see your certificate under "Server Certificates" in IIS.
Step 9: In IIS manager, go to "Sites" and click "Bindings."
Step 10: Click "Add" in the "Site Binding" window.
Step 11: In the new window, choose the type as "https."
Step 12: Enter your domain name (e.g., accuwebtraining.com) in the hostname field.
Step 13: Choose your certificate from the SSL certificate dropdown.
Step 14: Enable "Require Server Name Indication."
Step 15: Leave other settings as they are and click OK.

This finishes the SSL installation. You can check it by browsing your website over https.

To check the Let's Encrypt SSL certificate, you can use the "certlm.msc" command in the Windows Run dialog.

A task named "Certbot Renew" is set up in the Windows Task Scheduler. This task will automatically run when the Let's Encrypt certificate is due for renewal, so you don't have to renew it manually.
If you used the standalone method on a machine where port 80 is used for SSL certificates, you can edit the command for automatic renewal. Add "--pre-hook" and "--post-hook" flags to stop and start the IIS web service.
To do this, go to the "Certbot Renew" tab, choose Properties, click on the Actions tab, and then click Edit.

In the "Add Arguments" section, add the command:
certbot renew --pre-hook "IISRESET.EXE /STOP" --post-hook "IISRESET.EXE /START"

You can test this command by executing it in the Windows command prompt.
certbot renew --pre-hook "IISRESET.EXE /STOP" --post-hook "IISRESET.EXE /START"

2. Installing Let's Encrypt SSL Certificate Using Win-Acme Let's Encrypt Client
Win-acme is an easy-to-use program designed for Windows to help install Let's Encrypt SSL certificates on an IIS server. Here's how to do it:
Steps to Install Let's Encrypt SSL Certificate on Windows VPS using win-acme:
Step 1: Log in to the server using Remote Desktop Application.
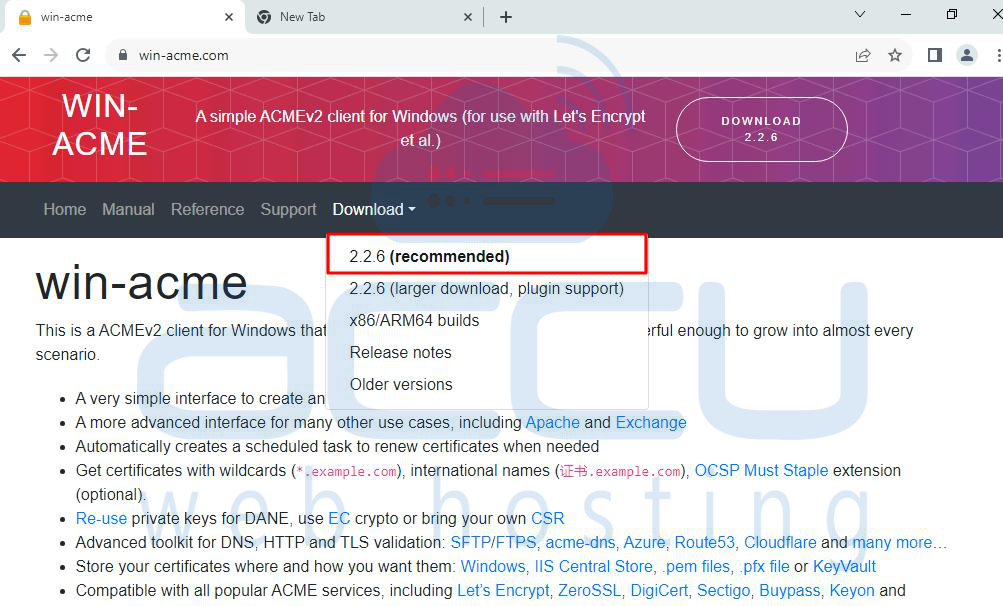
Step 2: Open the web browser on the server and go to the win-acme website.
Step 3: Click the Download button and choose the recommended version.
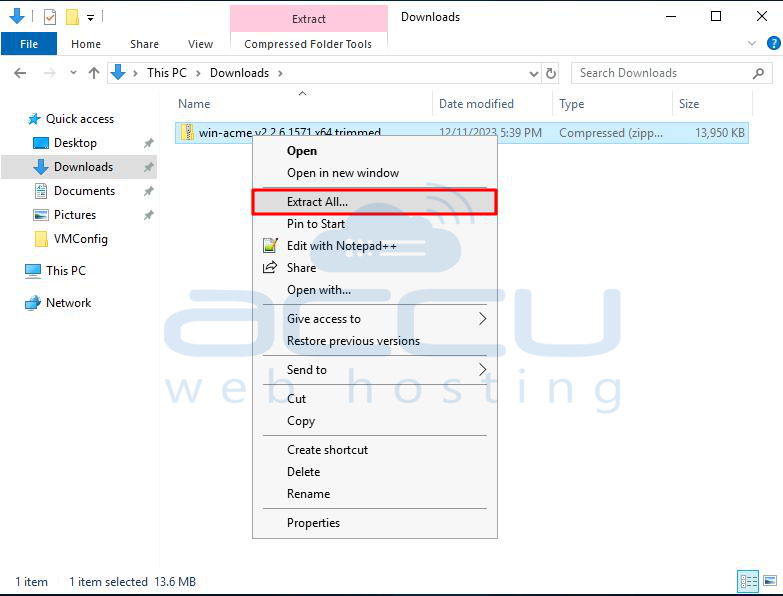
Step 4: Extract the downloaded zip folder and save it wherever you want.
Step 5: Open the Win-acme directory and double-click on "wacs.exe".

Step 6: Click on the More info link to visible the Run anyway button to install the Win-Acme application in Windows.
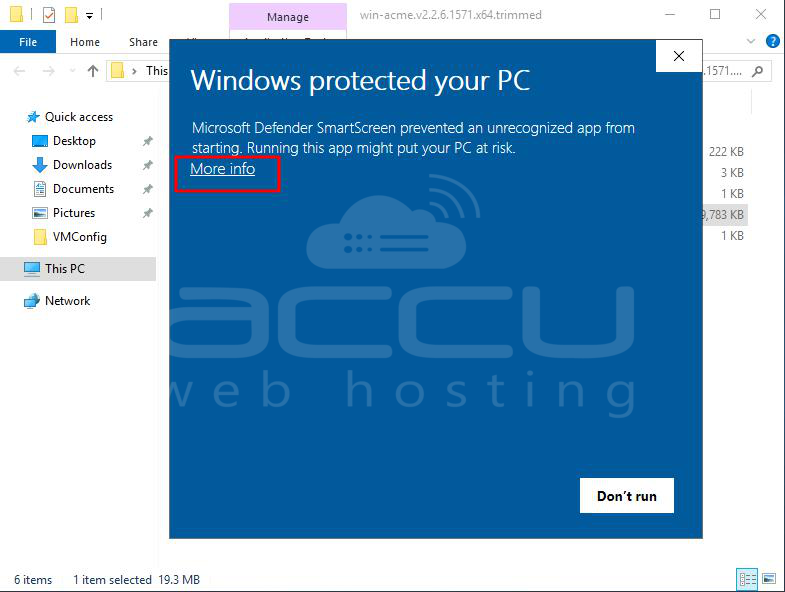
Step 7: Click on the Run anyway button to run the exe file.

Step 8: This will open the Win-acme console on your server.
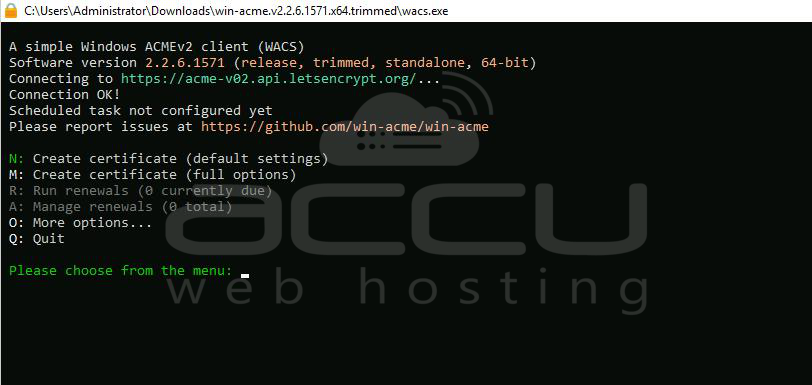
Step 9: To create a certificate, type "N" and press Enter. The win-acme client will scan your live websites from IIS and display the results.
Step 10: Enter the number corresponding to the website name.
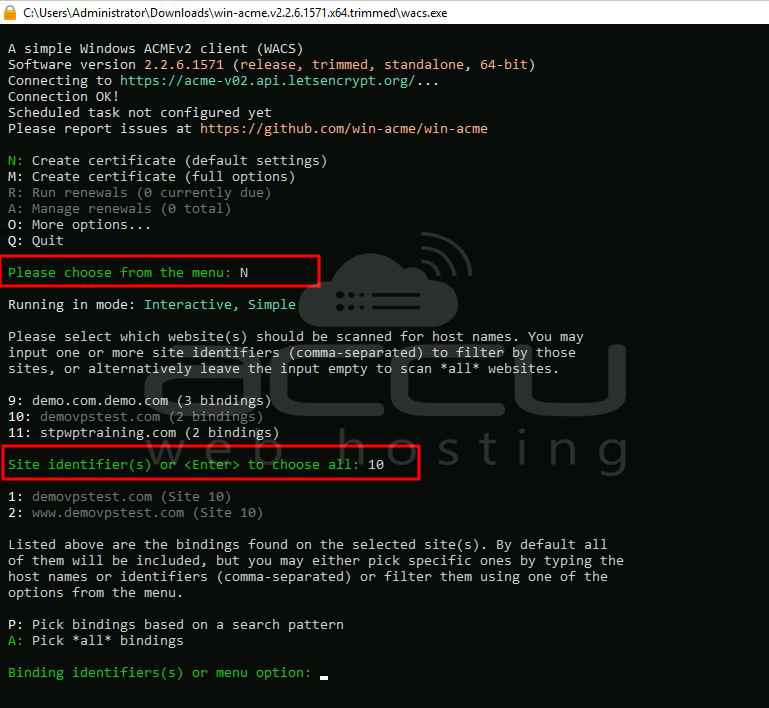
Step 11: Choose the website binding by entering the corresponding character.
Step 12: Select the website which you want to make the primary for the SSL Certificate. It will be presented as a subject of the Certificate.
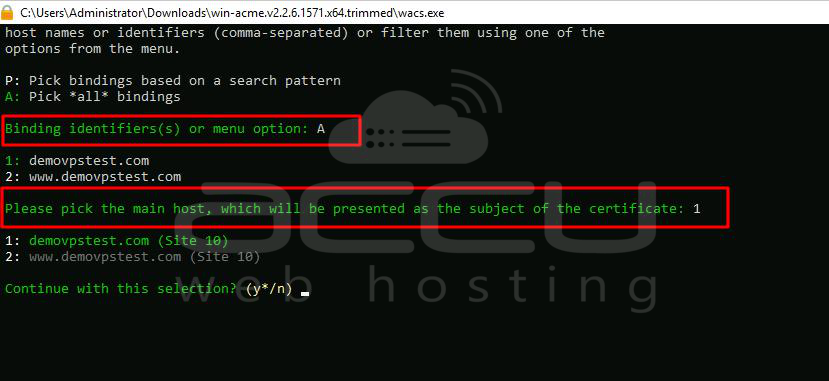
Step 13: Confirm the selection by typing "yes".
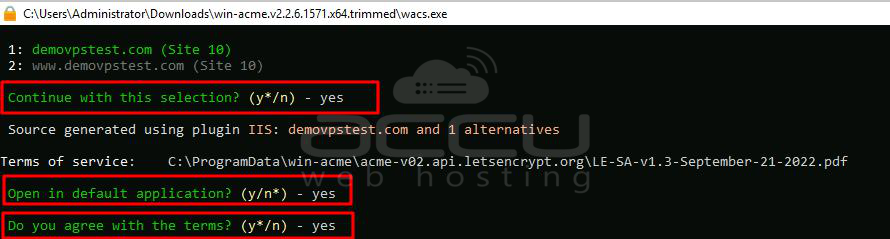
Step 14: Enter the email address in the field "Enter email(s) for notifications about problems and abuse"
Now, the Win-acme client will install the SSL certificate.
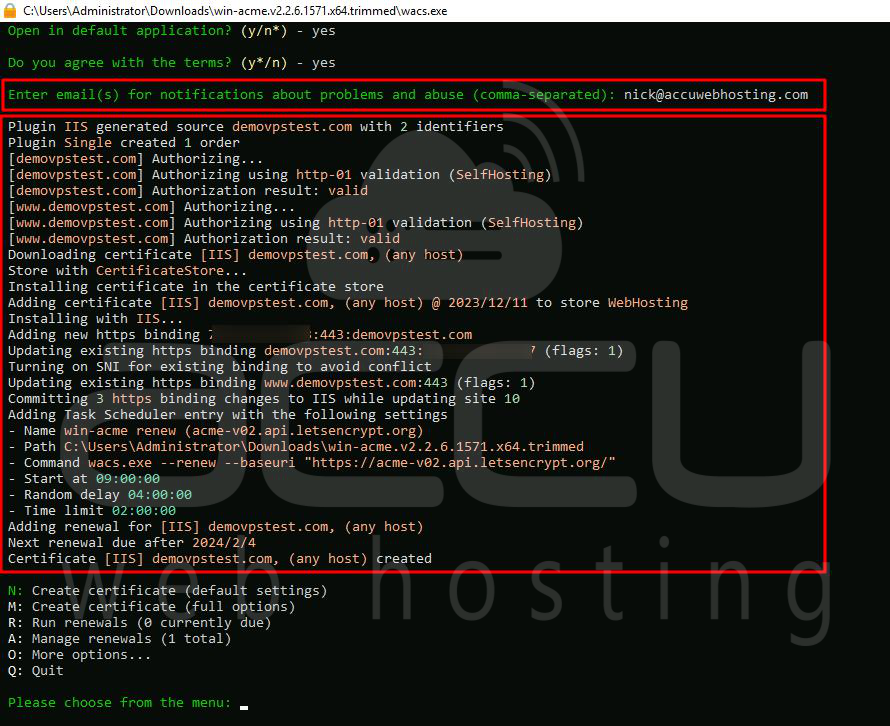
If your domain is correctly pointed to your server, it will successfully generate an SSL certificate for you. It will also set up a scheduled task for automatic certificate renewal. The application will install the SSL certificate for you as well.
You can use the SSL checker tool to check the SSL status of your website.
To Test The SSL Certificate Renewal, Follow These Steps:
Step 1: Run the "wacs.exe" file.
Step 2: Select option "A" to manage renewals.
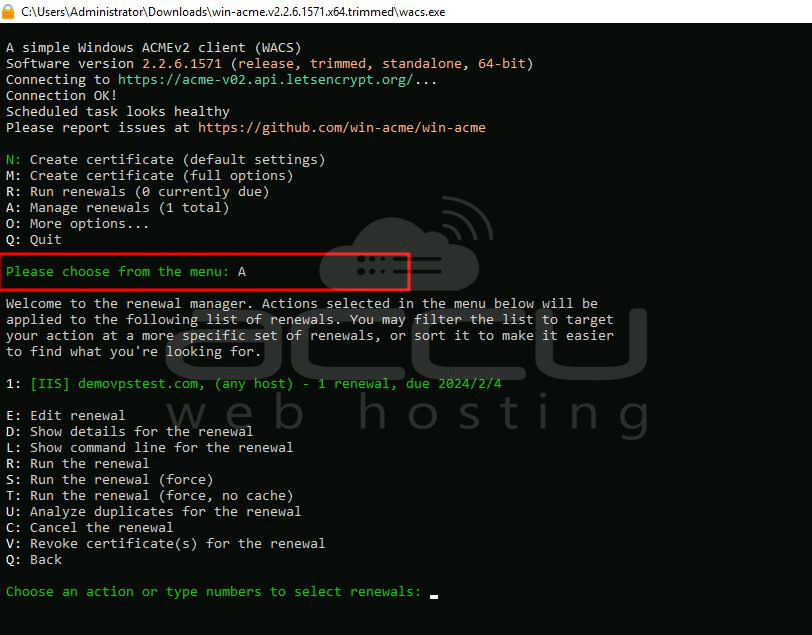
Step 3: A list of all Let's Encrypt SSL certificates on the server will be displayed. Enter the corresponding number for the SSL certificate you wish to renew (e.g., "1").
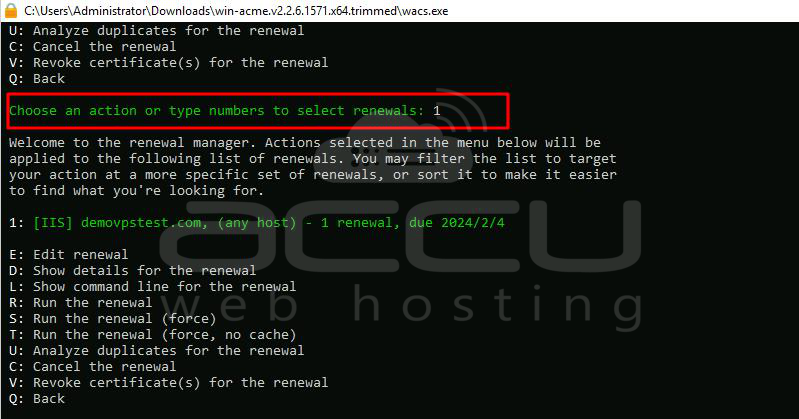
Step 4: Initiate the renewal by typing "R".
Step 5: The renewal process will run, and once completed, exit the console by typing "Q".
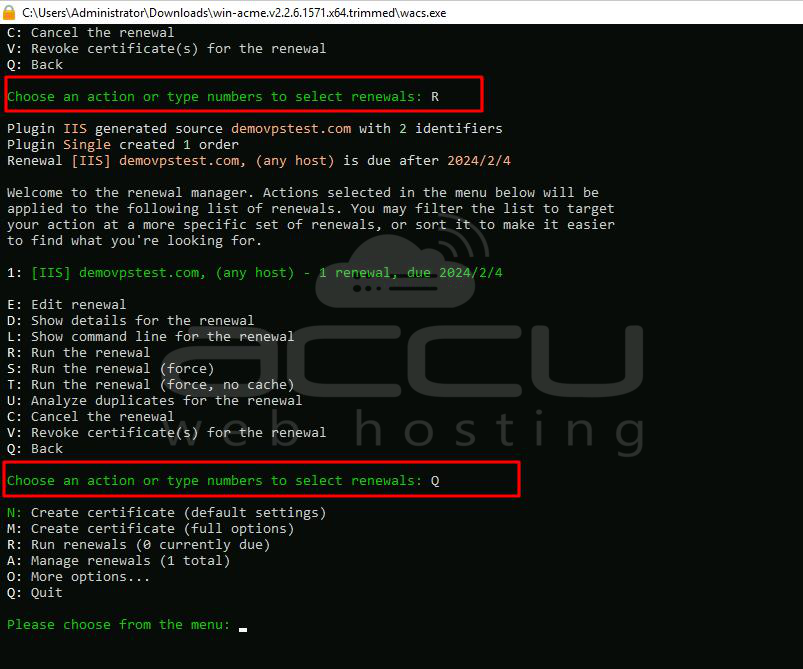
Following these steps, you have successfully issued a free Let's Encrypt SSL/TLS certificate using the win-acme Let's Encrypt Client. Your website will now be secured with the new Let's Encrypt SSL/TLS certificate when accessed through a web browser.
